Credit Card Processing For Expense Entry
| Related Pages |
| Related Categories |
All non-policy related expense transactions are recorded using the Voucher Transaction interface. (Optionally, Accounting -> Non-Policy Related Checks. can be used.)
The interface supports multiple General Ledger Profile expense entries per transaction. Voucher invoices are created when an expense is received, and can be paid immediately, or at a later date. When a voucher invoice is paid, the debit is recorded against the entered Bank Profile, which can be a bank account, or an alternate bank account such as a credit card.
This procedure outlines the day-to-day process of recording expense entries using a credit card, and posting a credit card payment against the balance.
- Each expense transaction is recorded individually, to the appropriate vendor (Electronic Store, Utility Company, Grocery Store etc).
- Entries can be recorded immediately instead of as a lump sum at the end of the month.
- The current credit card balance can be viewed from the Balance Sheet.
- Reports can be completed for total expense based on type, or total expense per vendor.
- Credit Card statements can be reconciled in Newton using Bank Reconcile.
(Alternatively, if individual transactions for each expense are not desired, and reports by vendor are not needed, a single Voucher Transaction or non-policy related check can be created with each expense general ledger account entered as a monthly total.)
Contents
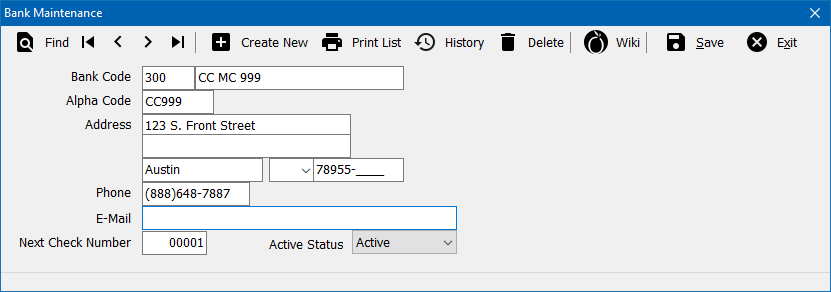
Create a New Credit Card Bank Profile
All expenses will be recorded to a dedicated Bank Profile, which represents a credit card balance.
- Select Setup -> Bank.
- Select Create New.
- Enter a unique code (From Example: 300).
- Enter a name. (From Example: CC MC 9999).
- Select Save -> Exit.
Create Expense Entry Charged to Credit Card
For more information regarding vendor payables, see Voucher Transaction.
- Select Vendor -> Voucher Transaction.
- Select a Vendor Code. This value will pre-fill if Create Voucher is selected from the vendor tab.
- Verify the Payable G/L. This value will pre-fill from your Agency profile, and is typically 2130: Vendor Payable.
- Select a Payable Date.
- Optionally enter a vendor invoice reference number and voucher description.
- Enter the total Payable Amount for the voucher.
- Enter the General Ledger Code or General Ledger Account Name, Department, and Amount for the first distribution.
- Enter name of the account, and the drop list will filter only items with partial or complete matches.
- Repeat the process for each line until all general ledger distributions are entered. (At any time, select the red X to the right of a distribution to remove an entry.)
- Select Save when done to create the voucher.
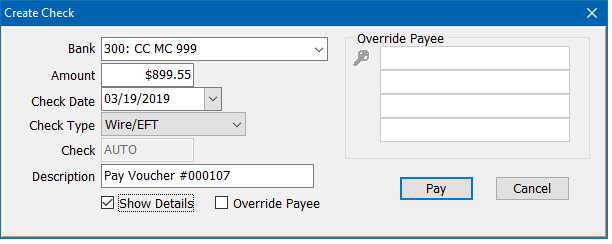
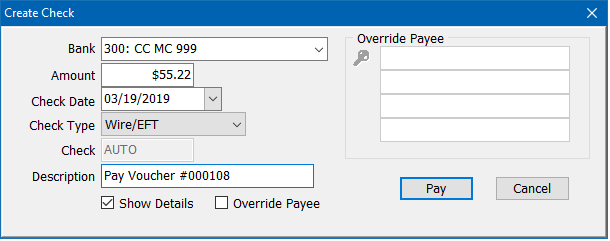
Example: Two Vendor Payable Voucher Transactions
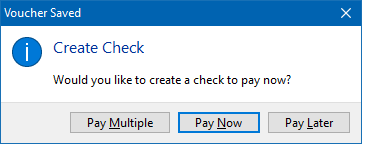
When a voucher is created, the Agency Systems will automatically prompt to pay now, pay later, or pay multiple.
Select Pay Now to create a wire check to pay the voucher using the credit card bank (From Example: 300).
Enter additional checks for each expense charged to the credit card.
View Credit Card Balance
The expense entries will be automatically posted to the system General Ledger, and available on a number of reports.
View Balance Sheet Entries
All bank codes are displayed under GL 1100, including the current credit card balance.
View GL Detail Entries
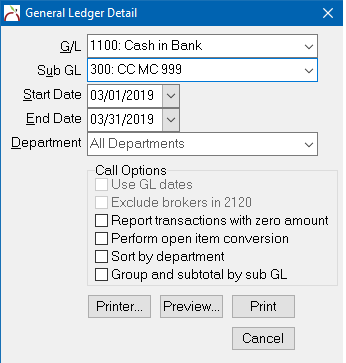
Reports -> General Ledger Detail for GL 1100 SubType 300 displays all transactions for the specified period.
View Income & Expense Entries
Reports -> Income & Expense displays the totals entered for each expense GL.
View Vendor Payable Entries
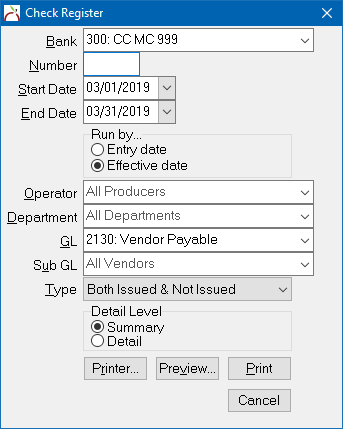
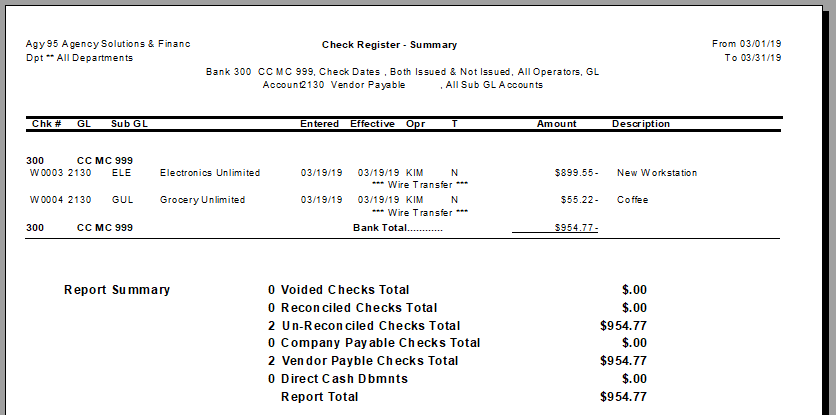
Reports -> Check Reports -> Check Register displays the totals entered for all vendors, or for a specific vendor if a Sub GL is used.
Pay Credit Card Balance with Bank Transfer
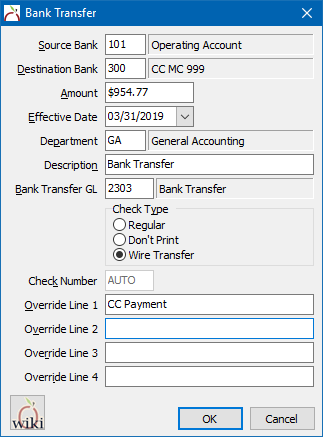
See Bank Transfer for setup and additional instructions.
- Select Accounting -> Bank Transfer.
- Enter the Source Bank Code.
- Enter the Destination Bank Code for the credit card. (From Example: 300)
- Enter the Payment Amount.
- Confirm the remaining details and select Ok.
- The transfer between bank accounts will be processed and a confirmation displayed.
When finished, a GL Detail Report will display the transfer, adjusting the bank balance.
