Forms
| Related Pages |
| Related Categories |
Newton by Agency Systems contains a large library of ACORD forms. ACORD forms serve as the standard for policy communication across the insurance industry. (http://www.acord.org/standards/Forms/Pages/default.aspx)
In addition to the library of ACORD forms, New York State Insurance Forms, schedules for drivers, vehicles, properties, equipment, workers and policy summary pages are also available.
Contents
Before You Begin
Access to the Policy Dashboard requires the current operator to have Security System: AR -> Policy Transaction -> View access.
Access to create and edit an existing forms requires the current operator to have Security System: AR -> Policy Transaction -> Entry and Edit access.
![]() See: Security System for more information.
See: Security System for more information.
Create a form
 |
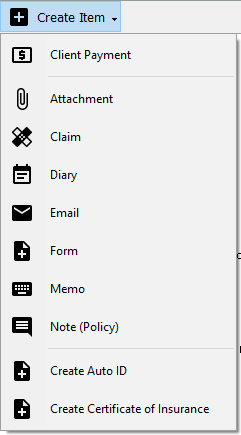
| Policy Dashboard - Create Item Menu |
New forms can be created from either the Client Tab, the Policy Dashboard, Policy & Billing, a Submission, automatically through Policy Tasks, by copying an existing form from one policy/client to another, or automatically through Download.
When a new holder is added to a certificate such as the ACORD 25: Certificate of Insurance, do not create a brand new form. See the section below and add the new holder to the existing form instead.
![]() Prior to creating a new form, the client and policy must already be entered into the system. See Create A Client and Create A Policy for more details.
Prior to creating a new form, the client and policy must already be entered into the system. See Create A Client and Create A Policy for more details.
- Search for and load the client or prospect.
- On the Client Dashboard tab select the (+) next to Policies. (To expand the band by default, see: Preferences)
- Left-Click the desired policy number to open the Policy Dashboard.
- Select Create Item -> Form within the policy dashboard toolbar.
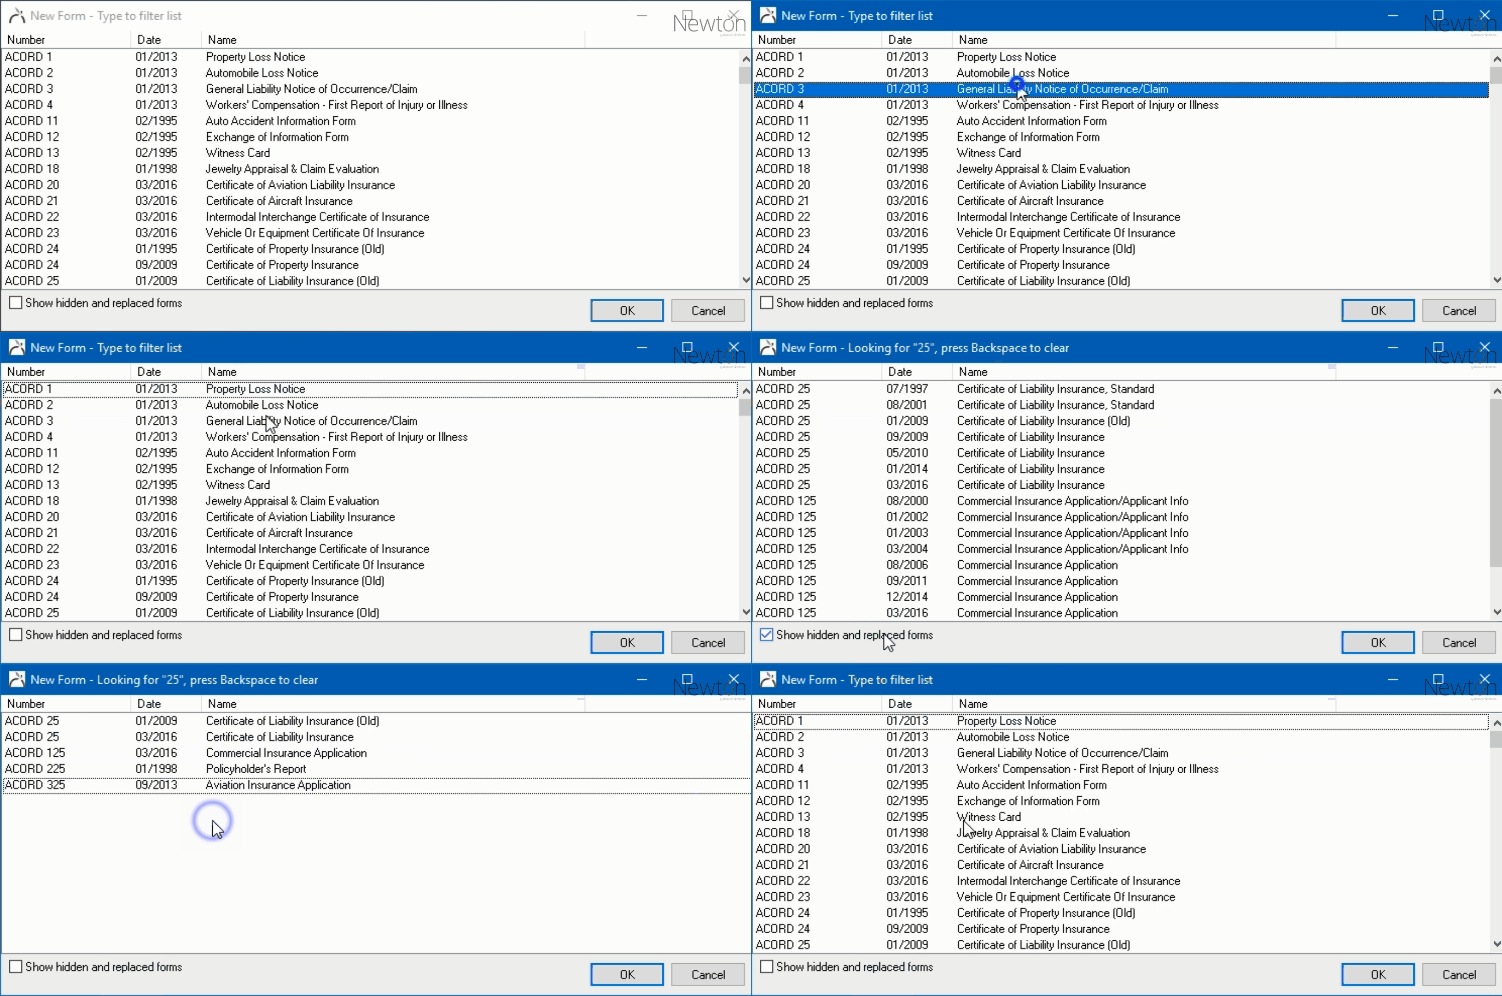
- Select the desired form and select OK.
- An empty form will open with the agency and client details pre-filled when applicable.
- Enter or import data onto the form using the schedule buttons or by importing from another form. (See: the section below for more information)
- Optionally enter a form description within the top toolbar for easy identification within Newton. The description does not print on the form.
- Select Save.
- Optionally add the form to a Form Bundle.
- Select Preview, Print, or Batch Send to generate the form. Batch Send provides a single interface to select multiple forms and send the package of forms to a printer, a .PDF file, My Insurance Dashboard, a fax printer, or as an email attachment.
![]() See: Scan An Electronic Signature to setup electronic form signatures.
See: Scan An Electronic Signature to setup electronic form signatures.
Import data on a form
The details of a form can be entered using a number of methods:
- Populated automatically when created from Download.
- Typing directly onto the form in the fields provided.
- Importing data from other related ACORD forms by selecting Import Data... within the top toolbar.
- Selecting the provided Vehicles, Drivers, Properties, Equipment, Workers, Holders, Interests, and Contact buttons within a form.
- Right-clicking to override static or default text.
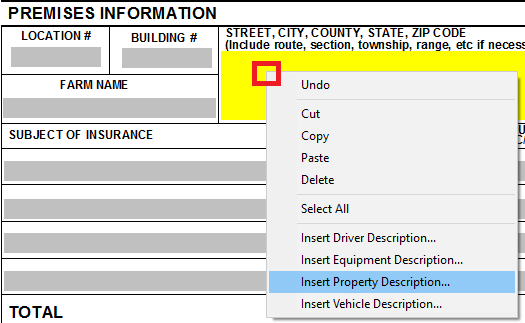
- Right-clicking in large text fields to enter descriptions from schedules.
- Selecting an electronic signature by pressing <Ctrl> + <G>. (Alternatively use Form Toolbar -> Other -> Signature.)
View or edit an existing form
Forms are listed on both the Client Tab and within the Policy Dashboard. The Client Tab lists all forms on all policies for the client. Multi-policy forms such as the ACORD 25 - Certificate of Insurance are listed in a category at the top of the client's forms tab.
![]() Previously printed and previewed forms are stored as .PDF files automatically. The completed documents can be access within the Policy Dashboard Activity and Attachments sections.
Previously printed and previewed forms are stored as .PDF files automatically. The completed documents can be access within the Policy Dashboard Activity and Attachments sections.
- Search for and load the client or prospect.
- On the Client Dashboard tab select the (+) next to Policies. (To expand the band by default, see: Preferences)
- Left-Click the desired policy number to open the Policy Dashboard.
- Select the Policy Forms tab. (Optionally select Form Bundle|View Current Form Bundle (Risk) to open the form bundle window.)
- The Policy Forms tab displays all forms and form bundles for the selected policy. To view or edit a form, left-click the form description.
- Enter any changes or import schedule or risk data.
- Select Save.
- Select Preview, Print, or Batch Send to generate the form.
Delete a form
If a form was created in error it can be deleted. Deleting a form cannot be reversed and requires Security System -> AR -> Policy Transaction -> Global access.
- Search for and load the client or prospect.
- On the Client Dashboard tab select the (+) next to Policies. (To expand the band by default, see: Preferences)
- Left-Click the desired policy number to open the Policy Dashboard.
- Select the Policy Forms tab. (Optionally select View Current Form Bundle (Risk) to open the form bundle window.)
- Left-click the form description for the desired form.
- Select Other -> Delete This Form. Deleting a form saved to multiple policies such as the ACORD 25 - Certificate of Insurance removes the form from all policies.
- Select Yes to confirm.
- Close the form. If prompted to save changes, select No.
Frequently Asked Questions (FAQ)
- How do I add an electronic signature to ACORD forms?
- How do I fix my agency phone number?
- How do I email a certificate to one holder with a cover letter?
How do I add an electronic signature to ACORD forms?
- Answer
Before you begin, assign a scanned signature to a user profile.
- Open the desired form using the steps above.
- Select Other -> Signature. (Optionally, press Ctrl-G to choose signature).
- Select Show signature on form.
- Type the appropriate producer code.
- Select OK, then Save.
How do I fix my agency phone number?
- The phone number showing on my ACORD form is incorrect. How do I fix it?
- Answer
- Select Setup -> Agency
- Select the Form/Numbering Setups tab.
- The Address on forms drop-down controls what address & phone number display by default to the forms.
- If this is set to Agency, the phone number can be changed under Setup -> Agency -> Basic tab.
- If this is set to Department, the phone number can be changed under Setup -> Department.
Optionally, right-click within the address field on an ACORD form to override the setting to use a specific address.
How do I email a certificate to one holder with a cover letter?
- Is there a way to attach a cover letter to a certificate of insurance before emailing it to a certificate holder directly?
- Answer
There are two basic ways to include a cover letter within an email.
- Batch Send can include a memo cover letter as the first page of the package PDF file.
- A memo template can also be used as the body of the email, with the certificate as an email attachment.


