Difference between revisions of "Workstation Installation Instructions"
Jump to navigation
Jump to search
(initial save.) |
|||
| (69 intermediate revisions by 5 users not shown) | |||
| Line 1: | Line 1: | ||
| − | + | [[Category:Installation]][[Category:Pervasive]] | |
| + | <table class="infobox" cellspacing="5" style="background-color: #FFFFFF; width:27em; text-align:left; border-spacing: 2px; line-height:1.5em;"> | ||
| + | <tr> | ||
| + | <td>[[File:Ic_description_black_24dp.png|link=Newton User Guide#Installation]] Newton User Guide: [[Newton User Guide#Installation|Installation]]</td> | ||
| + | </tr> | ||
| + | <tr style="background-color: #bdbdbd; text-align: center; font-weight:bold;"> | ||
| + | <td>Related Pages</td> | ||
| + | </tr> | ||
| + | <tr> | ||
| + | <td> | ||
| + | <ul> | ||
| + | <li>[[Backup Information]]</li> | ||
| + | <li>[[Hardware Recommendations]]</li> | ||
| + | <li>[[Installation Environment and Network Requirements]]</li> | ||
| + | <li>[[Make Text and Other Items Larger or Smaller]]</li> | ||
| + | </ul> | ||
| + | </td> | ||
| + | </tr> | ||
| + | <tr style="background-color: #d3d3d3; text-align: center; "> | ||
| + | <td>Related Categories</td> | ||
| + | </tr> | ||
| + | <tr> | ||
| + | <td> | ||
| + | <ul> | ||
| + | <li>[[:Category:Installation|Installation]]</li> | ||
| + | </ul> | ||
| + | </td> | ||
| + | </tr> | ||
| + | </table> | ||
| − | == Windows | + | ==Instructions== |
| + | *Verify the workstation is running a current version of Microsoft Windows. As of 2025-10-14 Windows 10 reached end-of-life. See [https://support.microsoft.com/en-us/windows/windows-10-support-ends-on-october-14-2025-2ca8b313-1946-43d3-b55c-2b95b107f281 https://support.microsoft.com/en-us/windows/windows-10-support-ends-on-october-14-2025-2ca8b313-1946-43d3-b55c-2b95b107f281]. | ||
| + | *Review the [[Installation Environment and Network Requirements]] and [[Hardware Recommendations]]. | ||
| + | ===Map Drive As Admin and run Adduser=== | ||
| + | #Login to Windows as the user. | ||
| + | #Run CMD as administrator. | ||
| + | #:[[File:wss.2.png]] | ||
| + | #Map a network drive to the share on your file server where Newton is installed. Use the same drive letter on every machine e.g.: | ||
| + | #:'''net use s: \\newton-server\asApps''' | ||
| + | #Change directory to the empire\programs directory on the mapped drive e.g.: | ||
| + | #:'''cd /d s:\empire\programs''' | ||
| + | #Run '''adduser.exe''' and click Begin. | ||
| + | #:[[File:wss.3.png]] | ||
| − | + | ===Map Drive as User=== | |
| − | + | #Open CMD. | |
| − | + | #:[[File:wss.0.png]] | |
| − | + | #Map the network drive e.g.: | |
| − | + | #:'''net use s: \\newton-server\asapps | |
| − | + | #:[[File:wss.1.png]] | |
| − | Map | + | #Exit CMD. |
| − | + | ===Run Newton to Complete Setup=== | |
| − | : | + | Double click the Agency Systems icon on the desktop to run Newton. You may get two User-Account-Control message boxes asking to run RWEasyMapi64.exe requiring admin elevation, and another to run mariadb-connector32-3-1-11.msi. Enter the local admin user and password to run them. |
| − | : | + | #:[[File:wss.4.png]] |
| − | : | + | ===Login=== |
| − | : | + | Have the user login to test, or use |
| + | *Agency: '''95''' | ||
| + | *Operator: '''DCS''' | ||
| + | *Password: '''EMPYRE''' | ||
| − | [[File: | + | ==LEGACY Pervasive Client Installation== |
| + | Open a '''new''' command prompt as Administrator. | ||
| + | '''x:''' | ||
| + | '''cd empire''' | ||
| + | '''PSQL11.3Client32.exe''' | ||
| + | #Select '''Yes''' | ||
| + | #:[[File:WorkstationInstall4.jpeg]] | ||
| + | #Select '''Unzip''' | ||
| + | #:[[File:WorkstationInstall5.jpeg]] | ||
| + | #Select '''Ok''' | ||
| + | #:[[File:WorkstationInstall6.jpeg]] | ||
| + | #Select '''Install''' | ||
| + | #:[[File:WorkstationInstall7.jpeg]] | ||
| + | #Select '''Next''' | ||
| + | #:[[File:WorkstationInstall8.jpeg]] | ||
| + | #Select '''I accept...''' | ||
| + | #Select '''Next''' | ||
| + | #:[[File:WorkstationInstall9.jpeg]] | ||
| + | #Select '''Run as a Service''' | ||
| + | #Select '''Next''' | ||
| + | #:[[File:WorkstationInstall10.jpeg]] | ||
| + | #Select '''Complete''' | ||
| + | #Select '''Next''' | ||
| + | #:[[File:WorkstationInstall11.jpeg]] | ||
| + | #Select '''Install''' | ||
| + | #:[[File:WorkstationInstall12.jpeg]] | ||
| + | #Select '''Finish''' | ||
| + | #Select '''Exit''' | ||
| + | *Disregard and Close the internet window. | ||
| + | :[[File:WorkstationInstall13.jpeg]] | ||
| − | + | === Configure Pervasive Settings === | |
| − | + | Close the old command prompt & Open a '''new''' command prompt as Administrator. | |
| + | '''PCC''' | ||
| + | #Select '''Tools''' > '''ODBC Administrator or 32bit ODBC Administrator''' (Not 64bit). | ||
| + | #Select the '''System DSN''' > '''Add''' (If Agyforms is not already configured). | ||
| + | #Choose '''Pervasive ODBC Client Interface''' and select Finish. | ||
| + | #Type '''AGYFORMS''' in the Data Source Name field. | ||
| + | #Enter '''Your''' Server Name in the Server Name/IP field. | ||
| + | #Select '''Get List'''. | ||
| + | #Verify '''Agyforms''' is selected in the drop down box named Database Name. | ||
| + | #Select '''Test''' and select '''OK''' once the Connection Successful box appears. | ||
| + | #Select '''OK''' to create the Client DSN. | ||
| + | #'''Exit''' the ODBC Administrator. | ||
| − | === | + | === Create Agency Systems Icon and Install Crystal Reports === |
| − | + | Close the old command prompt & Open a '''new''' command prompt as Administrator. | |
| − | + | '''x:''' | |
| − | + | '''cd empire''' | |
| + | '''Adduser.exe''' | ||
| + | #If the workstation will have 64 bit Microsoft Office installed (Office, Not Windows), replace '''Adduser.exe''' with '''Adduser.exe /64'''. | ||
| + | #Select '''Run'''. | ||
| + | #Select '''Begin'''. | ||
| + | #Select '''Finish'''. | ||
| − | + | === Test Agency Systems === | |
| − | + | #'''Double click''' the Agency Systems icon. | |
| − | + | #Agency: '''95''' | |
| − | + | #Operator: '''DCS''' | |
| − | === | + | #Password: '''EMPYRE''' |
| − | # | ||
| − | |||
| − | # | ||
| − | # | ||
| − | # | ||
| − | |||
| − | |||
| − | |||
| − | |||
| − | |||
| − | |||
| − | |||
| − | |||
| − | |||
| − | + | Once the application opens, click on one of the tabs to make sure it loads data. | |
| − | |||
| − | |||
| − | |||
| − | |||
| − | |||
| − | |||
| − | |||
| − | + | [[File:Ic_info_black_24dp.png]] See [[#Troubleshoot Error Codes and Other Considerations|the troubleshooting section above]] for any errors. | |
| − | + | == Troubleshoot Error Codes and Other Considerations == | |
| + | [[:Category:Error|Category: Error Codes]] | ||
| + | *[[Error: Crpe32.dll not found]] | ||
| + | *[[Error: 501 Job Failed]] | ||
| + | *[[The Easy MAPI COM Server is needed to use MAPI in a "Cross-Bitness" environment]] | ||
| + | |||
| + | Display Issues | ||
| + | *[[Display Issues Printing Forms or Viewing Window Buttons]] | ||
| + | *[[Make Text and Other Items Larger or Smaller]] | ||
| + | *[[Transaction Number Or Code Default Text Blank]] | ||
| + | |||
| + | Other | ||
| + | *[[Open File Security Warning]] | ||
Latest revision as of 14:22, 30 October 2025
| Related Pages |
| Related Categories |
Contents
Instructions
- Verify the workstation is running a current version of Microsoft Windows. As of 2025-10-14 Windows 10 reached end-of-life. See https://support.microsoft.com/en-us/windows/windows-10-support-ends-on-october-14-2025-2ca8b313-1946-43d3-b55c-2b95b107f281.
- Review the Installation Environment and Network Requirements and Hardware Recommendations.
Map Drive As Admin and run Adduser
- Login to Windows as the user.
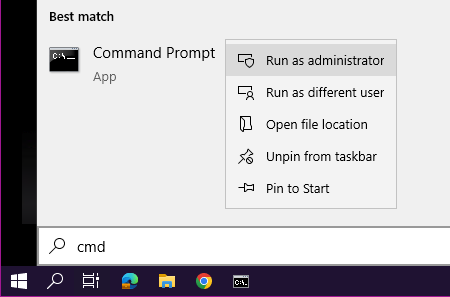
- Run CMD as administrator.
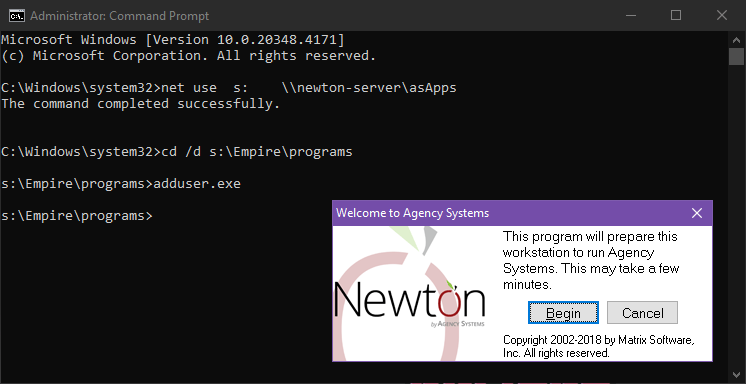
- Map a network drive to the share on your file server where Newton is installed. Use the same drive letter on every machine e.g.:
- net use s: \\newton-server\asApps
- Change directory to the empire\programs directory on the mapped drive e.g.:
- cd /d s:\empire\programs
- Run adduser.exe and click Begin.
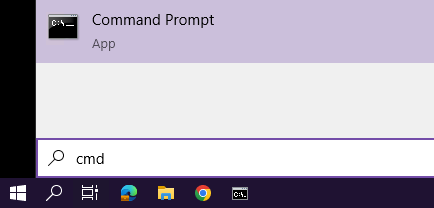
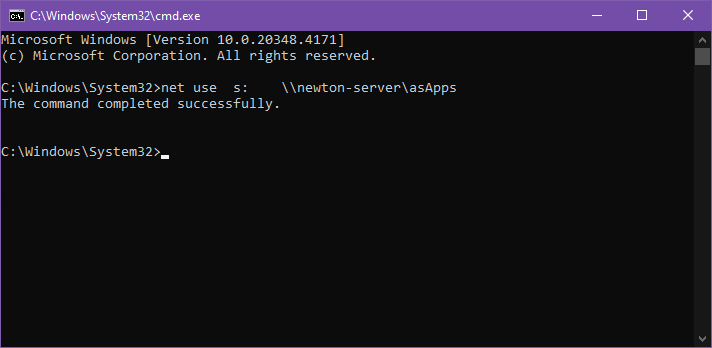
Map Drive as User
Run Newton to Complete Setup
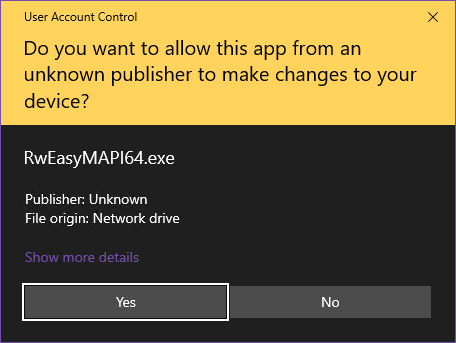
Double click the Agency Systems icon on the desktop to run Newton. You may get two User-Account-Control message boxes asking to run RWEasyMapi64.exe requiring admin elevation, and another to run mariadb-connector32-3-1-11.msi. Enter the local admin user and password to run them.
Login
Have the user login to test, or use
- Agency: 95
- Operator: DCS
- Password: EMPYRE
LEGACY Pervasive Client Installation
Open a new command prompt as Administrator.
x:
cd empire
PSQL11.3Client32.exe
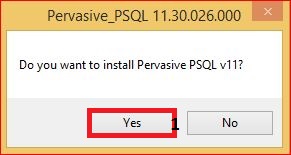
- Select Yes
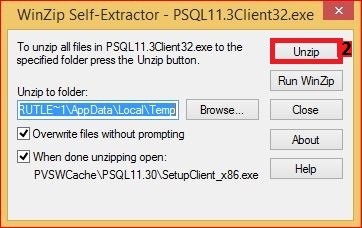
- Select Unzip
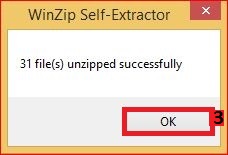
- Select Ok
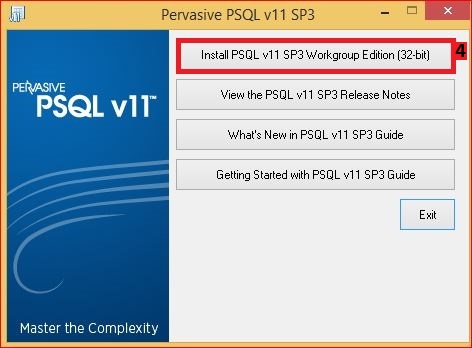
- Select Install
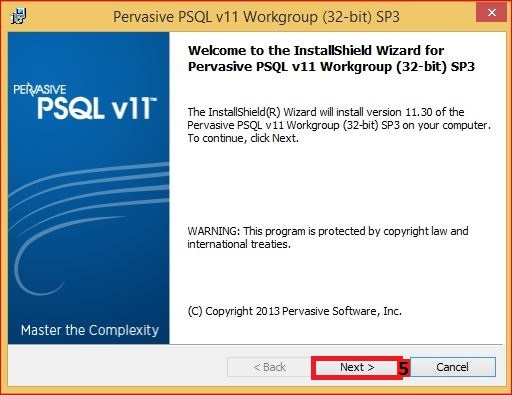
- Select Next
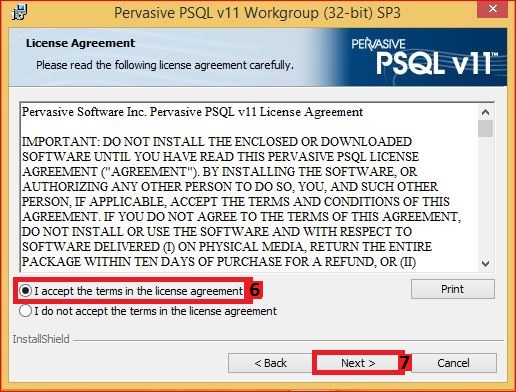
- Select I accept...
- Select Next
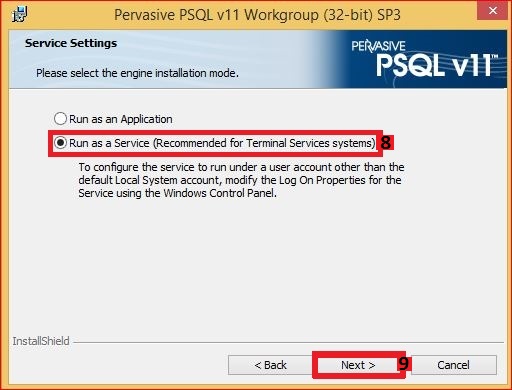
- Select Run as a Service
- Select Next
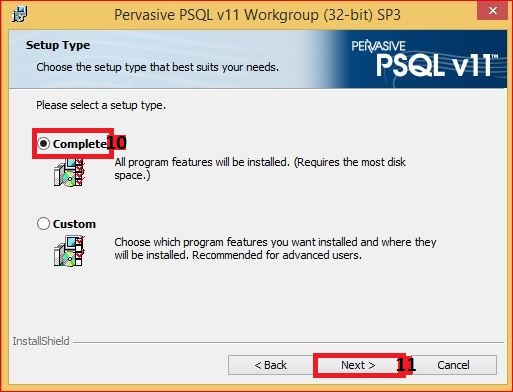
- Select Complete
- Select Next
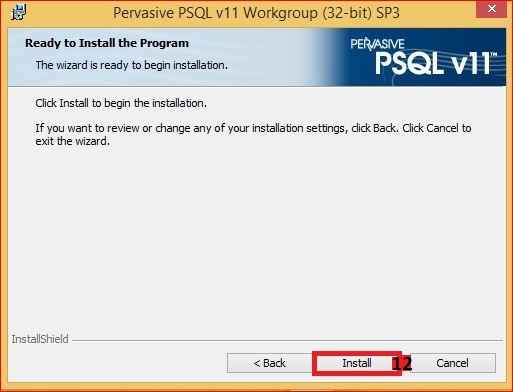
- Select Install
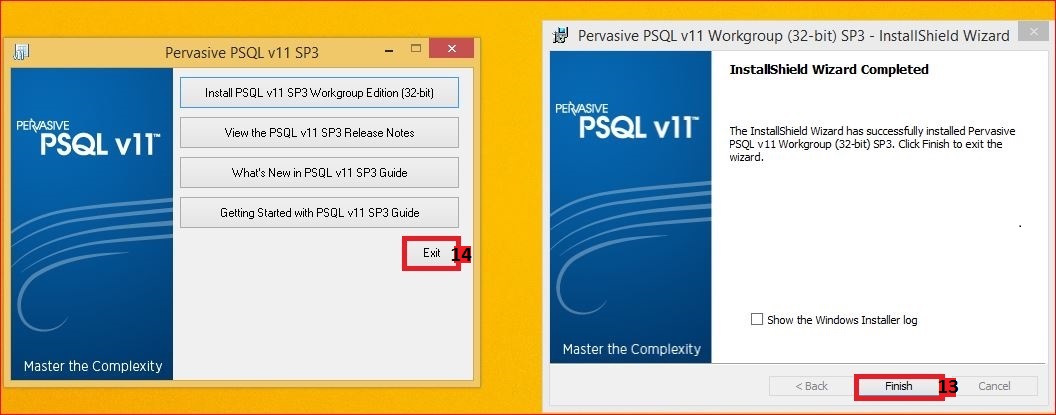
- Select Finish
- Select Exit
- Disregard and Close the internet window.
Configure Pervasive Settings
Close the old command prompt & Open a new command prompt as Administrator.
PCC
- Select Tools > ODBC Administrator or 32bit ODBC Administrator (Not 64bit).
- Select the System DSN > Add (If Agyforms is not already configured).
- Choose Pervasive ODBC Client Interface and select Finish.
- Type AGYFORMS in the Data Source Name field.
- Enter Your Server Name in the Server Name/IP field.
- Select Get List.
- Verify Agyforms is selected in the drop down box named Database Name.
- Select Test and select OK once the Connection Successful box appears.
- Select OK to create the Client DSN.
- Exit the ODBC Administrator.
Create Agency Systems Icon and Install Crystal Reports
Close the old command prompt & Open a new command prompt as Administrator.
x:
cd empire
Adduser.exe
- If the workstation will have 64 bit Microsoft Office installed (Office, Not Windows), replace Adduser.exe with Adduser.exe /64.
- Select Run.
- Select Begin.
- Select Finish.
Test Agency Systems
- Double click the Agency Systems icon.
- Agency: 95
- Operator: DCS
- Password: EMPYRE
Once the application opens, click on one of the tabs to make sure it loads data.
![]() See the troubleshooting section above for any errors.
See the troubleshooting section above for any errors.
Troubleshoot Error Codes and Other Considerations
- Error: Crpe32.dll not found
- Error: 501 Job Failed
- The Easy MAPI COM Server is needed to use MAPI in a "Cross-Bitness" environment
Display Issues
- Display Issues Printing Forms or Viewing Window Buttons
- Make Text and Other Items Larger or Smaller
- Transaction Number Or Code Default Text Blank
Other
