Difference between revisions of "Workstation Installation Instructions"
Jump to navigation
Jump to search
| (19 intermediate revisions by 5 users not shown) | |||
| Line 1: | Line 1: | ||
| − | [[Category:Installation]][[Category:Pervasive]] | + | [[Category:Installation]][[Category:Pervasive]] |
<table class="infobox" cellspacing="5" style="background-color: #FFFFFF; width:27em; text-align:left; border-spacing: 2px; line-height:1.5em;"> | <table class="infobox" cellspacing="5" style="background-color: #FFFFFF; width:27em; text-align:left; border-spacing: 2px; line-height:1.5em;"> | ||
| − | <tr style="background-color: #bdbdbd; text-align: center; font-weight:bold;"> | + | <tr> |
| + | <td>[[File:Ic_description_black_24dp.png|link=Newton User Guide#Installation]] Newton User Guide: [[Newton User Guide#Installation|Installation]]</td> | ||
| + | </tr> | ||
| + | <tr style="background-color: #bdbdbd; text-align: center; font-weight:bold;"> | ||
<td>Related Pages</td> | <td>Related Pages</td> | ||
| − | </tr> | + | </tr> |
| − | <tr> | + | <tr> |
| − | <td> | + | <td> |
| − | <ul> | + | <ul> |
| − | + | <li>[[Backup Information]]</li> | |
| − | <li>[[Backup Information]]</li> | + | <li>[[Hardware Recommendations]]</li> |
| − | <li>[[Hardware Recommendations]]</li> | + | <li>[[Installation Environment and Network Requirements]]</li> |
| − | <li>[[Installation Environment and Network Requirements]]</li> | + | <li>[[Make Text and Other Items Larger or Smaller]]</li> |
| − | <li>[[Make Text and Other Items Larger or Smaller]]</li> | + | </ul> |
| − | </ul> | + | </td> |
| − | </td> | + | </tr> |
| − | </tr> | + | <tr style="background-color: #d3d3d3; text-align: center; "> |
| − | <tr style="background-color: #d3d3d3; text-align: center; "> | ||
<td>Related Categories</td> | <td>Related Categories</td> | ||
| − | </tr> | + | </tr> |
| − | <tr> | + | <tr> |
| − | <td> | + | <td> |
| − | <ul> | + | <ul> |
| − | <li>[[:Category:Installation|Installation]]</li> | + | <li>[[:Category:Installation|Installation]]</li> |
| − | </ul> | + | </ul> |
| − | </td> | + | </td> |
| − | </tr> | + | </tr> |
</table> | </table> | ||
| − | |||
| + | ==Instructions== | ||
| + | *Verify the workstation is running a current version of Microsoft Windows. As of 2025-10-14 Windows 10 reached end-of-life. See [https://support.microsoft.com/en-us/windows/windows-10-support-ends-on-october-14-2025-2ca8b313-1946-43d3-b55c-2b95b107f281 https://support.microsoft.com/en-us/windows/windows-10-support-ends-on-october-14-2025-2ca8b313-1946-43d3-b55c-2b95b107f281]. | ||
*Review the [[Installation Environment and Network Requirements]] and [[Hardware Recommendations]]. | *Review the [[Installation Environment and Network Requirements]] and [[Hardware Recommendations]]. | ||
| − | + | ===Map Drive As Admin and run Adduser=== | |
| − | + | #Login to Windows as the user. | |
| + | #Run CMD as administrator. | ||
| + | #:[[File:wss.2.png]] | ||
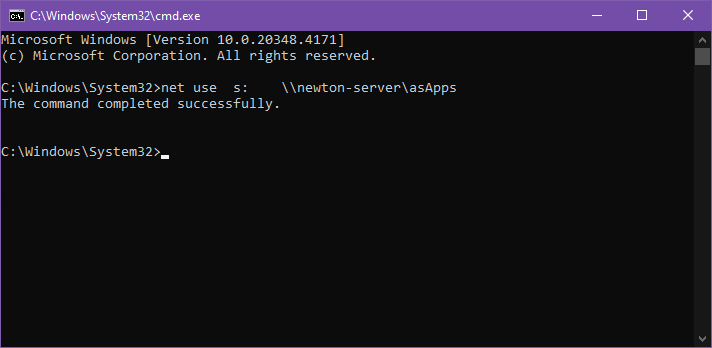
| + | #Map a network drive to the share on your file server where Newton is installed. Use the same drive letter on every machine e.g.: | ||
| + | #:'''net use s: \\newton-server\asApps''' | ||
| + | #Change directory to the empire\programs directory on the mapped drive e.g.: | ||
| + | #:'''cd /d s:\empire\programs''' | ||
| + | #Run '''adduser.exe''' and click Begin. | ||
| + | #:[[File:wss.3.png]] | ||
| − | == | + | ===Map Drive as User=== |
| − | [[: | + | #Open CMD. |
| − | + | #:[[File:wss.0.png]] | |
| − | + | #Map the network drive e.g.: | |
| − | + | #:'''net use s: \\newton-server\asapps | |
| + | #:[[File:wss.1.png]] | ||
| + | #Exit CMD. | ||
| − | [[ | + | ===Run Newton to Complete Setup=== |
| + | Double click the Agency Systems icon on the desktop to run Newton. You may get two User-Account-Control message boxes asking to run RWEasyMapi64.exe requiring admin elevation, and another to run mariadb-connector32-3-1-11.msi. Enter the local admin user and password to run them. | ||
| + | #:[[File:wss.4.png]] | ||
| + | ===Login=== | ||
| + | Have the user login to test, or use | ||
| + | *Agency: '''95''' | ||
| + | *Operator: '''DCS''' | ||
| + | *Password: '''EMPYRE''' | ||
| − | + | ==LEGACY Pervasive Client Installation== | |
| − | |||
| − | |||
| − | |||
| − | == | ||
| − | |||
| − | |||
| − | |||
| − | |||
| − | |||
| − | |||
| − | |||
| − | |||
| − | |||
| − | |||
| − | |||
| − | |||
| − | |||
| − | |||
| − | |||
| − | |||
| − | |||
| − | |||
| − | |||
| − | |||
Open a '''new''' command prompt as Administrator. | Open a '''new''' command prompt as Administrator. | ||
'''x:''' | '''x:''' | ||
| Line 96: | Line 92: | ||
=== Configure Pervasive Settings === | === Configure Pervasive Settings === | ||
| − | Open a '''new''' command prompt as Administrator. | + | Close the old command prompt & Open a '''new''' command prompt as Administrator. |
'''PCC''' | '''PCC''' | ||
#Select '''Tools''' > '''ODBC Administrator or 32bit ODBC Administrator''' (Not 64bit). | #Select '''Tools''' > '''ODBC Administrator or 32bit ODBC Administrator''' (Not 64bit). | ||
| Line 109: | Line 105: | ||
#'''Exit''' the ODBC Administrator. | #'''Exit''' the ODBC Administrator. | ||
| − | == Create Agency Systems Icon and Install Crystal Reports == | + | === Create Agency Systems Icon and Install Crystal Reports === |
| − | Open a '''new''' command prompt as Administrator. | + | Close the old command prompt & Open a '''new''' command prompt as Administrator. |
'''x:''' | '''x:''' | ||
'''cd empire''' | '''cd empire''' | ||
| Line 119: | Line 115: | ||
#Select '''Finish'''. | #Select '''Finish'''. | ||
| − | == Test Agency Systems == | + | === Test Agency Systems === |
#'''Double click''' the Agency Systems icon. | #'''Double click''' the Agency Systems icon. | ||
#Agency: '''95''' | #Agency: '''95''' | ||
| Line 127: | Line 123: | ||
Once the application opens, click on one of the tabs to make sure it loads data. | Once the application opens, click on one of the tabs to make sure it loads data. | ||
| − | See [[#Troubleshoot Error Codes and Other Considerations|the troubleshooting section above]] for any errors. | + | [[File:Ic_info_black_24dp.png]] See [[#Troubleshoot Error Codes and Other Considerations|the troubleshooting section above]] for any errors. |
| + | |||
| + | == Troubleshoot Error Codes and Other Considerations == | ||
| + | [[:Category:Error|Category: Error Codes]] | ||
| + | *[[Error: Crpe32.dll not found]] | ||
| + | *[[Error: 501 Job Failed]] | ||
| + | *[[The Easy MAPI COM Server is needed to use MAPI in a "Cross-Bitness" environment]] | ||
| + | |||
| + | Display Issues | ||
| + | *[[Display Issues Printing Forms or Viewing Window Buttons]] | ||
| + | *[[Make Text and Other Items Larger or Smaller]] | ||
| + | *[[Transaction Number Or Code Default Text Blank]] | ||
| + | |||
| + | Other | ||
| + | *[[Open File Security Warning]] | ||
Latest revision as of 14:22, 30 October 2025
| Related Pages |
| Related Categories |
Contents
Instructions
- Verify the workstation is running a current version of Microsoft Windows. As of 2025-10-14 Windows 10 reached end-of-life. See https://support.microsoft.com/en-us/windows/windows-10-support-ends-on-october-14-2025-2ca8b313-1946-43d3-b55c-2b95b107f281.
- Review the Installation Environment and Network Requirements and Hardware Recommendations.
Map Drive As Admin and run Adduser
- Login to Windows as the user.
- Run CMD as administrator.
- Map a network drive to the share on your file server where Newton is installed. Use the same drive letter on every machine e.g.:
- net use s: \\newton-server\asApps
- Change directory to the empire\programs directory on the mapped drive e.g.:
- cd /d s:\empire\programs
- Run adduser.exe and click Begin.


Map Drive as User
- Open CMD.
- Map the network drive e.g.:
- net use s: \\newton-server\asapps
- Exit CMD.


Run Newton to Complete Setup
Double click the Agency Systems icon on the desktop to run Newton. You may get two User-Account-Control message boxes asking to run RWEasyMapi64.exe requiring admin elevation, and another to run mariadb-connector32-3-1-11.msi. Enter the local admin user and password to run them.

Login
Have the user login to test, or use
- Agency: 95
- Operator: DCS
- Password: EMPYRE
LEGACY Pervasive Client Installation
Open a new command prompt as Administrator.
x:
cd empire
PSQL11.3Client32.exe
- Select Yes
- Select Unzip
- Select Ok
- Select Install
- Select Next
- Select I accept...
- Select Next
- Select Run as a Service
- Select Next
- Select Complete
- Select Next
- Select Install
- Select Finish
- Select Exit


- Disregard and Close the internet window.

Configure Pervasive Settings
Close the old command prompt & Open a new command prompt as Administrator.
PCC
- Select Tools > ODBC Administrator or 32bit ODBC Administrator (Not 64bit).
- Select the System DSN > Add (If Agyforms is not already configured).
- Choose Pervasive ODBC Client Interface and select Finish.
- Type AGYFORMS in the Data Source Name field.
- Enter Your Server Name in the Server Name/IP field.
- Select Get List.
- Verify Agyforms is selected in the drop down box named Database Name.
- Select Test and select OK once the Connection Successful box appears.
- Select OK to create the Client DSN.
- Exit the ODBC Administrator.
Create Agency Systems Icon and Install Crystal Reports
Close the old command prompt & Open a new command prompt as Administrator.
x:
cd empire
Adduser.exe
- If the workstation will have 64 bit Microsoft Office installed (Office, Not Windows), replace Adduser.exe with Adduser.exe /64.
- Select Run.
- Select Begin.
- Select Finish.
Test Agency Systems
- Double click the Agency Systems icon.
- Agency: 95
- Operator: DCS
- Password: EMPYRE
Once the application opens, click on one of the tabs to make sure it loads data.
![]() See the troubleshooting section above for any errors.
See the troubleshooting section above for any errors.
Troubleshoot Error Codes and Other Considerations
- Error: Crpe32.dll not found
- Error: 501 Job Failed
- The Easy MAPI COM Server is needed to use MAPI in a "Cross-Bitness" environment
Display Issues
- Display Issues Printing Forms or Viewing Window Buttons
- Make Text and Other Items Larger or Smaller
- Transaction Number Or Code Default Text Blank
Other