Difference between revisions of "Company Tab"
| (6 intermediate revisions by 2 users not shown) | |||
| Line 1: | Line 1: | ||
[[Category:Training Guides]] | [[Category:Training Guides]] | ||
<table class="infobox" cellspacing="5" style="background-color: #FFFFFF; width:27em; text-align:left; border-spacing: 2px; line-height:1.5em;"> | <table class="infobox" cellspacing="5" style="background-color: #FFFFFF; width:27em; text-align:left; border-spacing: 2px; line-height:1.5em;"> | ||
| + | <tr> | ||
| + | <td>[[File:Ic_description_black_24dp.png|link=Newton User Guide#Newton Interface Overview]] Newton User Guide: [[Newton User Guide#Newton Interface Overview|Newton Interface Overview]]</td> | ||
| + | </tr> | ||
<tr> | <tr> | ||
<td>[[File:Ic_info_black_24dp.png]] Required Software Version: [[:Category:Release Notes|March 2017]]</td> | <td>[[File:Ic_info_black_24dp.png]] Required Software Version: [[:Category:Release Notes|March 2017]]</td> | ||
| Line 93: | Line 96: | ||
*'''Exit''': Exit Tab - Closes the current tab. | *'''Exit''': Exit Tab - Closes the current tab. | ||
| − | == Company Tab: Dashboard == | + | == Company Tab: Company Dashboard == |
After [[#Find a Company|searching for and loading a company]], the Company Dashboard tab is displayed below the [[#Company Tab: Summary Panel|Summary Panel]]. | After [[#Find a Company|searching for and loading a company]], the Company Dashboard tab is displayed below the [[#Company Tab: Summary Panel|Summary Panel]]. | ||
| Line 110: | Line 113: | ||
=== Contacts=== | === Contacts=== | ||
| − | Contacts are listed as the first band on the company dashboard tab. Company contacts can be selected when [[Email | + | Contacts are listed as the first band on the company dashboard tab. Company contacts can be selected when [[Email|sending an email]], [[Claims|creating a claim]] or creating a [[Diary]]. |
| + | |||
| + | [[File:Companytab-contacts.png]] | ||
| + | |||
| − | + | Contacts are sorted in alphabetical order by department. Contacts without a department are listed first. To view the full details for a contact, click the contact name within the '''Name''' column. | |
| − | + | To create a new contact, select '''Create Contact''' within the Contacts band, or select the [[#Company_Tab:_Summary_Panel|contact card within the company tab summary panel]]. (Requires [[Security System|Security System: Profiles -> Company -> Entry]] access.) | |
| − | [[File: | + | [[File:Ic_info_black_24dp.png]] A [[Mynewtoncampus#Profile_Reports:_Company_Contacts|spreadsheet of active company contacts can be exported]] including contact email addresses. Inactive companies are not included. |
=== Notes === | === Notes === | ||
| Line 178: | Line 184: | ||
=== Memos === | === Memos === | ||
| − | Memos are word-processing documents that provide the ability to [[Create | + | Memos are word-processing documents that provide the ability to [[Memowriter: Create A Form Letter Template|create form letter templates]] that can be used to quickly merge data fields. |
[[File:Companytab-memo-saveas.png]] | [[File:Companytab-memo-saveas.png]] | ||
| − | [[File:Ic_info_black_24dp.png]] For additional information, see: [[ | + | [[#Contacts|Company contacts]] also have [[Memowriter]] merge codes. |
| + | |||
| + | [[File:Memowriter-merge-companycontact.png]] | ||
| + | |||
| + | |||
| + | [[File:Ic_info_black_24dp.png]] For additional information, see: [[Memowriter]]. | ||
=== Emails=== | === Emails=== | ||
| − | Click '''Emails''' to show e-mails sent from or attached to Newton. To attach an e-mail to a company, [[Email | + | Click '''Emails''' to show e-mails sent from or attached to Newton. To attach an e-mail to a company, [[Email|drag and drop it from Outlook]] onto the company dashboard. |
[[File:Companytab-email.png]] | [[File:Companytab-email.png]] | ||
| Line 193: | Line 204: | ||
''(See [[Preferences#User Options|Setup -> Preferences -> User Options -> Default Band Date Range]] to change the value)'' | ''(See [[Preferences#User Options|Setup -> Preferences -> User Options -> Default Band Date Range]] to change the value)'' | ||
| − | [[File:Ic_info_black_24dp.png]] For additional information, see: [[Email | + | [[File:Ic_info_black_24dp.png]] For additional information, see: [[Email]]. |
=== Attachments === | === Attachments === | ||
| Line 205: | Line 216: | ||
''(See [[Preferences#User Options|Setup -> Preferences -> User Options -> Default Band Date Range]] to change the value)'' | ''(See [[Preferences#User Options|Setup -> Preferences -> User Options -> Default Band Date Range]] to change the value)'' | ||
| − | [[File:Ic_info_black_24dp.png]] For additional information, see: [[ | + | [[File:Ic_info_black_24dp.png]] For additional information, see: [[Attachments]]. |
==== Secure Attachments ==== | ==== Secure Attachments ==== | ||
Latest revision as of 21:52, 24 May 2018
| Related Pages |
| Related Categories |
This page provides an overview of the Company Tab that displays by selecting Company -> Add Company Tab from the Main Menu.
The Main Menu, User Dashboard Tab, Client Tab, Policy Dashboard, Policy & Billing, Company Tab, Vendor Tab, and Management Tab are the primary interfaces and dashboards within Newton.
Contents
Find a Company
A Company Tab is created by selecting Company -> Add Company Tab from the Main Menu.
Multiple company tabs can be opened at the same time, similar to tabs in a browser. When an operator is finished with a company, the current tab can be switched to a new company profile, or the company tab can be closed entirely.
The company drop list provides a quick search feature which automatically searches company names or codes for partial or complete matches.
Select the drop-down box, enter the company code or name in the drop-down field and press <Enter> or <TAB> when finished.
Example: There are dozens of company profiles, many with similar names. After entering "trav”, all matching results are displayed.
By default, inactive companies are not included in the drop-down list. To load an inactive company, first select the "Include Inactive Companies" check box.
Create a Company
To enter a new company into Newton, you should always search existing companies first to avoid creating duplicates. Remember to include inactive companies.
![]() For more information, see: Company Profile.
For more information, see: Company Profile.
Company Tab Interface
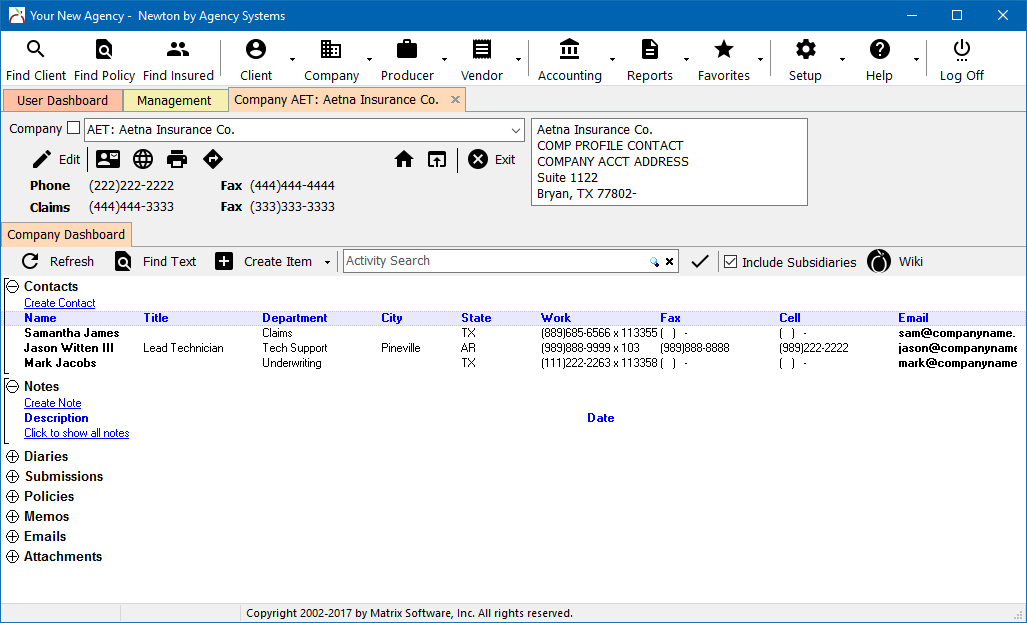
The company tab contains company information such as contact numbers, and data tabs for different data types such as contacts, policies, attachments and more.
The main menu is not specific to the Company Tab, displayed at the top of the Newton window.
![]() See: Main Menu and Tab Navigation for more information.
See: Main Menu and Tab Navigation for more information.
Company Tab: Summary Panel
The company summary panel is below the main menu. The summary panel includes the company selection drop-down box, and company details.
- Company Details
- Company name and number.
- Both company phone and fax numbers.
- Company Accounting Address.
- Action Icons
- Edit: Edit Company - Edits the current Company Profile.
- Contact Card: Contact List - Lists contacts for the current company in a window.
- Globe: View Website - Opens the company website in a browser.
- Printer: Dymo - Send company address to a Dymo label printer.
- Street Sign: View Map - Opens a map to the company address in a browser.
- House: Reload Tab - Clears any filters and sub-tabs and reloads the current company tab.
- Up Arrow: Pop Out Tab - Opens the current tab as a window. Select again to reload the company window as a company tab.
- Exit: Exit Tab - Closes the current tab.
Company Tab: Company Dashboard
After searching for and loading a company, the Company Dashboard tab is displayed below the Summary Panel.
Company Dashboard Toolbar
- Company Dashboard Toolbar
- Refresh: Reload the data on the selected tab. To reload the entire company, select the house icon within the summary panel.
- Find Text: Jump to text on the page.
- Create Item: Menu of company action items in addition to the Create Item links at the beginning of expanded data bands (+).
- Activity Search: Find and the filter the email and attachment data bands for a specific word or value.
- Include Subsidiaries: Deselect remove subsidiaries from the Policies band. (See the policy section below).
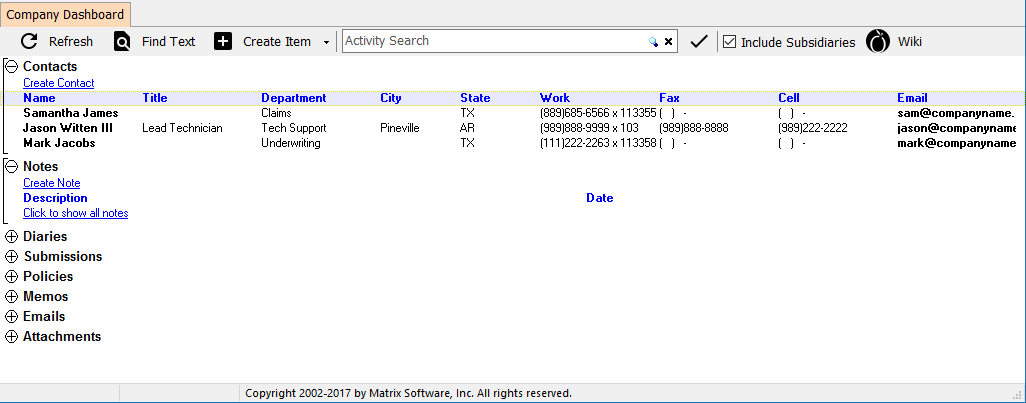
Contacts
Contacts are listed as the first band on the company dashboard tab. Company contacts can be selected when sending an email, creating a claim or creating a Diary.
Contacts are sorted in alphabetical order by department. Contacts without a department are listed first. To view the full details for a contact, click the contact name within the Name column.
To create a new contact, select Create Contact within the Contacts band, or select the contact card within the company tab summary panel. (Requires Security System: Profiles -> Company -> Entry access.)
![]() A spreadsheet of active company contacts can be exported including contact email addresses. Inactive companies are not included.
A spreadsheet of active company contacts can be exported including contact email addresses. Inactive companies are not included.
Notes
Company notes can be configured to display automatically within the Notes band, or pop-up automatically in a window.
Diaries
Any diary created from the Policy Dashboard will automatically include the policy company, and display on the Company tab. Select Create Diary from the company tab to create a diary that is only associated with the company, not a specific policy or client.
![]() For additional information, see: Diary.
For additional information, see: Diary.
Submissions
Submissions with an open status will always be displayed, regardless of their date.
![]() For additional information, see: Submission.
For additional information, see: Submission.
Policies
Any policy with a current or future expiration date is displayed. Click the policy number to open the Policy Dashboard. The premium and invoice totals of all the policies are shown here. Clicking the Premium, Invoiced, or Est Annual Prem amount for any policy record will open Policy & Billing.
Transaction, Class, and Company columns will only display the code. Holding the mouse pointer over each code will display the full name.
The Billed column displays the company code assigned to first invoice line on the policy. If the current transaction has not been invoiced, the billing company for the most recent invoice is displayed. If the policy has never been invoiced, nothing will be listed.
![]() For additional information, see: Policy: Create A Policy.
For additional information, see: Policy: Create A Policy.
Include Subsidiaries
The Policies band and expired policies section of the company tab will automatically display any policy written to the parent company and assigned subsidiaries.
The Policies band will also include a Company column if the selected company code is a parent company with assigned subsidiaries. The column displays the policy company for each item.
To list only policies assigned directly to the parent company, deselect Include Subsidiaries within the Company Dashboard Toolbar.
![]() For additional information, see: Company Profile - Parent Company
For additional information, see: Company Profile - Parent Company
Total Policy Count and Premium
A row below all active items will display the number of records and the totals for each of the columns: Premium, Invoiced, and Estimated Annual Premium. If the mouse pointer is held over the policy count, or each column total, a numeric break-down by Policy, Quote, and Binder will display.
The policy list provides a Right Click option to copy the list to the clipboard. After copying the list, open Microsoft Excel and paste the contents into a spreadsheet.
![]() For additional information, see: Management Tab.
For additional information, see: Management Tab.
Quotes and Expired Policies
The Policies band on the company tab will exclude quotes by default. Quotes can be displayed by right-clicking, and selecting “Include Quotes”. Quotes appear in green, and cancelled policies still in force display in red.
The Expired Policies sub-band only displays policies and quotes expired within the previous three years.
Memos
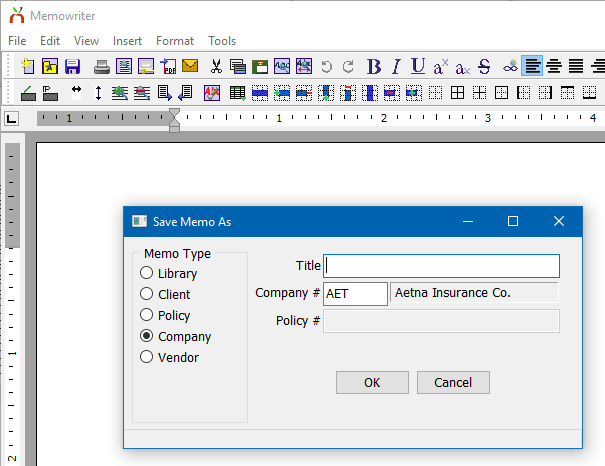
Memos are word-processing documents that provide the ability to create form letter templates that can be used to quickly merge data fields.
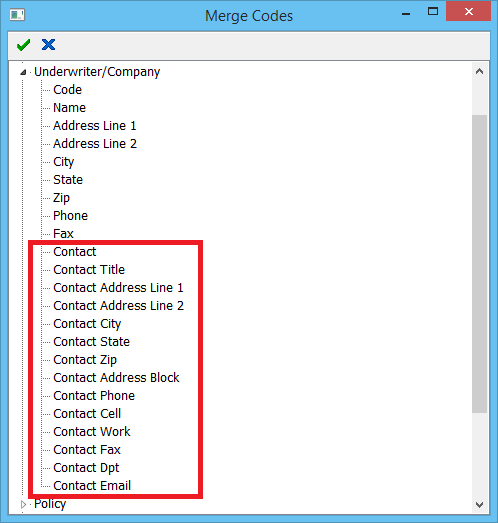
Company contacts also have Memowriter merge codes.
![]() For additional information, see: Memowriter.
For additional information, see: Memowriter.
Emails
Click Emails to show e-mails sent from or attached to Newton. To attach an e-mail to a company, drag and drop it from Outlook onto the company dashboard.
Only emails within the default filtered date range are initially displayed. Select Click to show all Emails to remove the date filter. (See Setup -> Preferences -> User Options -> Default Band Date Range to change the value)
![]() For additional information, see: Email.
For additional information, see: Email.
Attachments
Company tab attachments can be created through drag+drop, and automatically through Commission Download, Commission Builder, or Reconcile Company Payables.
Click the (+) next to Attachments to see attachments for company. Click Add Attachment to add an attachment by browsing, or simply drag and drop a file or photo onto the company dashboard.
Only attachments within the default filtered date range are initially displayed. Select Click to show all to remove the date filter. (See Setup -> Preferences -> User Options -> Default Band Date Range to change the value)
![]() For additional information, see: Attachments.
For additional information, see: Attachments.
Secure Attachments
All operators with access to the Company tab can view company attachments.
Company tab attachments can be converted to secure attachments using a right-click menu. After the conversion, the attachment will be removed from the company tab, and only available from the Management Tab.
![]() For additional information, see: Management Tab.
For additional information, see: Management Tab.
Reconcile Attachments
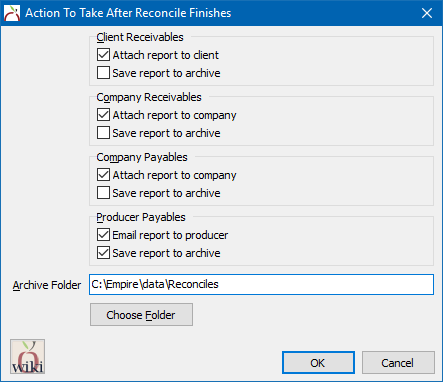
The reconcile functions can be configured to automatically create and store .PDF copies of the reports as each item is processed. The .PDF copies can be stored on the various attachment bands within Newton, or externally in a user-specified folder.
![]() For additional information, see: Select Actions When Reconcile Completes.
For additional information, see: Select Actions When Reconcile Completes.
