Difference between revisions of "Non-Policy Related Checks"
(→From the My Newton Campus Forum: Frequently Asked Questions: removed forum) |
|||
| Line 31: | Line 31: | ||
[[Credit Card Processing For Expense Entry|Click here for instructions to record expense entries using a credit card]], instead of a [[Bank Profile|bank account]]. | [[Credit Card Processing For Expense Entry|Click here for instructions to record expense entries using a credit card]], instead of a [[Bank Profile|bank account]]. | ||
| − | |||
| − | |||
| − | |||
| − | |||
| − | |||
| − | |||
| − | |||
| − | |||
== Vendor Payables - Create Check Without A Template == | == Vendor Payables - Create Check Without A Template == | ||
Revision as of 21:32, 5 November 2015
| Related Pages |
| Related Categories |
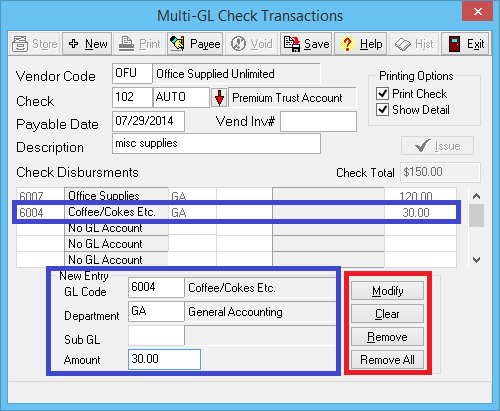
All non-policy related expense transactions are recorded as wire or regular checks using the Non-Policy Related Checks interface.
The interface supports multiple General Ledger Profile expense entries per transaction. The checks are all recorded under GL 2130: Vendor Payables. When a transaction is recorded, the debit is recorded against the entered Bank Profile, which can be a bank account, or an alternate bank account such as a credit card.
Click here for instructions to record expense entries using a credit card, instead of a bank account.
Contents
Vendor Payables - Create Check Without A Template
See Vendor Payables - Using Existing Check Template to create a check from a saved template.
- Select AP -> Check Transaction -> Non-Policy Related.
- Enter the Vendor Code.
- Enter the Bank Code.
- Enter the Payable Date.
- Enter a short Description.
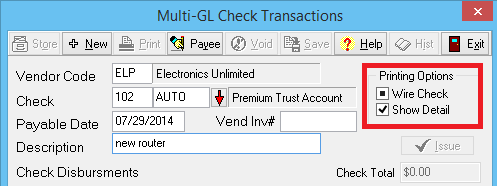
- For Printing Options,select Print Check twice to set to Wire Check.
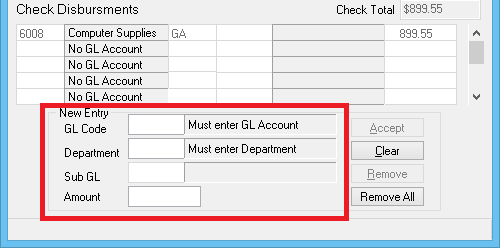
- Enter the GL Code for the expense.
- Enter the Department Code.
- Enter the Sub GL if necessary.
- Enter the Amount.
- Select Accept.
- Repeat steps 7-11 until all GL entries are listed.
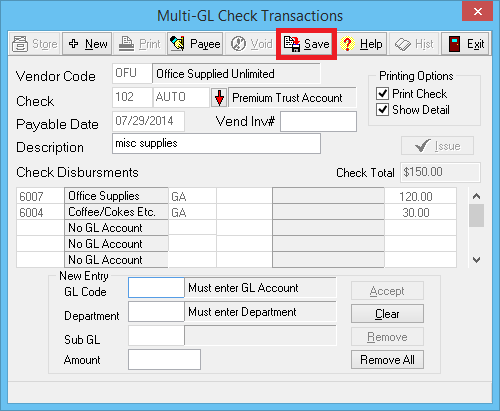
- When finished, select Save, then Print or Exit.
Vendor Payables - Report of Existing Vendor Checks
See Report: Check Register to run a report for existing Non-Policy Related checks.
Vendor Payables - Create Check Template
- Select AP -> Check Transaction -> Non-Policy Related.
- Enter the Vendor Code.
- Enter the Bank Code.
- Enter the Payable Date.
- Enter a short Description.
- For Printing Options,select Print Check twice to set to Wire Check.
- Enter the GL Code for the expense.
- Enter the Department Code.
- Enter the Sub GL if necessary.
- Enter the Amount.
- Select Accept.
- Repeat steps 7-11 until all GL entries are listed.
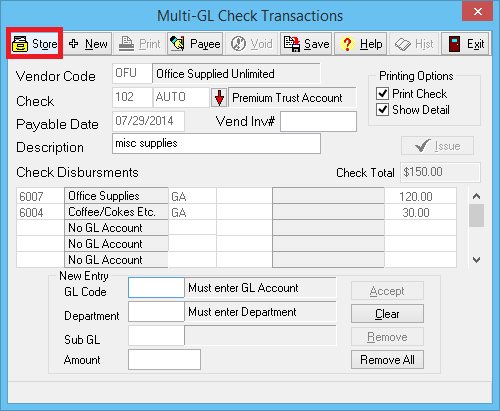
- When finished, select Store to save the check template. Do Not Select Save.
- Selecting Store will not create a check, it will only create a check template. After storing the template, to create a check, select Save or see the section below.
Vendor Payables - Using Existing Check Template
- Select AP -> Check Transaction -> Non-Policy Related.
- Enter the Vendor Code. The previously stored check template details will load.
- To edit an existing Check Disbursement Amount, enter the matching GL Code and Department. Enter the new Amount, and select Modify.
- To remove an existing Check Disbursement, enter the matching GL Code and Department. Select Remove.
- To remove all existing Check Disbursements, select Remove All.
- Select Store to update the check template with the new Check Disbursements.
- To create a check, select Save.
Vendor Payables - Check Template Examples
Employee Salary Payroll Check Template
Each employee must be assigned a Vendor Code.
To include producer commission with a payroll check see: Producer Payables: Include Producer Commission in Payroll Check
| Example General Ledger Check Disbursements | |||
| General Ledger Code | GL Name | Dpt Code | Amount |
|---|---|---|---|
| 6001 | Office Salaries | GA | 3000.00 |
| 2122 | Federal Tax Withholding | GA | -186.00 |
| 2121 | Medicare | GA | -43.50 |
| 2126 | Social Security WH | GA | -186.00 |
- Select AP -> Check Transaction -> Non-Policy Related.
- Enter the Vendor Code for the employee.
- Enter the Bank Code.
- Enter the Payable Date.
- Enter a short Description.
- For Printing Options,select Print Check twice to set to Wire Check or leave the default Printing Options -> Print Check.
- Enter the GL Code for the expense.
- Enter the Department Code.
- Enter the Sub GL if necessary.
- Enter the Amount.
- Select Accept.
- Repeat steps 7-11 until all GL entries are listed. (See example chart above).
- When finished, select Store to save the check template. Do Not Select Save.
After storing the template, to create a check, select Save or see the section above.
Federal Tax Payroll Check Template
Create a Vendor Code for Payroll Tax used to move the Federal Tax Withholding from the employee salary payroll check to an expense General Ledger Account.
The Federal Tax Withholding account must match the account used for the employee salary payroll check.
| Example General Ledger Check Disbursements | |||
| General Ledger Code | GL Name | Dpt Code | Amount |
|---|---|---|---|
| 2122 | Federal Tax Withholding | GA | -1860.00 |
| 6028 | Payroll Taxes | GA | 1860.00 |
- Select AP -> Check Transaction -> Non-Policy Related.
- Enter the Vendor Code.
- Enter the Bank Code.
- Enter the Payable Date.
- Enter a short Description.
- For Printing Options,select Print Check twice to set to Wire Check.
- Enter the GL Code for the expense.
- Enter the Department Code.
- Enter the Sub GL if necessary.
- Enter the Amount.
- Select Accept.
- Repeat steps 7-11 until all GL entries are listed. (See example chart above. The Check Total should be 0.00.)
- When finished, select Store to save the check template. Do Not Select Save.
After storing the template, to create a check, select Save or see the section above.
