Difference between revisions of "MyInsuranceDashboard.com Integration"
| (38 intermediate revisions by 4 users not shown) | |||
| Line 1: | Line 1: | ||
| − | [[Category:MyInsuranceDashboard]] | + | [[Category:MyInsuranceDashboard]][[Category:Forms]] |
| − | [[ | + | MyInsuranceDashboard.com provides a 24/7 web portal for your customers to access their policy related information that integrates directly with Newton by Agency Systems. Your customers will be able to review schedule items, generate published certificates with updated holder information, and view published documents to their dashboard. They will also be able to interact with your agency by requesting changes to schedule items, and upload supporting documents to your office. These items will flow directly to your management system with minimal effort by your staff. |
| − | MyInsuranceDashboard. | + | == Frequently Asked Questions (FAQ) == |
| + | *[[Talk:MyInsuranceDashboard.com_Integration#Why_am_I_receiving_outgoing_My_Insurance_Dashboard_.28MID.29_client_emails.3F|Why am I receiving outgoing My Insurance Dashboard (MID) client emails?]] | ||
| + | *[[Talk:MyInsuranceDashboard.com_Integration#How_do_I_troubleshoot_customer_access_to_certificates_through_MID.3F|How do I troubleshoot customer access to certificates through MID?]] | ||
| − | == | + | == Release Notes == |
| − | + | [[MyInsuranceDashboard Release Notes: December 2013]] | |
| + | |||
| + | [[MyInsuranceDashboard Release Notes: February 2014]] | ||
| + | ==Using Newton by Agency Systems with MyInsuranceDashboard.com== | ||
| − | + | ===How do I Enroll Customers in MyInsuranceDashboard.com?=== | |
| + | There are a few methods that you may use to enroll your customers. For each method, MyInsuranceDashboard.com will send the selected contact an email notification that they have been enrolled with a web link to setup their account on MyInsuranceDashboard.com. | ||
| − | From the Basic Tab in Agency Systems select '''Edit''' | + | ====Method One: From a Contact on the Basic Tab==== |
| + | From the Client Dashboard in Agency Systems, select '''Edit''' for the contact you want to send the MyInsuranceDashboard Email to, and select '''Enroll'''. An email address must be saved to the contact before the button is available. | ||
[[File:Enroll1.JPG]] | [[File:Enroll1.JPG]] | ||
| − | + | ====Method Two: Within a Certificate of Liability - ACORD 25==== | |
| + | Open a Certificate of Insurance (Acord 25) and select '''Other -> Publish Cert to MyInsuranceDashboard.com.''' | ||
| + | [[File:Enroll4.jpg]] | ||
| − | ''' | + | If the customer is not currently enrolled, Agency Systems will display a select contact window. Highlight the contact you want to send the enroll email to, and select '''Send Form.''' After the enroll is complete, it will set the Certificate as the only published Certificate. If the customer is already enrolled, the system will bypass the select contact window, and will automatically publish the Certificate. |
| − | + | ====Method Three: From MyInsuranceDasbhoard.com Admin Page==== | |
| + | #Login to the MyInsuranceDashboard.com admin portal. | ||
| + | #At the top of the page under Add Client select the proper '''Agency Code''' from the drop down box. | ||
| + | #:[[File:Enroll3.JPG]] | ||
| + | #Enter the corresponding '''Client Number''' from Agency Systems. | ||
| + | #Select '''Add Client''' | ||
| − | + | The client will now show in the listing for enrolled clients. To send the enroll notification email directly from the MyInsuranceDashboard portal, select '''Notify'''. Select which client contact to send the email to or input an alternate email address in the free form email box. | |
| + | ===How do I Select or Publish a Certificate of Insurance to MyInsuranceDashboard.com?=== | ||
| − | ''' | + | Open a Certificate of Insurance (Acord 25) and select '''Other -> Publish Cert to MyInsuranceDashboard.com.''' |
| − | + | [[File:Enroll4.jpg]] | |
| − | + | If the customer is not currently enrolled, Agency Systems will display a select contact window. Highlight the contact you want to send the enroll email to, and select Send Form. After the enroll is complete, it will set the Certificate as the only published Certificate. | |
| + | If the customer is already enrolled, the system will bypass the select contact window, and will automatically publish the Certificate. Since only one Certificate can be available at a time, this will override a previously selected certificate. See [[#Manage Certificates from Agency Admin Portal|Manage Certificates from Agency Admin Portal]] for additional information. | ||
| − | + | ===How do I Publish Documents to MyInsuranceDashboard.com?=== | |
| + | Documents can be published directly from Newton by Agency Systems either individually, or in a batch. | ||
| − | + | ====Publish A Single Document==== | |
| + | #[[Client Tab#Find a Client|Load a client]] on one of the [[Client Tab|client tabs]]. | ||
| + | #Expand the '''Attachments''' band. ''(Any document published to MyInsuranceDashboard.com will be displayed in purple.)'' | ||
| + | #'''Right Click''' on the desired attachment and select '''Publish Doc to MID'''. | ||
| + | #:[[File:MID-DocumentPublish.png]] | ||
| + | #A status message indicating '''Item successfully published.''' will display. | ||
| + | #All contacts enrolled for that customer will receive an email notification that a document has been published to MyInsurancedashboard.com. | ||
| − | [[ | + | ====Publish Multiple Documents In A Batch==== |
| + | #[[Client Tab#Find a Client|Load a client]] on one of the [[Client Tab|client tabs]]. | ||
| + | #Expand the '''Attachments''' band. ''(Any document published to MyInsuranceDashboard.com will be displayed in purple.)'' | ||
| + | #'''Right Click''' and select '''Multiple Selections'''. | ||
| + | #'''Right Click''' on any of the selected items and select '''Publish Doc to MID'''. | ||
| + | #A status message indicating '''Item successfully published.''' will display. | ||
| + | #All contacts enrolled for that customer will receive an email notification that a document has been published to MyInsurancedashboard.com. | ||
| − | === | + | ====Publish Documents and ACORD Forms Using Batch Print==== |
| + | {{#ev:youtube|6kxT7c2MYP0|300|right|MyInsuranceDashboard and Batch Print}} | ||
| + | Using [[Batch Send]] and selecting the '''Publish to MyInsuranceDashboard''' option will upload the documents to [[MyInsuranceDashboard.com Integration|MyInsuranceDashboard]] as a .PDF package. If attachments are included in the selection, the items are published individually from the .PDF package. | ||
| − | + | [[File:Batchprint-MID-form.png]] | |
| − | + | ====Unpublish A Document==== | |
| + | You may unpublish items in two different ways. | ||
| − | + | #[[Client Tab#Find a Client|Load a client]] on one of the [[Client Tab|client tabs]]. | |
| + | #Expand the '''Attachments''' band. | ||
| + | #'''Right Click''' on the desired attachment and select '''Remove Doc from MID'''. | ||
| + | #:[[File:MID-DocumentUnPublish.png]] | ||
| + | #A status message indicating '''Item successfully unpublished.''' will display. | ||
| + | #The attachment will change back to black indicating that the item is no longer published to MyInsuranceDashboard.com. | ||
| − | [[ | + | See [[#Unpublish Documents from Agency Admin Portal|the section below]] to unpublish documents from the MyInsuranceDashboard Agency Admin Portal. |
| − | + | ==MyInsuranceDashboard.com Customer Portal== | |
| − | + | MyInsuranceDashboard.com is an opt in system. This means that you, the agency, select which tabs are available to your clients through MyInsuranceDashboard.com. In general, the available contact, policy and schedule information will match the client's basic tab in Newton by Agency Systems. Your customers may also have access to Certificates of Insurance if published, or any published Documents. | |
| + | [[File:MID-Tabs.PNG]] | ||
| − | + | During your initial [[#MyInsuranceDashboard.com Agency Admin Settings|MyInsuranceDashboard.com setup]] you will set the default visible tabs available to an enrolled client. | |
| − | [[ | + | You can modify a single client's settings by [[#Manage Client Access to the Different Tabs|following the instructions below]]. |
===How do my Customers use MyInsuranceDashboard.com?=== | ===How do my Customers use MyInsuranceDashboard.com?=== | ||
| − | MyInsuranceDashboard is designed to allow your customers to review their | + | MyInsuranceDashboard.com is designed to allow your customers to review their schedule items, and make requests for changes. These requests may include adding, editing, or removing a schedule item. Your customers may also generate a [[#How do I Select or Publish a Certificate of Insurance to MyInsuranceDashboard.com?|published Certificate of Insurance]], download [[#How do I Publish Documents to MyInsuranceDashboard.com?|published documents]], or submit new documents through the secure portal. |
====Contacts==== | ====Contacts==== | ||
| + | The contacts section will list all active contacts from the Agency Systems basic tab. The '''Refresh''' button will check for new information and update the list. | ||
| − | + | To edit an existing contact select the '''contact name''', enter the desired changes and select '''Submit'''. To add a new contact, select the '''New Contact''' button. To remove a contact, select the '''Delete''' button. ''(Deleting a contact from the client portal will only mark the contact inactive in Agency Systems)'' | |
| − | |||
[[File:MID-Contacts.PNG]] | [[File:MID-Contacts.PNG]] | ||
| − | + | The '''Download CSV''' button will download a spreadsheet file including all contact information, which can be opened in Microsoft Excel or another compatible spreadsheet program. | |
====Schedule Items: Drivers / Vehicles / Location / Equipment==== | ====Schedule Items: Drivers / Vehicles / Location / Equipment==== | ||
| − | + | Each schedule item will be listed on an individual tab. Selecting a schedule tab will list all currently active items of that type, with additional options to view inactive items, or [[#How do I Process A Customer Request from MyInsuranceDashboard.com?|pending requests]]. | |
| − | |||
| − | |||
| − | |||
| − | |||
| − | |||
| − | |||
| − | |||
| − | |||
| − | |||
| − | |||
| − | [[ | ||
| − | |||
| − | |||
| − | |||
| − | |||
| − | + | [[File:MID-ClientSchedule5.jpg]][[File:MID-ClientSchedule6.jpg]][[File:MID-ClientSchedule7.jpg]] | |
| − | '''Download CSV''' | + | For each of the tabs, a spreadsheet (CSV) file can be downloaded by selecting the '''Download CSV''' button. It can be opened in Microsoft Excel or another compatible spreadsheet program. |
[[File:MID-ClientSchedule3.jpg]] | [[File:MID-ClientSchedule3.jpg]] | ||
| − | + | The Insurance Agency's customer can submit requests for new schedule items, or requests to edit existing schedule times. The pending request will not be applied until the [[#How do I Process A Customer Request from MyInsuranceDashboard.com?|Insurance Agency approves the change]]. | |
| − | + | =====Submit A Customer Request For A New Schedule Item===== | |
| − | ''' | + | #Log in to MyInsuranceDashboard.com as the insured. |
| − | ''' | + | #Select one of the Schedule tabs. |
| − | [[File:MID- | + | #Select the '''New''' button. |
| − | + | #:[[File:MID-ClientSchedule2.jpg]][[File:MID-ClientSchedule10.jpg]][[File:MID-ClientSchedule11.jpg]][[File:MID-ClientSchedule12.jpg]] | |
| − | + | #Enter the details for the request. All items with a red star are required fields. | |
| − | + | #Select the '''Submit Request''' button. | |
| − | + | #The [[#Account Settings|default message]] from the Insurance Agency will display. | |
| − | + | #To confirm, select '''I understand''' and select '''Submit Request'''. | |
| − | + | #:[[File:MID-ClientSchedule1.jpg]] | |
| − | + | #The request is [[#How do I Process A Customer Request from MyInsuranceDashboard.com?|submitted to the Agency for review]]. | |
| − | [[File:MID- | + | #Once approved, an email notification that the item has been processed is automatically sent. |
| − | |||
| − | |||
| − | |||
| − | [[File:MID- | ||
| − | |||
| − | |||
| − | |||
| − | [[File:MID- | ||
| − | |||
| − | The | ||
| − | |||
| − | ''' | ||
| − | |||
| − | [[File:MID- | ||
| − | + | =====Submit A Customer Request To Edit A Schedule Item===== | |
| + | #Log in to MyInsuranceDashboard.com as the insured. | ||
| + | #Select one of the Schedule tabs. | ||
| + | #Select the name of the schedule item. | ||
| + | #Enter the edited schedule item details for the request. All items with a red star are required fields. | ||
| + | #Select the '''Submit Request''' button. | ||
| + | #The [[#Account Settings|default message]] from the Insurance Agency will display. | ||
| + | #To confirm, select '''I understand''' and select '''Submit Request'''. | ||
| + | #:[[File:MID-ClientSchedule1.jpg]] | ||
| + | #The request is [[#How do I Process A Customer Request from MyInsuranceDashboard.com?|submitted to the Agency for review]]. | ||
| + | #Once approved, an email notification that the item has been processed is automatically sent. | ||
| − | ''' | + | =====Submit A Customer Request To Delete A Schedule Item===== |
| + | #Log in to MyInsuranceDashboard.com as the insured. | ||
| + | #Select one of the Schedule tabs. | ||
| + | #Select the '''Delete''' button next to the desired active schedule item. | ||
| + | #:[[File:MID-ClientSchedule8.jpg]] | ||
| + | #Select '''Yes''' to confirm, or No to cancel. | ||
| + | #The request is [[#How do I Process A Customer Request from MyInsuranceDashboard.com?|submitted to the Agency for review]]. | ||
| + | #Once approved, an email notification that the item has been processed is automatically sent. | ||
| − | [[File:MID-ClientSchedule9.jpg]] | + | =====Submit A Customer Request to Reactivate An Inactive Schedule Item===== |
| + | #Log in to MyInsuranceDashboard.com as the insured. | ||
| + | #Select one of the Schedule tabs. | ||
| + | #Select the '''inactive''' tab. | ||
| + | #:[[File:MID-ClientSchedule6.jpg]] | ||
| + | #Select the '''Make Active''' button next to the desired active schedule item. | ||
| + | #:[[File:MID-ClientSchedule9.jpg]] | ||
| + | #Select '''Yes''' to confirm, or No to cancel. | ||
| + | #The request is [[#How do I Process A Customer Request from MyInsuranceDashboard.com?|submitted to the Agency for review]]. | ||
| + | #Once approved, an email notification that the item has been processed is automatically sent. | ||
| − | + | <!-- '''Refresh'''[[File:MID-ClientSchedule4.jpg]] --> | |
==== Certificates ==== | ==== Certificates ==== | ||
| Line 156: | Line 191: | ||
==== Documents ==== | ==== Documents ==== | ||
| − | The documents tab | + | The documents tab allows the customer to upload new documents, view previously submitted items, or view items published by the agency from Agency Systems. |
| + | |||
| + | =====View or Download a Document===== | ||
| + | #Select the Documents tab. | ||
| + | #All available documents will be listed. ''The list can be filtered to only show items Uploaded by Client, or Published by Agent''. | ||
| + | #Select '''Download''' next to the desired item. | ||
| + | |||
| + | =====Upload A New Document===== | ||
| + | #Select the Documents tab. | ||
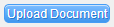
| + | #Select the '''Upload Document''' button. | ||
| + | #:[[File:MID-Document-UploadButton.PNG]] This will open the '''Upload File to Agent''' section. | ||
| + | #Enter a description, then select '''Choose File''' to browse and select the desired file. | ||
| + | #:[[File:MID-Document-UploadScreen.PNG]] | ||
| + | #After the description has been entered and the file selected, an '''Upload''' button will appear. Select '''Upload'''. | ||
| + | #:[[File:MID-Document-UploadButton2.PNG]] | ||
| + | #This will save the document to the client's attachment list, and create an activity in Agency Systems. It will also send an email notification to the client CSR that a document has been posted. | ||
| + | |||
| + | The attachment description will be listed as '''"MID Client Upload: %Client Entered Discription%"'''. | ||
| + | |||
| + | ==MyInsuranceDashboard.com Agency Admin Portal== | ||
| − | + | ===How do I Grant Access to MyInsuranceDashboard.com to my CRSs?=== | |
| + | The CSRs tab within the Agency Admin Portal allows the agency manager to manage CSR access to MyInsuranceDashboard.com. The list of available users is automatically populated from the active producer profiles within Agency Systems. | ||
| − | [[File:MID- | + | [[File:MID-CSR1.JPG]] |
| − | + | =====CSRs Registration===== | |
| + | #Log in to http://www.MyInsuranceDashboard.com. | ||
| + | #Select the '''CSRs''' tab. | ||
| + | #Find the CSR and Select '''Grant Access'''. This will send a registration email to the address saved in their Agency Systems producer profile. | ||
| + | #The status will then change to '''Waiting for Activation''', and the action button will change to '''Rescind Access'''. | ||
| + | #After the CSR creates their unique login to MyInsuranceDashboard.com, the status will change to '''Activated'''. | ||
| − | + | =====CSRs Revoke/Rescind Access===== | |
| + | There are two ways to disable a CSR's login to MyInsuranceDashboard.com. | ||
| + | #Log in to http://www.MyInsuranceDashboard.com. | ||
| + | #Select the '''CSRs''' tab. | ||
| + | #Find the CSR and Select '''Rescind Access'''. | ||
| + | #The account access to MyInsuranceDashboard.com will be disabled immediately. | ||
| − | + | A second option to disable access is available directly inside of Agency Systems. | |
| + | #Select '''Setup -> Producer'''. | ||
| + | #Enter the producer code, or select '''Search'''. | ||
| + | #Change '''Active Status''' to '''Inactive'''. | ||
| + | #The account access to MyInsuranceDashboard.com will be disabled immediately. | ||
| − | [[ | + | =====CSRs Reinstate Access===== |
| + | A previously disabled account cannot be reactivated. To register a CSR that was previously granted access to MyInsuranceDashboard.com [[#CSRs Registration|follow the initial registration steps]] to create a new account. | ||
| − | === | + | ===Manage Client Access, Tab Visibility, Certificates, and Available Documents=== |
| + | ====UnEnroll / Revoke Access to a Customer==== | ||
| + | To unenroll a customer, login to the MyInsuranceDashboard admin portal. Find the desired client and select '''Revoke Site Access.''' This will immediately disable the account for all enrolled contacts. | ||
| − | + | [[File:MID-Client-RevokeSiteAccess.PNG]] | |
| − | [[ | + | To reinstate access, the client will need to be re-enrolled using [[#How do I Enroll Customers in MyInsuranceDashboard.com?|one of the methods outlined above]]. |
| − | From Agent Side of the MyInsuranceDashboard.com portal each client will have a | + | ====Manage Client Access to the Different Tabs==== |
| + | From the Agent Side of the MyInsuranceDashboard.com portal, each client will have a '''Settings''' button. This option allows a client-specific override from the [[#MyInsuranceDashboard.com Agency Admin Settings|MyInsuranceDashboard.com Agency defaults]]. | ||
| − | [[File:MID- | + | [[File:MID-Tabs2.PNG]] |
| − | + | Select the '''Settings''' button, change the tab visibility settings, and select '''Update.''' | |
| − | [[File:MID- | + | [[File:MID-Tabs1.PNG]] |
| + | Select the '''Login as Client''' button to login as if you were your customer, to review exactly what your customer can see. | ||
| − | + | [[File:MID-Client-LoginAsClient.PNG]] | |
| − | From | + | ====Manage Certificates from Agency Admin Portal==== |
| + | From the Agent Portal on MyInsuranceDashboard.com, each client will have a certificates button. | ||
| − | [[File:MID- | + | [[File:MID-CertButton.jpg]] |
| − | + | Selecting the button will list all certificates that are eligible for MyInsuranceDashboard.com. For a certificate to be eligible, '''all polices''' on the certificate must be active. An active policy has an expiration date set to today, or any day in the future. | |
| − | + | Only one certificate is available to the client side at a time, which is marked as '''SELECTED'''. You may toggle the currently available certificate by selecting the '''Select''' button. To disable access to any certificate, select '''Revoke Cert for Client.''' | |
| − | From Agent Side of the MyInsuranceDashboard.com portal each client will have a ''' | + | [[File:MID-CertSelectScreen.JPG]] |
| + | ====Unpublish Documents from Agency Admin Portal==== | ||
| + | From Agent Side of the MyInsuranceDashboard.com portal each client will have a '''Documents''' button. This will show you a listing of all documents that are currently published. | ||
[[File:MID-DocumentUnPublish3.PNG]] | [[File:MID-DocumentUnPublish3.PNG]] | ||
| Line 203: | Line 280: | ||
[[File:MID-DocumentUnPublish2.PNG]] | [[File:MID-DocumentUnPublish2.PNG]] | ||
| + | ===How do I Process A Customer Request from MyInsuranceDashboard.com?=== | ||
| + | A pending customer request must be first accepted by the Agency. After a request is accepted, the data will be saved immediately into Agency Systems, along with an activity for the change. | ||
| + | |||
| + | If the request is rejected, no data fields are updated in Agency Systems other than a single activity record. | ||
| + | |||
| + | ====Process A Request From The Email Notification==== | ||
| + | Pending requests can be processed directly from the notification email. An example notification email is listed below. | ||
| + | <pre> | ||
| + | Subject: MyInsuranceDashboard.com Request for Client Agency Systems Home Office: Change Driver Kenneth Uptain to Inactive | ||
| + | |||
| + | MyInsuranceDashboard.com Client Request | ||
| + | Date: 2013-07-19 19:18:37 | ||
| + | Request: Change Driver Kenneth Uptain to Inactive | ||
| + | |||
| + | APPROVE THIS REQUEST: https://myinsurancedashboard.com/agency/service/request/EXAMPLE/1 | ||
| + | |||
| + | REJECT THIS REQUEST: https://myinsurancedashboard.com/agency/service/request/EXAMPLE/0 | ||
| + | </pre> | ||
| + | |||
| + | Select either web link contained within the email to '''Approve''' or '''Reject''' the request. | ||
| − | + | Enter any comments on the MyInsuranceDashboard.com request page, and confirm the action. | |
| − | From Agent | + | ====Process A Request From the Agent Portal On MyInsuranceDashboard.com==== |
| + | A list of pending requests can also be accessed from the Agent Portal of MyInsuranceDashboard.com. All pending requests received through email notifications are available through the Agent Portal. | ||
| + | #Log in to http://www.MyInsuranceDashboard.com | ||
| + | #Select the '''Requests''' tab. ''The CSR drop-down box will limit the requests by the CSR code saved in Agency Systems.'' | ||
| + | #:[[File:MID-Request2.jpg]] | ||
| + | #Select '''View Details and Respond.''' | ||
| + | #:[[File:MID-Request3.PNG]] | ||
| + | #The '''Request Details''' section will open. The request details will be listed at the top in red. | ||
| + | #:[[File:MID-Request1.jpg]] | ||
| + | #Before processing the request, optionally select '''Add Comments to Response''' to enter a message for the customer notification email. | ||
| + | #Select '''Accept''' or '''Reject''' to process the request. | ||
| + | #An email notification will be automatically sent to the client. | ||
| − | [[File:MID-Client-ResetAndNotify.PNG]] | + | ===How do I Reset a Customer Password to MyInsuranceDashboard.com?=== |
| + | #Log in to http://www.MyInsuranceDashboard.com. | ||
| + | #Find the client and select '''Reset and Notify.''' | ||
| + | #:[[File:MID-Client-ResetAndNotify.PNG]] | ||
| + | #A new enrollment email will be sent to the customer containing steps to update their login credentials before they can access MyInsuranceDashboard.com. | ||
| − | + | A customer can also select '''Reset Password''' on the main MyInsuranceDashbaord.com login page. The customer will need to provide their username in the login box before selecting '''Reset Password'''. | |
[[File:MID-Client-ResetPassword.PNG]] | [[File:MID-Client-ResetPassword.PNG]] | ||
| + | |||
| + | === MyInsuranceDashboard.com Agency Admin Settings=== | ||
| + | |||
| + | The settings tab serves two roles. At a basic level it allows the CSR and Agency Manager to update their login credentials. The Agency Manager then has access to agency wide settings. Both conditions will be discussed below. | ||
| + | |||
| + | ==== User Settings ==== | ||
| + | The user settings section will allow you to update your login information, and email address for notifications. Once you have made the required changes select the '''Update''' button. You will then receive notification that the update has been completed | ||
| + | |||
| + | [[File:Settings1.JPG]] | ||
| + | |||
| + | ==== Account Settings ==== | ||
| + | |||
| + | [[File:Settings2.JPG]] | ||
| + | |||
| + | {|class ="wikitable" style="text-align: left;" | ||
| + | !style="width: 15%; text-align:left;"|Data Field | ||
| + | !style="text-align:left;"|Description | ||
| + | |- | ||
| + | |Agency Name | ||
| + | |Agency Name is what displays on the header for the logoff and agent side. | ||
| + | |- | ||
| + | |Default Email | ||
| + | |Default email is used when there is not a CSR listed for the customer that has made a request. The system will then use the default email to send the notification. If a CSR is attached to the client they will receive the email rather than the default email address. | ||
| + | |- | ||
| + | |CC Email | ||
| + | |For all request made the CC email will always receive a copy. | ||
| + | |- | ||
| + | |Header Disclaimer | ||
| + | |This is a message of your choosing that will be displayed at the top of all customer pages. | ||
| + | '''EXAMPLE:''' ''The information located on this page constitutes the current information on your insurance policies.'' | ||
| + | |- | ||
| + | |Pre-Submit Disclaimer | ||
| + | |This message appears before a customer can submit a request. | ||
| + | '''EXAMPLE:''''' Your request is about to be submitted to the agency. No actual change to your policy or coverage will be made or implied by this request. All changes require approval of an authorized Agent. You can check back on this page for updates, and you will be notified when your Agent processes your request.'' | ||
| + | |- | ||
| + | |Require Fax Number | ||
| + | |This check box will toggle on or off the requirement that before a cert holder can be added that they must place in a fax number. | ||
| + | |- | ||
| + | |Allow Edit Descriptions | ||
| + | |This check box will toggle on or off the edit box for allowing the end user to update the description of operations section. | ||
| + | |- | ||
| + | |Show SSN | ||
| + | |This box will toggle on or off showing the social security number field for drivers. | ||
| + | |} | ||
Latest revision as of 19:49, 30 September 2021
MyInsuranceDashboard.com provides a 24/7 web portal for your customers to access their policy related information that integrates directly with Newton by Agency Systems. Your customers will be able to review schedule items, generate published certificates with updated holder information, and view published documents to their dashboard. They will also be able to interact with your agency by requesting changes to schedule items, and upload supporting documents to your office. These items will flow directly to your management system with minimal effort by your staff.
Contents
- 1 Frequently Asked Questions (FAQ)
- 2 Release Notes
- 3 Using Newton by Agency Systems with MyInsuranceDashboard.com
- 4 MyInsuranceDashboard.com Customer Portal
- 5 MyInsuranceDashboard.com Agency Admin Portal
- 5.1 How do I Grant Access to MyInsuranceDashboard.com to my CRSs?
- 5.2 Manage Client Access, Tab Visibility, Certificates, and Available Documents
- 5.3 How do I Process A Customer Request from MyInsuranceDashboard.com?
- 5.4 How do I Reset a Customer Password to MyInsuranceDashboard.com?
- 5.5 MyInsuranceDashboard.com Agency Admin Settings
Frequently Asked Questions (FAQ)
- Why am I receiving outgoing My Insurance Dashboard (MID) client emails?
- How do I troubleshoot customer access to certificates through MID?
Release Notes
MyInsuranceDashboard Release Notes: December 2013
MyInsuranceDashboard Release Notes: February 2014
Using Newton by Agency Systems with MyInsuranceDashboard.com
How do I Enroll Customers in MyInsuranceDashboard.com?
There are a few methods that you may use to enroll your customers. For each method, MyInsuranceDashboard.com will send the selected contact an email notification that they have been enrolled with a web link to setup their account on MyInsuranceDashboard.com.
Method One: From a Contact on the Basic Tab
From the Client Dashboard in Agency Systems, select Edit for the contact you want to send the MyInsuranceDashboard Email to, and select Enroll. An email address must be saved to the contact before the button is available.

Method Two: Within a Certificate of Liability - ACORD 25
Open a Certificate of Insurance (Acord 25) and select Other -> Publish Cert to MyInsuranceDashboard.com.

If the customer is not currently enrolled, Agency Systems will display a select contact window. Highlight the contact you want to send the enroll email to, and select Send Form. After the enroll is complete, it will set the Certificate as the only published Certificate. If the customer is already enrolled, the system will bypass the select contact window, and will automatically publish the Certificate.
Method Three: From MyInsuranceDasbhoard.com Admin Page
- Login to the MyInsuranceDashboard.com admin portal.
- At the top of the page under Add Client select the proper Agency Code from the drop down box.
- Enter the corresponding Client Number from Agency Systems.
- Select Add Client

The client will now show in the listing for enrolled clients. To send the enroll notification email directly from the MyInsuranceDashboard portal, select Notify. Select which client contact to send the email to or input an alternate email address in the free form email box.
How do I Select or Publish a Certificate of Insurance to MyInsuranceDashboard.com?
Open a Certificate of Insurance (Acord 25) and select Other -> Publish Cert to MyInsuranceDashboard.com.
If the customer is not currently enrolled, Agency Systems will display a select contact window. Highlight the contact you want to send the enroll email to, and select Send Form. After the enroll is complete, it will set the Certificate as the only published Certificate.
If the customer is already enrolled, the system will bypass the select contact window, and will automatically publish the Certificate. Since only one Certificate can be available at a time, this will override a previously selected certificate. See Manage Certificates from Agency Admin Portal for additional information.
How do I Publish Documents to MyInsuranceDashboard.com?
Documents can be published directly from Newton by Agency Systems either individually, or in a batch.
Publish A Single Document
- Load a client on one of the client tabs.
- Expand the Attachments band. (Any document published to MyInsuranceDashboard.com will be displayed in purple.)
- Right Click on the desired attachment and select Publish Doc to MID.
- A status message indicating Item successfully published. will display.
- All contacts enrolled for that customer will receive an email notification that a document has been published to MyInsurancedashboard.com.

Publish Multiple Documents In A Batch
- Load a client on one of the client tabs.
- Expand the Attachments band. (Any document published to MyInsuranceDashboard.com will be displayed in purple.)
- Right Click and select Multiple Selections.
- Right Click on any of the selected items and select Publish Doc to MID.
- A status message indicating Item successfully published. will display.
- All contacts enrolled for that customer will receive an email notification that a document has been published to MyInsurancedashboard.com.
Publish Documents and ACORD Forms Using Batch Print
Using Batch Send and selecting the Publish to MyInsuranceDashboard option will upload the documents to MyInsuranceDashboard as a .PDF package. If attachments are included in the selection, the items are published individually from the .PDF package.

Unpublish A Document
You may unpublish items in two different ways.
- Load a client on one of the client tabs.
- Expand the Attachments band.
- Right Click on the desired attachment and select Remove Doc from MID.
- A status message indicating Item successfully unpublished. will display.
- The attachment will change back to black indicating that the item is no longer published to MyInsuranceDashboard.com.

See the section below to unpublish documents from the MyInsuranceDashboard Agency Admin Portal.
MyInsuranceDashboard.com Customer Portal
MyInsuranceDashboard.com is an opt in system. This means that you, the agency, select which tabs are available to your clients through MyInsuranceDashboard.com. In general, the available contact, policy and schedule information will match the client's basic tab in Newton by Agency Systems. Your customers may also have access to Certificates of Insurance if published, or any published Documents.
![]()
During your initial MyInsuranceDashboard.com setup you will set the default visible tabs available to an enrolled client.
You can modify a single client's settings by following the instructions below.
How do my Customers use MyInsuranceDashboard.com?
MyInsuranceDashboard.com is designed to allow your customers to review their schedule items, and make requests for changes. These requests may include adding, editing, or removing a schedule item. Your customers may also generate a published Certificate of Insurance, download published documents, or submit new documents through the secure portal.
Contacts
The contacts section will list all active contacts from the Agency Systems basic tab. The Refresh button will check for new information and update the list.
To edit an existing contact select the contact name, enter the desired changes and select Submit. To add a new contact, select the New Contact button. To remove a contact, select the Delete button. (Deleting a contact from the client portal will only mark the contact inactive in Agency Systems)

The Download CSV button will download a spreadsheet file including all contact information, which can be opened in Microsoft Excel or another compatible spreadsheet program.
Schedule Items: Drivers / Vehicles / Location / Equipment
Each schedule item will be listed on an individual tab. Selecting a schedule tab will list all currently active items of that type, with additional options to view inactive items, or pending requests.
![]()
![]()
![]()
For each of the tabs, a spreadsheet (CSV) file can be downloaded by selecting the Download CSV button. It can be opened in Microsoft Excel or another compatible spreadsheet program.
![]()
The Insurance Agency's customer can submit requests for new schedule items, or requests to edit existing schedule times. The pending request will not be applied until the Insurance Agency approves the change.
Submit A Customer Request For A New Schedule Item
- Log in to MyInsuranceDashboard.com as the insured.
- Select one of the Schedule tabs.
- Select the New button.
- Enter the details for the request. All items with a red star are required fields.
- Select the Submit Request button.
- The default message from the Insurance Agency will display.
- To confirm, select I understand and select Submit Request.
- The request is submitted to the Agency for review.
- Once approved, an email notification that the item has been processed is automatically sent.

Submit A Customer Request To Edit A Schedule Item
- Log in to MyInsuranceDashboard.com as the insured.
- Select one of the Schedule tabs.
- Select the name of the schedule item.
- Enter the edited schedule item details for the request. All items with a red star are required fields.
- Select the Submit Request button.
- The default message from the Insurance Agency will display.
- To confirm, select I understand and select Submit Request.
- The request is submitted to the Agency for review.
- Once approved, an email notification that the item has been processed is automatically sent.
Submit A Customer Request To Delete A Schedule Item
- Log in to MyInsuranceDashboard.com as the insured.
- Select one of the Schedule tabs.
- Select the Delete button next to the desired active schedule item.
- Select Yes to confirm, or No to cancel.
- The request is submitted to the Agency for review.
- Once approved, an email notification that the item has been processed is automatically sent.
Submit A Customer Request to Reactivate An Inactive Schedule Item
- Log in to MyInsuranceDashboard.com as the insured.
- Select one of the Schedule tabs.
- Select the inactive tab.
- Select the Make Active button next to the desired active schedule item.
- Select Yes to confirm, or No to cancel.
- The request is submitted to the Agency for review.
- Once approved, an email notification that the item has been processed is automatically sent.
Certificates
The role of the Certificates Tab is to allow your customer to print a Certificate of Insurance via the Internet without having to contact the insurance agency. They may add or edit the Certificate Holder information, but cannot change the rest of the form.

How to issue a certificate using MyInsuranceDashboard.com
NOTE: Do not print this page. Printing this page will not result in a valid certificate.
NOTE: The buttons in the above text at the top of the screen are not active. The actual buttons are further down the page, on the certificate section itself.
- Verify that the details of the certificate are correct. If they are not, please contact your agent.
- If the Certificate Holder is not correct, click on Edit. You may select from a list of Certificate Holders, or enter a new one.
- When you are done click on Submit.
- You may print or download a PDF of your certificate by clicking on Download Certificate.
Edit Certificate Holder
The customer may need to add or edit a holder. To select or add someone different select Edit.

They may select from previously entered holders from the list on the right. To start with a clean slate hit the Clear button. Once they have filled out the proper information select Okay. This holder will now appear in the holder box, and is ready to be submitted.

Documents
The documents tab allows the customer to upload new documents, view previously submitted items, or view items published by the agency from Agency Systems.
View or Download a Document
- Select the Documents tab.
- All available documents will be listed. The list can be filtered to only show items Uploaded by Client, or Published by Agent.
- Select Download next to the desired item.
Upload A New Document
- Select the Documents tab.
- Select the Upload Document button.
 This will open the Upload File to Agent section.
- Enter a description, then select Choose File to browse and select the desired file.
- After the description has been entered and the file selected, an Upload button will appear. Select Upload.
- This will save the document to the client's attachment list, and create an activity in Agency Systems. It will also send an email notification to the client CSR that a document has been posted.

The attachment description will be listed as "MID Client Upload: %Client Entered Discription%".
MyInsuranceDashboard.com Agency Admin Portal
How do I Grant Access to MyInsuranceDashboard.com to my CRSs?
The CSRs tab within the Agency Admin Portal allows the agency manager to manage CSR access to MyInsuranceDashboard.com. The list of available users is automatically populated from the active producer profiles within Agency Systems.

CSRs Registration
- Log in to http://www.MyInsuranceDashboard.com.
- Select the CSRs tab.
- Find the CSR and Select Grant Access. This will send a registration email to the address saved in their Agency Systems producer profile.
- The status will then change to Waiting for Activation, and the action button will change to Rescind Access.
- After the CSR creates their unique login to MyInsuranceDashboard.com, the status will change to Activated.
CSRs Revoke/Rescind Access
There are two ways to disable a CSR's login to MyInsuranceDashboard.com.
- Log in to http://www.MyInsuranceDashboard.com.
- Select the CSRs tab.
- Find the CSR and Select Rescind Access.
- The account access to MyInsuranceDashboard.com will be disabled immediately.
A second option to disable access is available directly inside of Agency Systems.
- Select Setup -> Producer.
- Enter the producer code, or select Search.
- Change Active Status to Inactive.
- The account access to MyInsuranceDashboard.com will be disabled immediately.
CSRs Reinstate Access
A previously disabled account cannot be reactivated. To register a CSR that was previously granted access to MyInsuranceDashboard.com follow the initial registration steps to create a new account.
Manage Client Access, Tab Visibility, Certificates, and Available Documents
UnEnroll / Revoke Access to a Customer
To unenroll a customer, login to the MyInsuranceDashboard admin portal. Find the desired client and select Revoke Site Access. This will immediately disable the account for all enrolled contacts.
![]()
To reinstate access, the client will need to be re-enrolled using one of the methods outlined above.
Manage Client Access to the Different Tabs
From the Agent Side of the MyInsuranceDashboard.com portal, each client will have a Settings button. This option allows a client-specific override from the MyInsuranceDashboard.com Agency defaults.
![]()
Select the Settings button, change the tab visibility settings, and select Update.

Select the Login as Client button to login as if you were your customer, to review exactly what your customer can see.
![]()
Manage Certificates from Agency Admin Portal
From the Agent Portal on MyInsuranceDashboard.com, each client will have a certificates button.
![]()
Selecting the button will list all certificates that are eligible for MyInsuranceDashboard.com. For a certificate to be eligible, all polices on the certificate must be active. An active policy has an expiration date set to today, or any day in the future.
Only one certificate is available to the client side at a time, which is marked as SELECTED. You may toggle the currently available certificate by selecting the Select button. To disable access to any certificate, select Revoke Cert for Client.

Unpublish Documents from Agency Admin Portal
From Agent Side of the MyInsuranceDashboard.com portal each client will have a Documents button. This will show you a listing of all documents that are currently published.
![]()
To unpublish the document of choice Select Rescind Access. This will immediately unpubish the document and will change the attachment in Newton By Agency Systems back to black indicating to others in the office that this item is not published.

How do I Process A Customer Request from MyInsuranceDashboard.com?
A pending customer request must be first accepted by the Agency. After a request is accepted, the data will be saved immediately into Agency Systems, along with an activity for the change.
If the request is rejected, no data fields are updated in Agency Systems other than a single activity record.
Process A Request From The Email Notification
Pending requests can be processed directly from the notification email. An example notification email is listed below.
Subject: MyInsuranceDashboard.com Request for Client Agency Systems Home Office: Change Driver Kenneth Uptain to Inactive

MyInsuranceDashboard.com Client Request
Date: 2013-07-19 19:18:37
Request: Change Driver Kenneth Uptain to Inactive

APPROVE THIS REQUEST: https://myinsurancedashboard.com/agency/service/request/EXAMPLE/1

REJECT THIS REQUEST: https://myinsurancedashboard.com/agency/service/request/EXAMPLE/0
Select either web link contained within the email to Approve or Reject the request.
Enter any comments on the MyInsuranceDashboard.com request page, and confirm the action.
Process A Request From the Agent Portal On MyInsuranceDashboard.com
A list of pending requests can also be accessed from the Agent Portal of MyInsuranceDashboard.com. All pending requests received through email notifications are available through the Agent Portal.
- Log in to http://www.MyInsuranceDashboard.com
- Select the Requests tab. The CSR drop-down box will limit the requests by the CSR code saved in Agency Systems.
- Select View Details and Respond.
- The Request Details section will open. The request details will be listed at the top in red.
- Before processing the request, optionally select Add Comments to Response to enter a message for the customer notification email.
- Select Accept or Reject to process the request.
- An email notification will be automatically sent to the client.


How do I Reset a Customer Password to MyInsuranceDashboard.com?
- Log in to http://www.MyInsuranceDashboard.com.
- Find the client and select Reset and Notify.
- A new enrollment email will be sent to the customer containing steps to update their login credentials before they can access MyInsuranceDashboard.com.
A customer can also select Reset Password on the main MyInsuranceDashbaord.com login page. The customer will need to provide their username in the login box before selecting Reset Password.
![]()
MyInsuranceDashboard.com Agency Admin Settings
The settings tab serves two roles. At a basic level it allows the CSR and Agency Manager to update their login credentials. The Agency Manager then has access to agency wide settings. Both conditions will be discussed below.
User Settings
The user settings section will allow you to update your login information, and email address for notifications. Once you have made the required changes select the Update button. You will then receive notification that the update has been completed

Account Settings

| Data Field | Description |
|---|---|
| Agency Name | Agency Name is what displays on the header for the logoff and agent side. |
| Default Email | Default email is used when there is not a CSR listed for the customer that has made a request. The system will then use the default email to send the notification. If a CSR is attached to the client they will receive the email rather than the default email address. |
| CC Email | For all request made the CC email will always receive a copy. |
| Header Disclaimer | This is a message of your choosing that will be displayed at the top of all customer pages.
EXAMPLE: The information located on this page constitutes the current information on your insurance policies. |
| Pre-Submit Disclaimer | This message appears before a customer can submit a request.
EXAMPLE: Your request is about to be submitted to the agency. No actual change to your policy or coverage will be made or implied by this request. All changes require approval of an authorized Agent. You can check back on this page for updates, and you will be notified when your Agent processes your request. |
| Require Fax Number | This check box will toggle on or off the requirement that before a cert holder can be added that they must place in a fax number. |
| Allow Edit Descriptions | This check box will toggle on or off the edit box for allowing the end user to update the description of operations section. |
| Show SSN | This box will toggle on or off showing the social security number field for drivers. |