Cash Payment Fee Wizard
The cash payment fee wizard allows the operator to easily add multiple fees while taking a direct payment. Multiple user-defined templates can be used for the same transaction creating a quick-and-easy process, with the complex adjustments automated in the background.
Contents
Payment Fee Wizard Templates
Access to the payment fee setup screen requires the operator to have Security System -> AR -> Late Charge Setups -> Read & Entry access.
The available fee profiles are configured by selecting Profiles -> Payment Fee Setup.
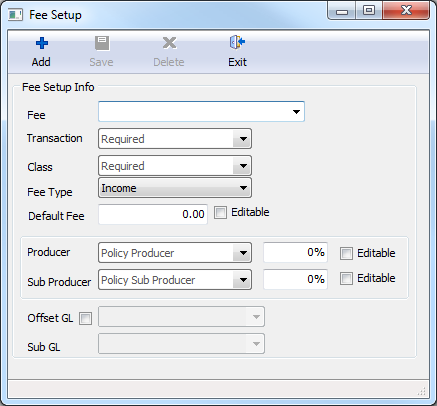
Create A New Fee Wizard Template For Commission
- Select Add.
- Enter a Fee Name.
- Select the fee invoice line Transaction code. (Select Profiles -> Transaction to create a new code)
- Select the fee invoice line Class code. (Select Profiles -> Class to create a new code)
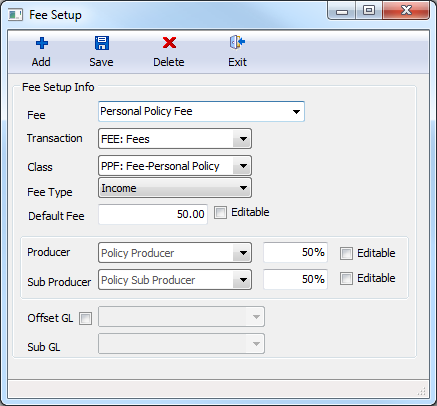
- Select the Fee Type as either Commission.
- Commission: Records the entire receivable as GL 4110 (Agency Bill income). A portion of the invoice can be optionally split with a producer and/or sub-producer. The income can be optionally moved to a separate GL account.
- Enter a Default Fee amount. If Editable is selected, the amount can be altered when a fee is entered.
- The Producer code will default to the current policy producer unless a specific code is selected. Enter a producer commission percentage if desired.
- The Sub Producer code will default to the current policy sub-producer unless a specific code is selected. Enter a sub-producer commission percentage if desired.
- Select Save -> Exit.
To automatically move the income from 4110 to another GL account, select Offset GL to specify the account.
Create A New Fee Wizard Template For Expense
- Select Add.
- Enter a Fee Name.
- Select the fee invoice line Transaction code. (Select Profiles -> Transaction to create a new code)
- Select the fee invoice line Class code. (Select Profiles -> Class to create a new code)
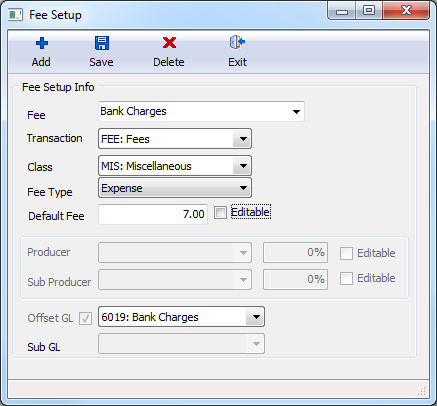
- Select the Fee Type Expense.
- Expense: Automatically moves the entire fee amount from 4110 (Agency Bill Income) to a user-specified offset GL.
- Enter a Default Fee amount. If Editable is selected, the amount can be altered when a fee is entered.
- Select the Offset Gl where the Agency Bill Income (4110) balance will be offset.
- Select Save -> Exit.
Edit or Delete an Existing Fee Wizard Template
Select Profiles -> Payment Fee Setup.
To edit an existing template, select the fee name from the drop-down to make changes.
To delete an existing template, select the fee name from the drop-down and select Delete.
How To Add A Fee To A Cash Payment
- The new cash payment fee wizard can be accessed from any of the Attach Payment screens including:
- Policy Express -> Create Item -> Payment
- Basic Tab -> Active Policies Band -> Right-Click -> Attach Payment
- Account Tab -> Right-Click -> Attach Payment
- Express Billing -> Payments -> Attach Cash -> Create New Client Cash Receipt
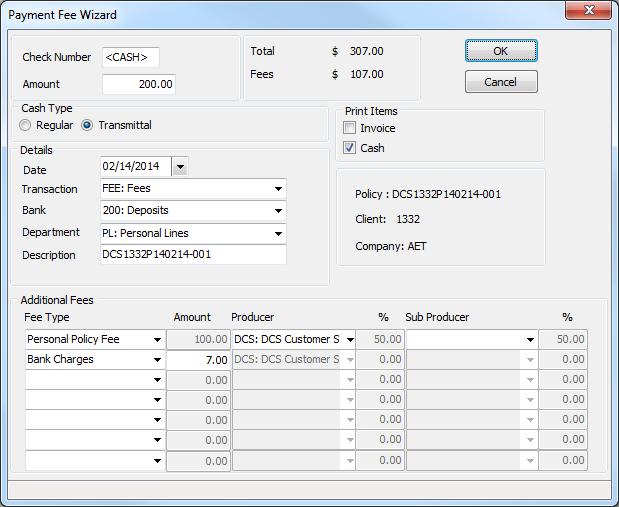
- Select Fees.
- Enter the customer's check # or select F2 for cash.
- Enter the policy premium payment Amount.
- Select the policy Transaction code. (Typically FEE). The previously selected code will be automatically loaded.
- Select the desired Fee Types.
- Edit the fee amount for each if desired or available.
- The total fee amount and total receivable will be displayed.
- Select the desired Print Items, and select Ok.


