| Related Pages |
| Related Categories |
Emails in Newton are listed within the Emails band on the Client Dashboard, Policy Dashboard, Company Tab, Vendor Tab, and User Dashboard. Any email sent or received in Newton will also record the body of the email as a permanent searchable activity item.
Contents
- 1 Before you begin
- 2 Create a new email
- 3 Compose email window
- 4 Attach a received email
- 5 View, reply, forward, or edit an email
Before you begin
Email integration requires the workstation or remote desktop session to have a current version of Microsoft Outlook installed and configured to send and receive email.
![]() See: Hardware Recommendations for more information.
See: Hardware Recommendations for more information.
Create a new email
An email in Newton can be initiated from a number of areas including the Client Tab, Policy Dashboard, Company Tab, Vendor Tab, User Dashboard Tab, and Batch Send.
Create a client email
Emails created from the client's dashboard tab will be automatically recorded to the client.
- Load a Client on a client tab.
- On the Client Dashboard tab select Create Item -> Email from the top toolbar.
- Enter the email details. (See the compose email window section below for more information)
- Select the email recipients from within Newton or within the Microsoft Outlook address book.
- Enter the email subject line and message body.
- Add any attachments from within Newton or from your computer.
- Select Send.
Create a client email from the contact list
Emails created from the client's contacts band will be automatically recorded to the client.
- Load a Client on a client tab.
- Left-Click the (+) next to Contacts. (To expand the band by default, see: Preferences)
- Left-Click on a contact email address. The selected contact email will pre-fill within the compose email window.
- Enter the email details. (See the compose email window section below for more information)
- Select any additional email recipients from within Newton or within the Microsoft Outlook address book.
- Enter the email subject line and message body.
- Add any attachments from within Newton or from your computer.
- Select Send.
Create a policy email
- Load a Client on a client tab.
- On the Client Dashboard tab select the (+) next to Policies. (To expand the band by default, see: Preferences)
- Left-Click the desired policy number to open the Policy Dashboard. (Optionally, Right-Click on the policy number and select Send Email to jump directly to the compose email window.)
- Select Create Item -> Email within the top toolbar.
- Enter the email details. (See the compose email window section below for more information)
- Select the email recipients from within Newton or within the Microsoft Outlook address book.
- Enter the email subject line and message body.
- Add any attachments from within Newton or from your computer.
- Select Send.
The Policy Dashboard can also be loaded using the Policy Keyword Search.
Create a policy email using batch send
- Load a Client on a client tab.
- On the Client Dashboard tab select the (+) next to Policies. (To expand the band by default, see: Preferences)
- Left-Click the desired policy number to open the Policy Dashboard. (Optionally, Right-Click on the policy number and select Batch Send to jump directly to Batch Send selection window.)
- Select Batch Send within the top toolbar.
- Select the desired Forms, Memos, or Attachments. Select Email.
- Enter the email details. (See the compose email window section below for more information)
- Select the email recipients from within Newton or within the Microsoft Outlook address book.
- Enter the email subject line and message body.
- Add any additional attachments from within Newton or from your computer.
- Select Send.
![]() See: Batch Send for more information.
See: Batch Send for more information.
Compose email window
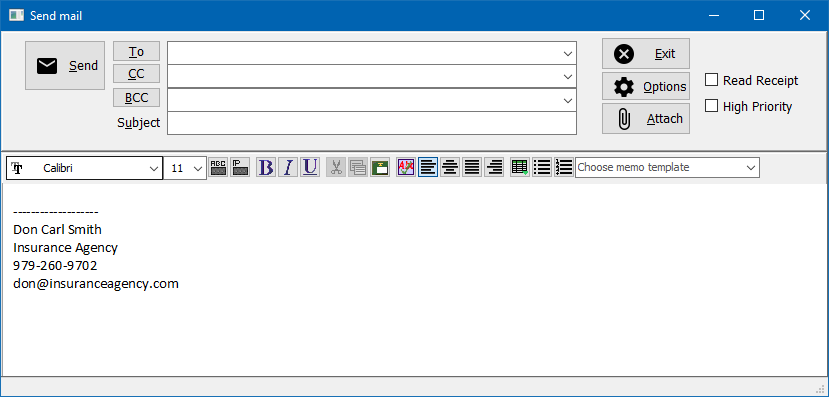
The compose email window is universally opened when an email is started from any of the available locations.
Selecting an email recipient
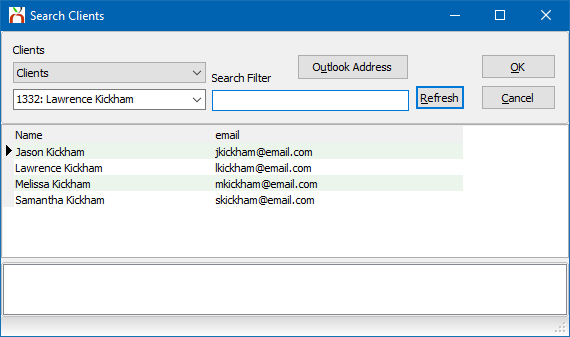
An email can contain three categories of email recipients; TO, CC, and BCC. Type the email address in one or more of the three fields or select from existing contacts.
- Left-click TO, CC, or BCC.
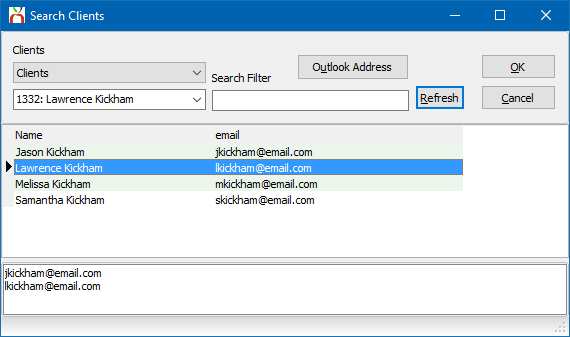
- The Search Clients window will list active contacts for the client by default.
- To select a contact, double click on the contact name. Multiple names can be selected and will be listed in the bottom white box.
- Select OK when finished.
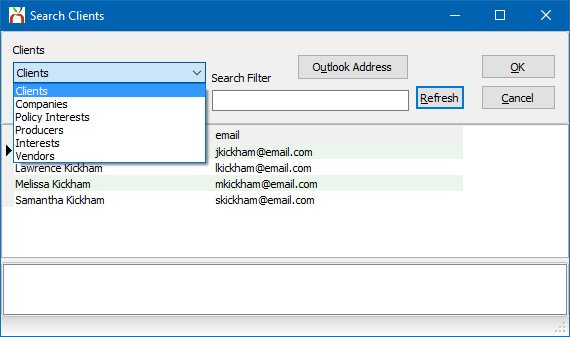
Other categories of contacts are available. Use the drop-list and the Search Filter to filter the list based on the selected category.
- Clients: All active contacts for the client.
- Companies: All active contacts for the selected company. The company code will be pre-selected if the email is started from the Policy Dashboard. The selected company can be changed by changing the drop down box below Companies.
- Policy Interests: Additional Interests saved to the policy.
- Producers: All active producers and operators.
- Vendors: Contact for each Vendor.
Selecting a contact stored externally in Microsoft Outlook
Contacts stored externally in your Microsoft Outlook address book can also be selected from the compose email window. Left-click TO, CC, or BCC and select Outlook Address. This will list all contacts stored in your external Microsoft Outlook Address book.
The Outlook Address lookup can also be accessed directly by Right Clicking on either TO, CC, or BCC from the compose email window.
Adding attachments to an email
An attachment can be added to an outgoing client email, policy email, or from Batch Send. Any attachment included in an outgoing email will be automatically stored within Newton's email activity for direct access.
From the compose email window, select the Attach button.
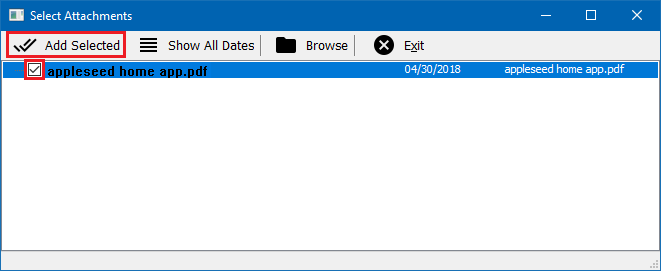
Choose the desired client or policy attachments, then select Add Selected within the top toolbar. If an older attachment is not listed, optionally select Show All Dates to remove the date filter. Select Browse to locate an attachment not previously stored in Newton. Only one attachment can be selected at a time through the browse window.
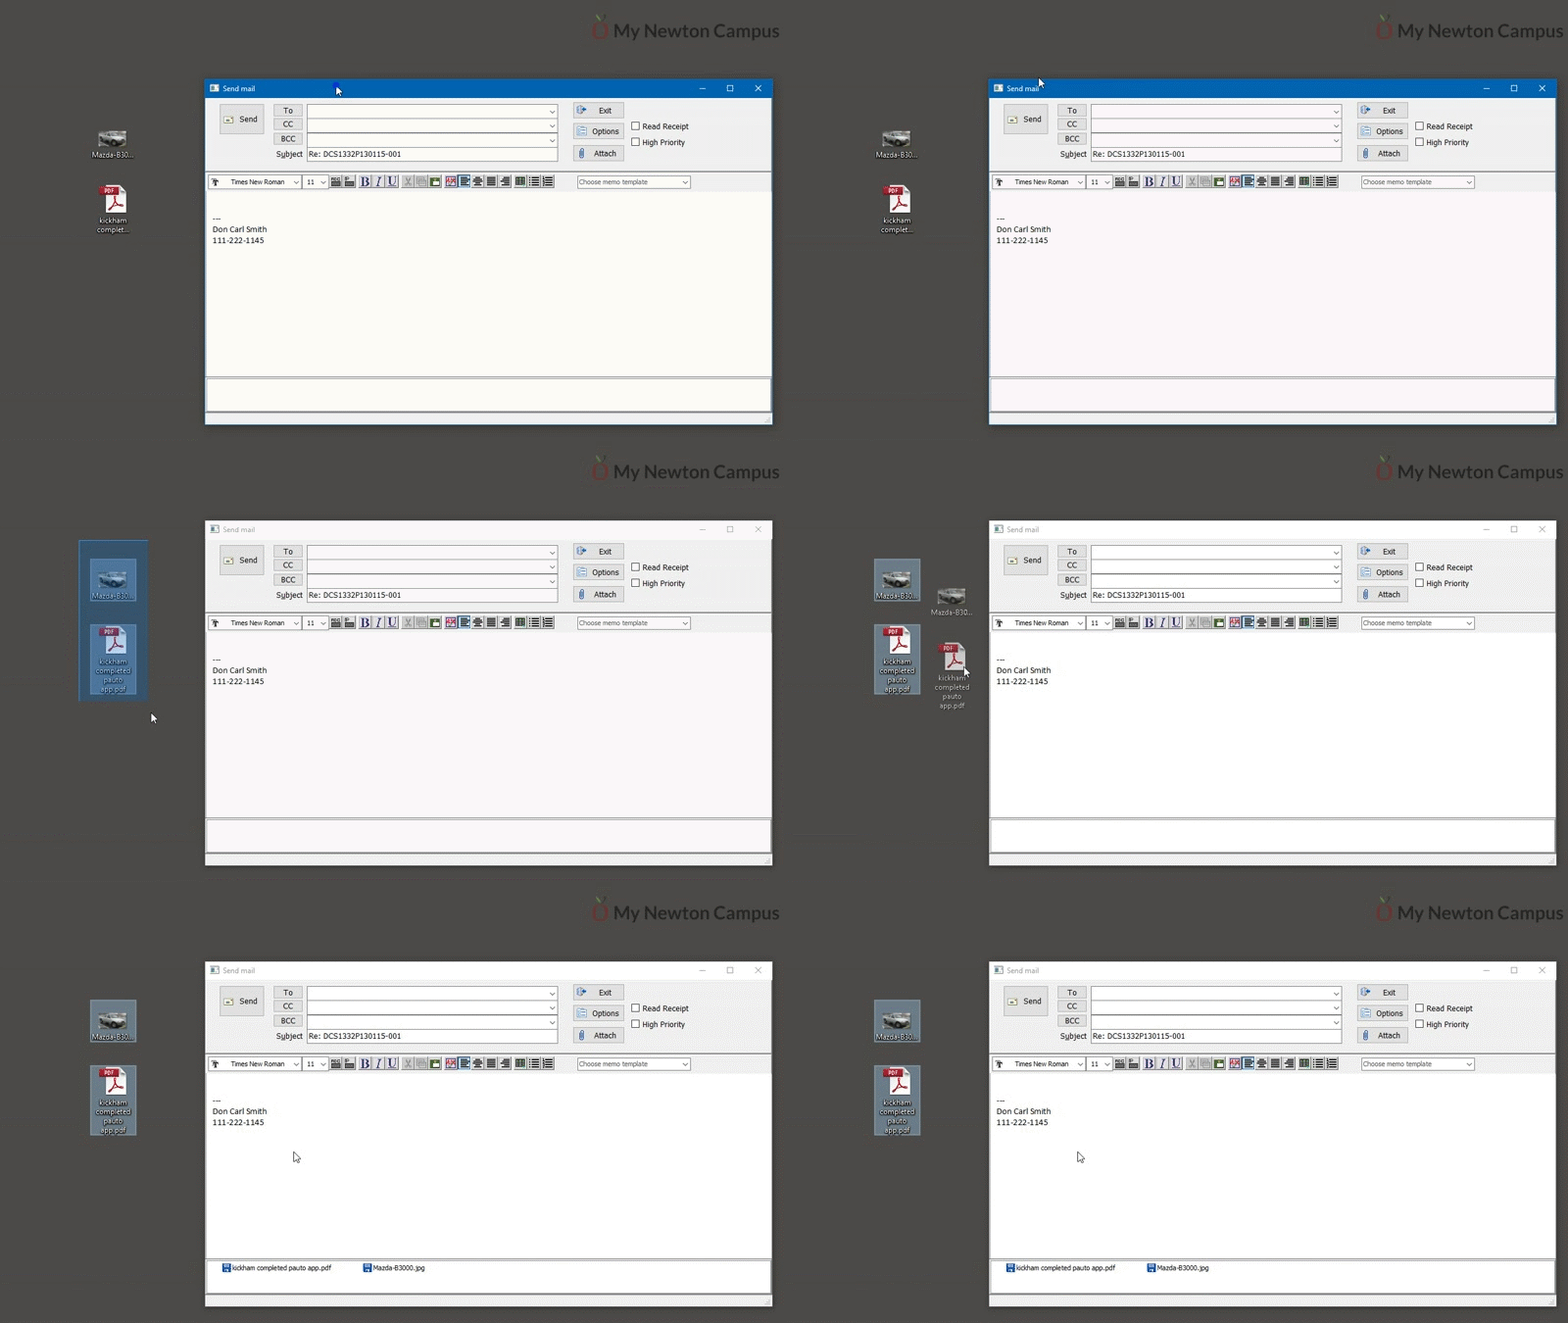
Attachments can also be dragged and dropped onto the compose email window from outside of the system. Multiple attachments can be dragged and dropped at the same time.
![]() See: Attachments for more information.
See: Attachments for more information.
Entering the email message body
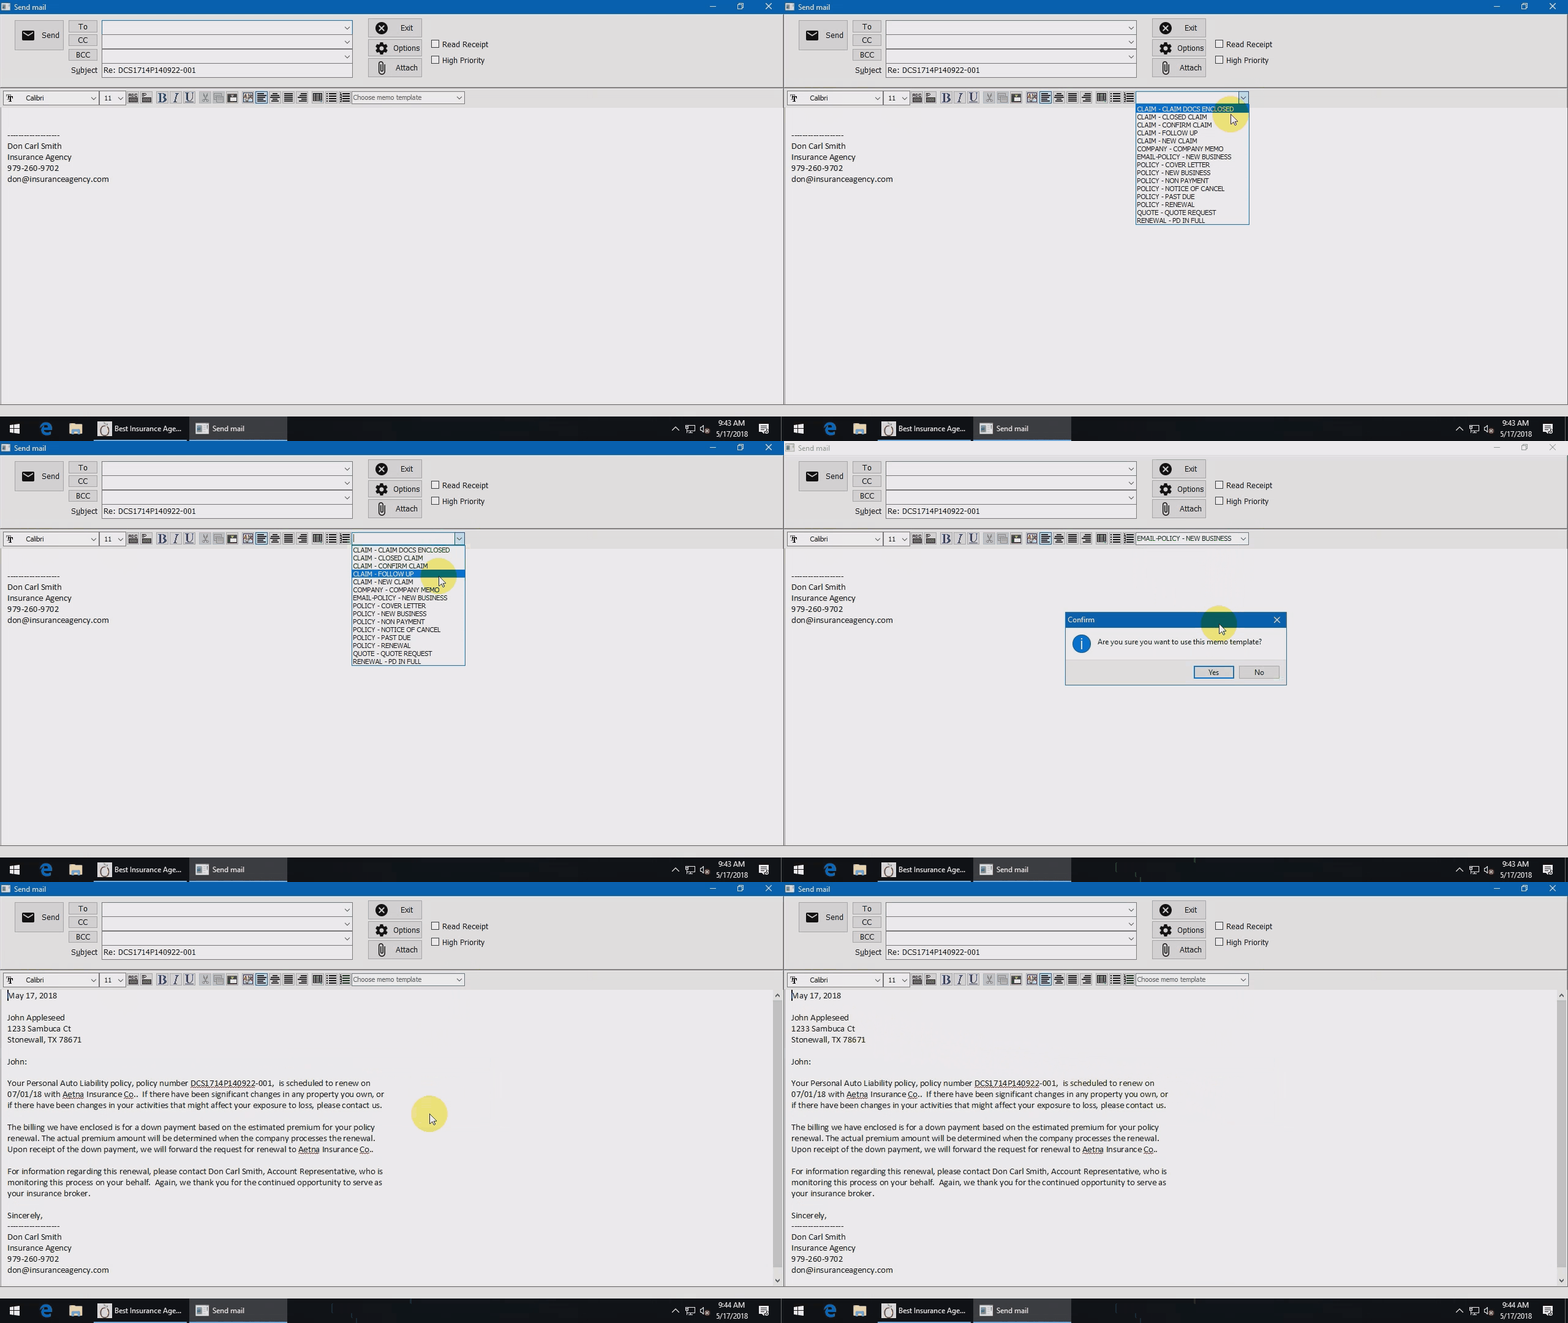
The message body content can be entered manually, or can be pre-filled from an existing memo template. To select a memo template, select the Choose Memo template drop down box and select the desired memo. Memos are organized by category, then name.
When a memo template is selected, the information will be automatically placed as the body of the email, with any merge codes converted to data from the client file automatically.
![]() See: Memowriter: Create A Form Letter Template for more information.
See: Memowriter: Create A Form Letter Template for more information.
Use a previously completed memo as the email message body
If an existing client or policy memo document is open and completed, it can also be used as the body of an email.
- Open the completed memo in Memowriter.
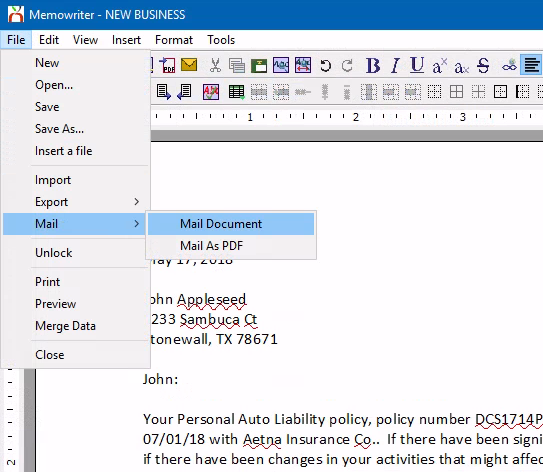
- Select File -> Mail -> Mail Document. The completed memo text is transferred to the compose email window as the message body.
- Enter the email details. (See the compose email window section for more information)
- Select the email recipients from within Newton or within the Microsoft Outlook address book.
- Insert an email signature.
- Add any attachments from within Newton or from your computer.
- Select Send.
Email signature
The email signature for the current operator will be automatically placed as the footer of an email when it is started.
Additional email signatures such as a house account can be configured in Setup -> Producer. To select a different email signature, Right Click -> Insert Signature -> Choose... and select the desired profile.
![]() See: Email: Email Signature for more information.
See: Email: Email Signature for more information.
Email from a second Microsoft Outlook account
The compose email window supports multiple email accounts within the same Microsoft Outlook profile. To send an email from a different email account, select the Account drop down, and select the desired account.
The option is not visible unless the profile contains two different email accounts. This feature is not available with legacy versions of Microsoft Office.
Other options
The main window has two options that can be selected to modify the email message.
- Read Receipt: Include a request for a Read Receipt.
- High Priority: Flag an email as High Priority.
Select Options to view the extended email options.
- Reply-To: Change the email address that will pre-fill when the recipient selects reply. For example, redirect all replies to csr@insuranceagency.com instead of the original sender. This is only necessary if the desired reply-to email address is different than the sender’s. The default reply-to address can be configured within the operator profile.
- Font: Specify the default font and font size for composing emails.
![]() See: Preferences for additional email options.
See: Preferences for additional email options.
Attach a received email
Any email sent out of Newton is automatically saved. The content in the email will be stored as a permanent non-editable searchable activity item, and any attachments will be stored within Newton automatically.
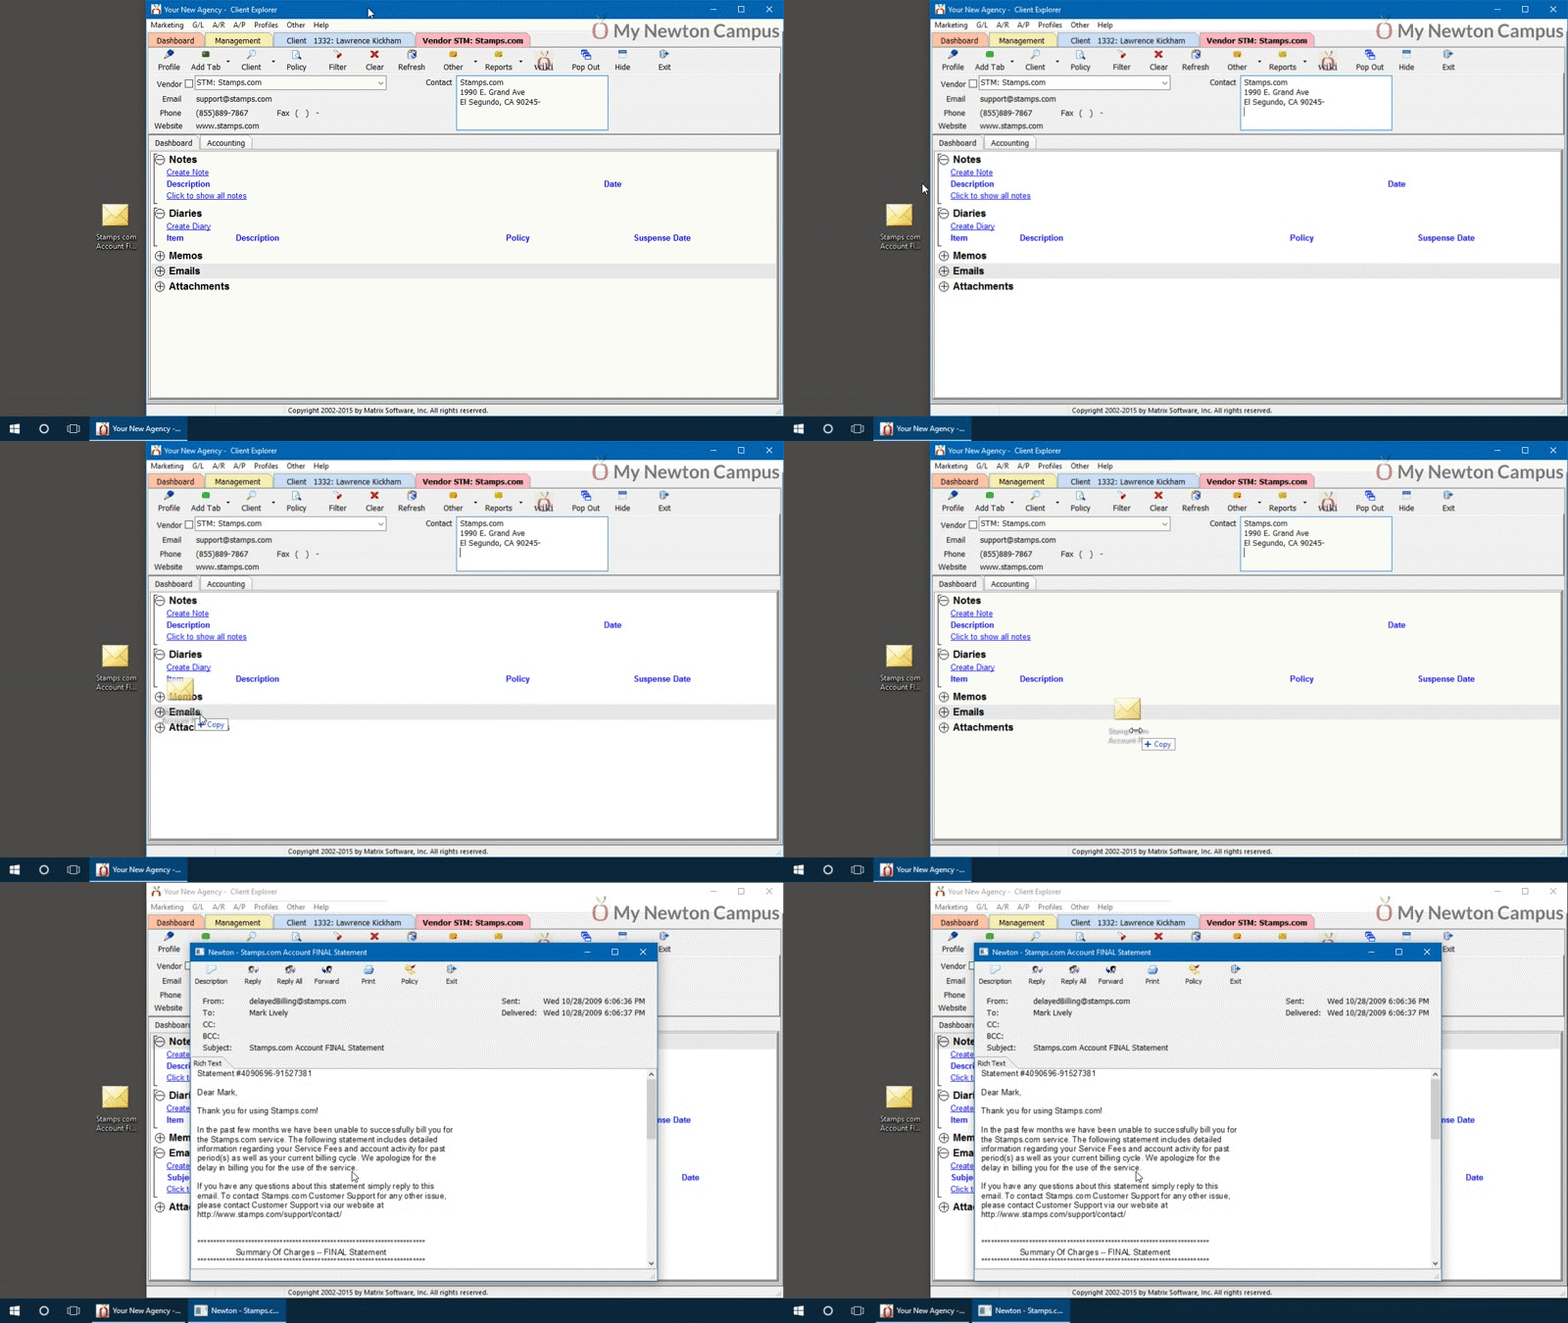
To attach an email received in Microsoft Outlook, simply drag-and-drop the email into Newton. The emails can be attached to a Client, Policy, Company, or Vendor.
The emails can be dragged directly from Microsoft Outlook, or from their saved location on your computer.
After dragging and dropping an email, the converted email will open. Reply, Forward, or close the converted email window.
View, reply, forward, or edit an email
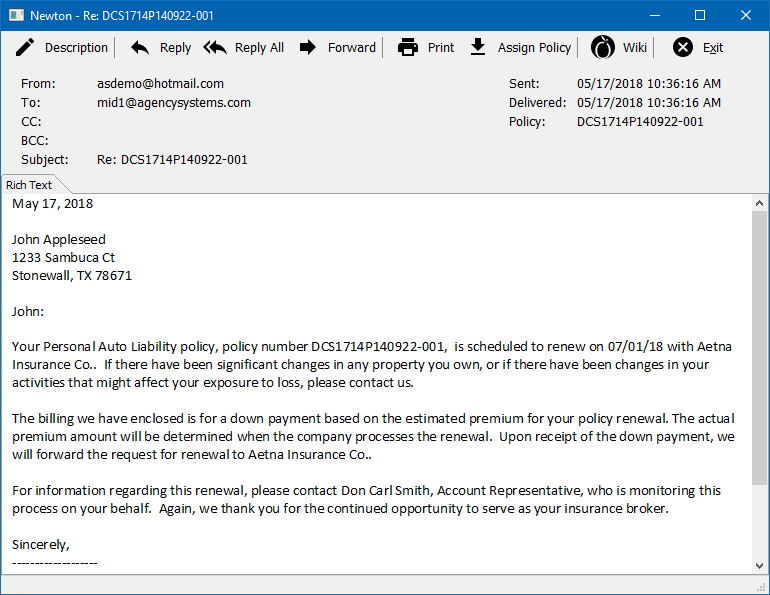
An email attached into Newton will be converted and listed under the Emails band on the Client Dashboard, or within the emails band on the Policy Dashboard.
View a client email
All emails saved to a client or to any policy on a client are visible on the client dashboard.
- Load a client on one of the client tabs.
- Select the (+) next to Emails.
- Left-Click the Subject to view the desired email.
- Reply, forward, or close the email.
View a policy email
All emails saved to a policy are visible on the Policy Dashboard. Although the same items are listed on the client, filtering the list to a single policy is more efficient in most cases.
- Load a client on one of the client tabs.
- Select the (+) next to Policies. (To expand the band by default, see: Preferences.)
- Left-Click the desired policy number to open the Policy Dashboard.
- Select the (+) next to Emails.
- Left-Click the Subject to view the desired email.
- Reply, forward, or close the email.
The Policy Dashboard can also be loaded using the Policy Keyword Search.
Reply or forward an email
- Select Reply to send an email to the original sender.
- Select Reply all to send an email to all recipients included in the original message.
- Select Forward to forward the email to a new recipient.
The original message will be listed below the body of the new email text. When the message is sent, the outgoing email will be automatically recorded as a client email, or an email to a specific policy.
After attaching an email through drag and drop, select reply on the converted view email window to respond quickly and have the response recorded automatically in Newton.
Edit the description of an email
The description for an email can be edited from the original subject of the email. The description is listed within each of the email lists. When an email is opened, the original subject of the email is retained and displayed.
- Open the Email
- Select Description and enter the new description text.
- Select Ok.
- Close the email window.
To change the description without opening the email:
- Load a client on one of the client tabs.
- Select the (+) next to Emails.
- Right-Click on the email and select Edit Description.
- Enter the new description and select Ok.
An email description can be reverted to the original text by removing the current description and selecting OK.
Move an existing email to or from a policy
An email previously attached to the client only can be assigned to a policy number.
- Open the Email
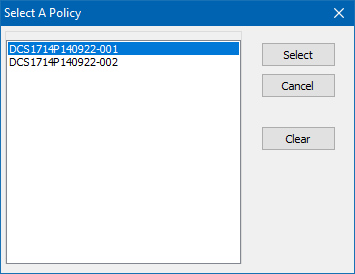
- Select Assign Policy.
- Select the desired policy from the list and choose Select. Optionally Select Clear unassign a specific policy number.
- Close the email window.
Delete an email
An duplicate email or an email attached to the wrong client can be deleted by an office administrator. The operator must have a security access level of 9 to delete emails.
![]() You cannot recover a deleted attachment link.
You cannot recover a deleted attachment link.
- Load a client on one of the client tabs.
- Select the (+) next to Emails.
- Right-Click -> Delete the desired email.
- Select Yes to confirm.
An activity will be recorded stating the item has been deleted. The email will be removed from the email lists, however the original activity cannot be modified.


