Difference between revisions of "Print a Check or Range of Checks"
(initial save) |
(updated menu options and images) |
||
| (2 intermediate revisions by one other user not shown) | |||
| Line 40: | Line 40: | ||
When a check is printed, the internal check number can be printed on the check if '''Print Check # -> Yes''' is selected. | When a check is printed, the internal check number can be printed on the check if '''Print Check # -> Yes''' is selected. | ||
| − | :[[File:Menu- | + | :[[File:Menu-accounting-print-checks-printcheckyes.png]] |
== Print a Single Check == | == Print a Single Check == | ||
#Load an existing check using the [[Express_Checks#View_an_Existing_Check|Express Checks interface]]. | #Load an existing check using the [[Express_Checks#View_an_Existing_Check|Express Checks interface]]. | ||
#Select '''Print'''. | #Select '''Print'''. | ||
| − | #:[[File: | + | #:[[File:Accounting-expresschecks-print.png]] |
#The '''[[Bank Profile|Bank Code]]''' and '''Check Number''' will pre-fill. | #The '''[[Bank Profile|Bank Code]]''' and '''Check Number''' will pre-fill. | ||
| − | #:[[File: | + | #:[[File:Accounting-printchecks-single.png]] |
#Select '''Printer''' to verify the selected check printer, and select '''Print'''. | #Select '''Printer''' to verify the selected check printer, and select '''Print'''. | ||
#'''Yes''' to confirm the checks printed successfully, or '''No''' to leave the check saved as '''Not Issued'''. | #'''Yes''' to confirm the checks printed successfully, or '''No''' to leave the check saved as '''Not Issued'''. | ||
| − | #:[[File:Menu- | + | #:[[File:Menu-accounting-print-checks-checksok.png]] |
== Print a Batch or Range of Checks == | == Print a Batch or Range of Checks == | ||
| Line 59: | Line 59: | ||
Prior to printing a range of checks, it is recommended to use the a [[Report: Check Register: Not Issued Checks (Not Yet Printed)|check register report]] to preview the pending transactions. | Prior to printing a range of checks, it is recommended to use the a [[Report: Check Register: Not Issued Checks (Not Yet Printed)|check register report]] to preview the pending transactions. | ||
| − | #Select ''' | + | #Select '''Accounting -> Print Checks'''. ''(Optionally, '''Print Checks''' can be selected from the Company, Producer or Vendor menu)'' |
#Enter the [[Bank Profile|Bank Code]]. | #Enter the [[Bank Profile|Bank Code]]. | ||
#Change the '''Date Method''' if needed. ''(Default = Entry Date)'' | #Change the '''Date Method''' if needed. ''(Default = Entry Date)'' | ||
#Change the '''Start Date''' and '''End Date''' if needed. ''(Default = Current Day)'' | #Change the '''Start Date''' and '''End Date''' if needed. ''(Default = Current Day)'' | ||
| − | #:[[File:Menu- | + | #:[[File:Menu-accounting-print-checks-selectbank.png]] |
#Select '''Printer''' to verify the selected check printer, and select '''Print'''. | #Select '''Printer''' to verify the selected check printer, and select '''Print'''. | ||
#'''Yes''' to confirm the checks printed successfully, or '''No''' to leave the check saved as '''Not Issued'''. | #'''Yes''' to confirm the checks printed successfully, or '''No''' to leave the check saved as '''Not Issued'''. | ||
| − | #:[[File:Menu- | + | #:[[File:Menu-accounting-print-checks-checksok.png]] |
== Reprint a Single Check or a Batch of Checks == | == Reprint a Single Check or a Batch of Checks == | ||
| Line 74: | Line 74: | ||
#Follow the instructions above to select a [[#Print a Single Check|single check]], or [[#Print a Batch or Range of Checks|a batch of checks]]. | #Follow the instructions above to select a [[#Print a Single Check|single check]], or [[#Print a Batch or Range of Checks|a batch of checks]]. | ||
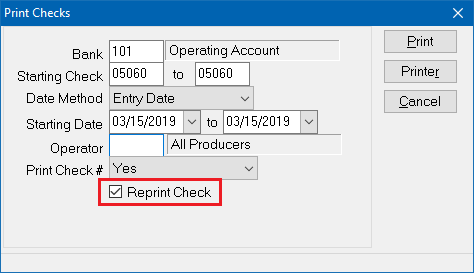
#Prior to selecting '''Print''', select '''Reprint Check'''. | #Prior to selecting '''Print''', select '''Reprint Check'''. | ||
| − | #:[[File:Menu- | + | #:[[File:Menu-accounting-print-checks-reprintyes.png]] |
#Select '''Printer''' to verify the selected check printer, and select '''Print'''. | #Select '''Printer''' to verify the selected check printer, and select '''Print'''. | ||
#'''Yes''' to confirm the checks printed successfully, or '''No''' to leave the check saved as '''Not Issued'''. | #'''Yes''' to confirm the checks printed successfully, or '''No''' to leave the check saved as '''Not Issued'''. | ||
| − | #:[[File:Menu- | + | #:[[File:Menu-accounting-print-checks-checksok.png]] |
Latest revision as of 14:00, 19 March 2019
| Related Pages |
| Related Categories |
All regular check transactions can be printed individually, or in a batch.
Any printable check can be reprinted individually, or reprinted as a batch.
Contents
Setup and Print Options
Prior to printing checks, verify the check form type is configured.
See: Order Printable Checks to order pre-printed check stock.
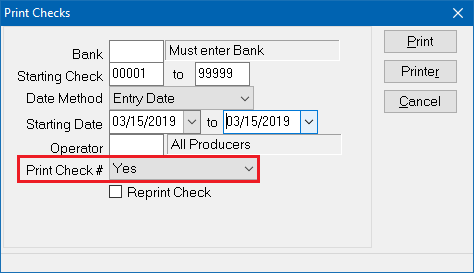
When a check is printed, the internal check number can be printed on the check if Print Check # -> Yes is selected.
Print a Single Check
- Load an existing check using the Express Checks interface.
- Select Print.
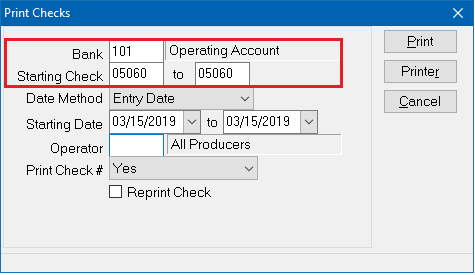
- The Bank Code and Check Number will pre-fill.
- Select Printer to verify the selected check printer, and select Print.
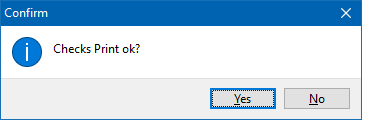
- Yes to confirm the checks printed successfully, or No to leave the check saved as Not Issued.
Print a Batch or Range of Checks
Any regular check matching the bank and date criteria will be included in a single batch unless:
- The check has been previously flagged as Issued (Printed)
- The check was created as Check Type -> Do Not Print
- The check was created as Check Type -> Wire Transfer.
Prior to printing a range of checks, it is recommended to use the a check register report to preview the pending transactions.
- Select Accounting -> Print Checks. (Optionally, Print Checks can be selected from the Company, Producer or Vendor menu)
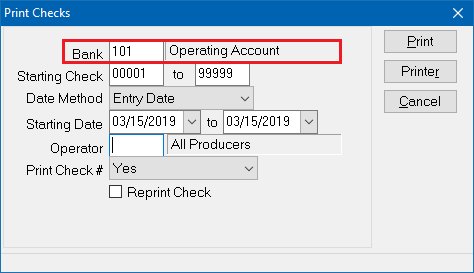
- Enter the Bank Code.
- Change the Date Method if needed. (Default = Entry Date)
- Change the Start Date and End Date if needed. (Default = Current Day)
- Select Printer to verify the selected check printer, and select Print.
- Yes to confirm the checks printed successfully, or No to leave the check saved as Not Issued.
Reprint a Single Check or a Batch of Checks
Prior to reprinting a check, if the check number needs to be changed, see: Express Checks: Reissue a check with a new number. After reissuing a check with a new number, follow the normal steps above to print a check or range of checks.
If a check or batch of checks has already been printed, an option exists to ignore the Issued/Printed status, and reprint any valid check.
- Follow the instructions above to select a single check, or a batch of checks.
- Prior to selecting Print, select Reprint Check.
- Select Printer to verify the selected check printer, and select Print.
- Yes to confirm the checks printed successfully, or No to leave the check saved as Not Issued.
