Workstation Installation Instructions
Adding Newton by Agency Systems to a workstation requires the installation of Pervasive. The instructions below reference the most current version of pervasive, however your office may be running an older version. Since all versions of Pervasive on the same network must match, please contact Agency Systems Support to verify the installed version before proceeding.
Contents
Windows 8 / 7 / Vista
Verify the workstation is running one of the following: Microsoft Windows 8 / Windows 7 / Windows Vista
You will need to be logged in as a local Administrative user.
Map the Network Drive
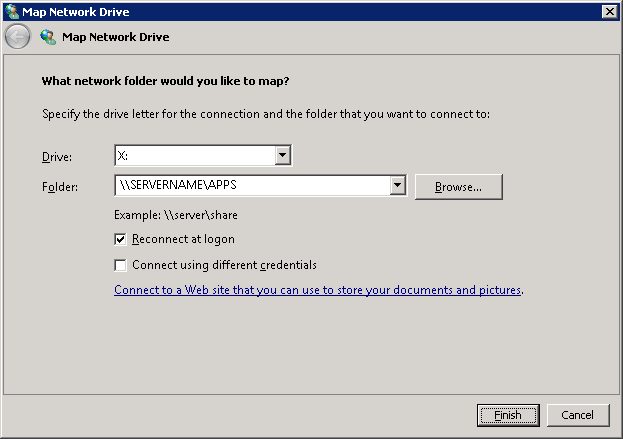
Map a network drive to the share directory containing the empire folder on the Server/Master machine. It is recommended to use the same drive letter on every machine in the office. For the examples below the letter X: will be used. Substitute X: with your drive letter as needed.
- Example
- Full Path: \\SERVERNAME\APPS\Empire\
- Server Name: SERVERNAME
- Shared Folder: APPS
- Mapped Path: X:\APPS\.
Optionally, the drive can be mapped from a cmd.exe prompt.
net use X: \\SERVERNAME\APPS
Install the Pervasive Client
Browse to X:\Empire\ and run the pervasive installer PSQ11.3Client32.exe. The version number of 11.3 may be different if you are using an older version of Pervasive.
If the file does not exist, download it from the following location and save it to the X:\Empire\ folder on the server.
http://www.asfiles.com/PSQL/PSQL11.3Client32.exe
Take all of the defaults except, select "Install as Service" when prompted.
Setup Client Data Source Name (DSN)
- Select the Microsoft Windows Start Menu.
- Enter PCC in the start search box then select Ok.
- Select Tools -> ODBC Administrator.
- Select the System DSN tab and then select Add.
- Highlight Pervasive ODBC Client Interface and select Finish.
- Under Data Source Name enter AgyForms.
- Enter the full server name in the Server Name/IP: field and select Get List.
- Verify AgyForms is selected in the drop down box named Database Name.
- Select Test and select Ok once the Connection Successful box appears.
- Select Ok to create the Client DSN.
- Exit the ODBC Administrator.
Setup the Agency Systems Icon
When installing from a mapped network drive, the drive mappings are lost when the Administrator account is elevated. This is a function of the User Access Control (UAC) in Windows. The elevated and non-elevated administrator accounts have different logon tokens and can therefore have different drive mappings.
- Select the Microsoft Windows Start Menu.
- Enter CMD in the start search box.
- Right-click and select Run as Administrator. This step is critical, even if you are already logged into the machine as Administrator.
- Enter the following commands where X: is the drive letter for your office:
net use X: \\SEVERNAME\SHAREDFOLDERNAME
X:
cd Empire
Adduser.exe.
Select Run, Begin, then Finish.
If prompted to reboot the machine select Yes.
