Express Checks
Contents
Create A Check
View or Edit an Existing Check
Void A Check
Both policy related and non-policy related checks can be voided from within Express Checks. When a check is voided, all distributions are automatically removed from the system. For example, if the check was paying a list of company payable invoices, once the check has been voided, each invoice will regain a payable balance.
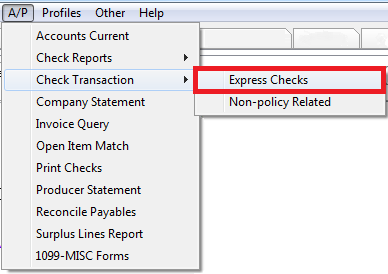
- Select A/P -> Check Transaction -> Express Checks.
- Enter the Bank Code of the check.
- Enter the Check Number. Select Tab to load the check details.
- Select Void then Yes to confirm.
- Select Exit.
Void and Reissue A Check with a new Number or Bank
A check an be automatically numbered to a different number, or a different bank code.
The process will void the old check number, and create a duplicate of the original check to the new bank and check number. The check type will be retained from the original check of either regular / wire.
- Select A/P -> Check Transaction -> Express Checks.
- Enter the Bank Code of the check.
- Enter the Check Number. Select Tab to load the check details.
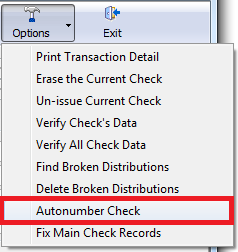
- Select Options -> Autonumber Check.
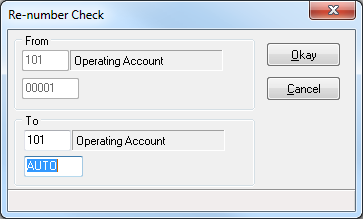
- Enter the new Bank Code if desired, and the new Check Number. To automatically number the new check, leave the default of AUTO.
- Select Ok.
Void, Erase, and Reissue a Check With the Same Number
Checks posted to an incorrect GL cannot be edited. Instead, the check can be voided, erased, and reissued with the same number.
- Select A/P -> Check Transaction -> Express Checks.
- Enter the Bank Code of the check.
- Enter the Check Number. Select Tab to load the check details.
- Select Void then Yes to confirm.
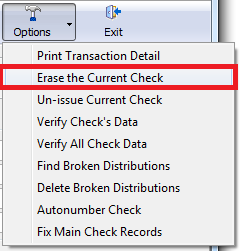
- Select Options -> Erase the Current Check. Select Yes to confirm.
- Select Exit.
You can now create a check with the same check number.
Void A Check in a Closed GL Period
If the general ledger period is closed, additional steps are required to show the check as void, without changing the prior general Ledger balances. The steps below will void the check and replace it with journal entries. After voiding the check you can issue a replacement check in the current period.
Example: Check #3500 in the amount of $500, for Bank 101 was entered December 01, 2010 to Client 189.
The Client has misplaced the check, so you will need to issue a replacement check for the current period.
Open General Ledger For Original Check Date
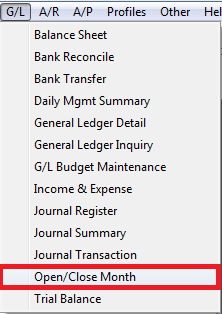
- From the main Agency Systems screen select G/L -> Open/Close Month.
- Enter the Check Date in the Date field.
- Select Open Month twice to open the month and days.
- Exit the Open/Close Month screen.
Void The Check Transaction
For additional details see void a check.
- Select A/P -> Check Transaction -> Express Checks.
- Enter the Bank Code of the check.
- Enter the Check Number. Select Tab to load the check details.
- Select Void then Yes to confirm.
- Select Exit to close.
Create a Set of Journal Entries In Prior Period
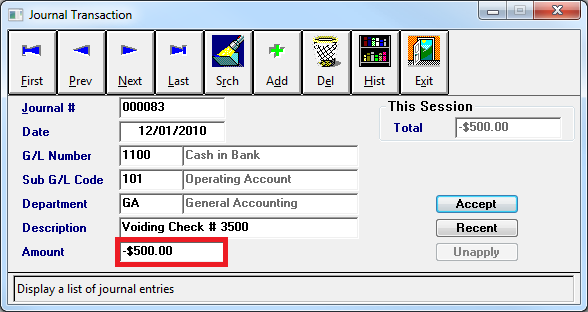
- Select G/L -> Journal Transaction.
- Enter the 'Date of the Voided Check. (From example, 12-1-2010)
- Enter G/L Number 1100.
- For Sub G/L Code, enter the Bank Code. (From example, 101)
- Enter the Department code.
- Enter the voided check # in the Description field.
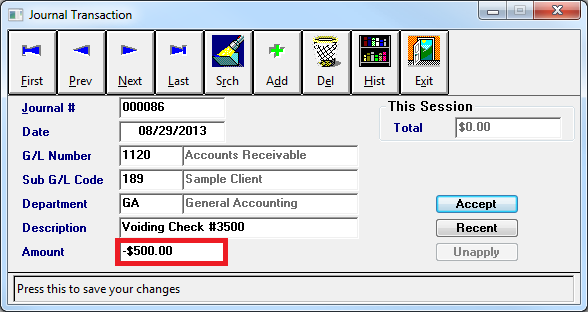
- In the Amount field, enter the amount of the check as a negative (-). (From example, -$500.00)
- Select Accept then Add.
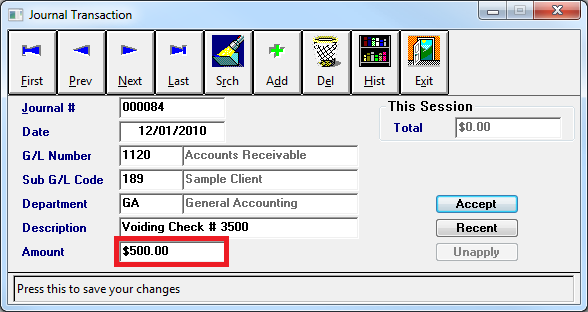
- For the next Journal Entry, enter the same date as the previous Journal. (From example, 12-1-2010)
- Enter G/L Number. (From Example, 1120)
- Enter Sub G/L Code. (From Example, 189)
- Enter in the Department code.
- Enter the voided check # for the Description.
- Enter the check Amount as a positive amount. (From Example, $500.00)
- Select Accept then Exit to close the Journal Transaction screen.
Close the Month for Voided Check
- Select G/L -> Open/Close Month.
- Enter the Check date in the Date field.
- Select Close Month twice. Select Yes to confirm closing all days.
- Select Exit.
Create a Set of Journals in Current Period
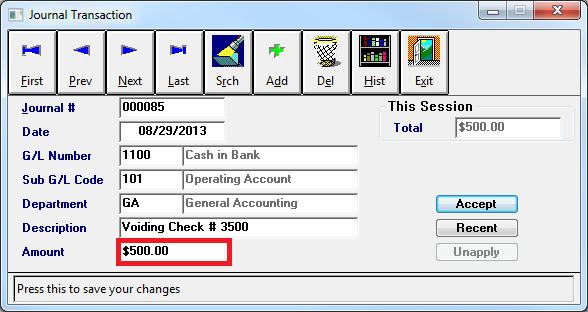
- Select G/L -> Journal Transaction.
- The Date is the current date.
- Enter the G/L Number 1100.
- Enter the Sub G/L Code. (From Example, 101)
- Enter the Department Code.
- Enter the voided check # for the Description.
- The Amount is the amount of the original check as a positive. (From Example, $500.00)
- Select Accept then Add.
- Enter the G/L Number. (From Example, 1120)
- Enter the Sub G/L Code. (From Example, 139)
- Enter the Department Code.
- Enter the voided check # for the Description.
- In the Amount field, enter the amount of the check as a negative (-). (From Example, -$500.00)
- Select Accept then Exit to close the Journal Transaction screen.
You can now recreate a new check transaction as normal.
