Newton Release Notes: November 2014
Feature Highlights:
- Activity Types and Filters
- Attachments Types, Tags and Filters
- Related Clients and Client Contact Copy
- Parent / Sub-Company and Billing Company Columns
- Updated ACORD Forms and Automatic Current Form Date
- Batch Reconcile Company and Producer Payables
- Bank Deposit Wizard
- Operator-Specific Interface Options and Preferences
Contents
- 1 Activity
- 2 Attachments
- 3 Client Profile
- 4 Company Codes
- 5 Forms
- 6 Reconcile Payables
- 7 Bank Deposit
- 8 Bank Reconcile
- 9 Operator Preferences and Options
- 10 Other
Activity
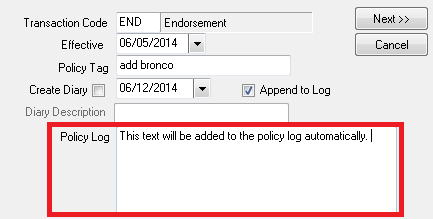
Each of the Policy Express -> Automated Procedures have been updated to allow the operator to append additional details to the activity log. This behavior is similar to the previously available option for adding activity text to the activity log when an attachment is created.
For example, when a policy is endorsed, additional text can be added to the Policy Log field.
This text will be appended to the automatic activity item for the endorsement.
The append to policy log option is available for the following automated procedures:
- Renew Policy
- Endorse Policy
- Cancel Policy
- Reinstate Policy
- Move to New Client
- Change Policy Number
In addition, the Create Diary option can be selected to simultaneously create a follow up suspense item, and append the text to the activity log.
The Basic Tab -> Activity Band now features a Print Preview option. Selecting the option will print complete activity items based on the currently filtered activity types, and date range in date order.
Activity Types and Filters
Additional activity types have been added, with a filter for each type. The activity bands have been updated to include an activity type display column.
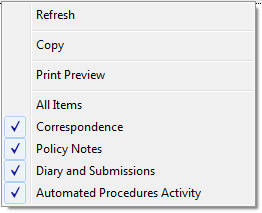
- Correspondence: Emails, Attachments, Printed Memos.
- Policy Notes: Policy activity note added from policy express.
- Diaries: Any diary action including creating, editing, and closing diary items. (New activity type displayed in blue)
- Submissions: Any submission action including creating, editing, and closing submission items. (New activity type displayed in blue)
- Automated Procedures Activity: Any Policy Express -> Automated Procedures activity such as Renew, Endorse, Cancel, Reinstate and more. (New Activity Type)
- System: All other activity, recorded automatically by the system for E&O.
The activity filters can be changed by right-clicking an activity within the following areas:
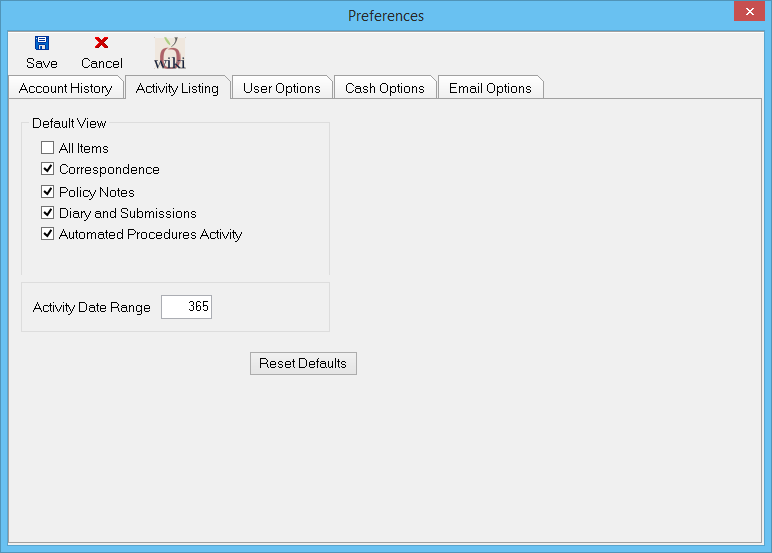
By default, all activity types other than System are displayed. To edit the default displayed activity types, see Other -> Preferences -> Activity Listing below.
Attachments
- After attaching an item to the Client Basic Tab through drag+drop, the Attachment Band will automatically refresh the list of attachments to show the item.
- After attaching an item to the Company Tab through drag+drop, the Attachment Band will automatically refresh the list of attachments to show the item.
- After attaching an item to the Management Tab -> Company or Operator, through drag+drop, the Attachment Band will automatically refresh the list of attachments to show the item.
- Management Tab -> Company or Operator -> Attachment Band now features a Right-Click -> Refresh option. Selecting the option will only refresh the Attachment Band, not the entire policy list.
Attachment Types and User Tags
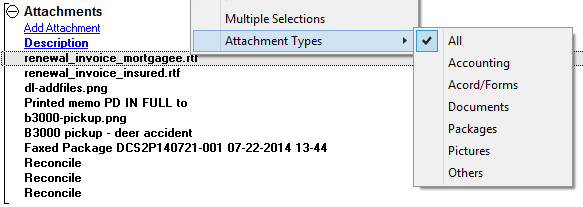
In addition to being saved to a policy, Attachments can now be assigned a Type and User-Defined Tag. View filters can be applied for the types, similar to Activity Filters.
Attachment Type and Tag columns are displayed in the following locations:
- Dashboard -> Attachments
- Management Tab -> Operator -> Attachments
- Management Tab -> Company -> Attachments
- Company Tab -> Attachments
- Client Basic Tab -> Attachments
Attachment Type Setup
Attachment types can be manually assigned to user-created attachments, in addition to being automatically set for system-generated attachments.
| Type | Automatically Assigned To |
|---|---|
| Accounting | Client/Company Reconcile Reports, Commission Download/Commission Builder Reports |
| Document | Printed Memo Writer documents. |
| ACORD/Forms | Previewed or Printed ACORD forms. |
| Picture | |
| Other | |
| Packages | Batch print generated PDF packages. |
Attachment Type profiles cannot be modified.
Attachment Tag Setup
Attachment tag profiles are used-defined, created by office administrators. (Requires Other -> Security System -> AR -> Policy Transaction -> Global Access)
Create an Attachment Tag
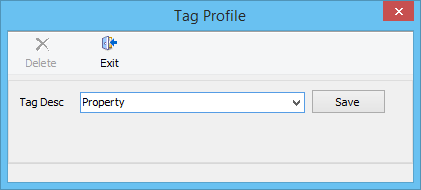
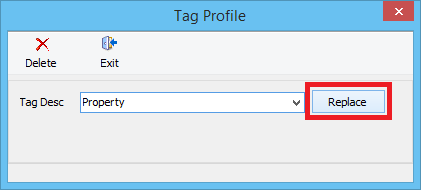
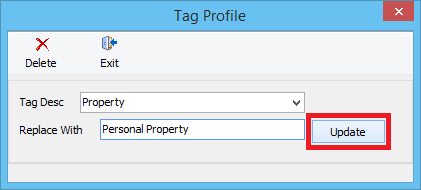
Rename an Attachment Tag
- Select Profiles -> Attachment Tag Setup.
- Select the existing Tag Desc from the drop-down.
- Select Replace.
- Enter the new Attachment Tag Name.
- Select Update.
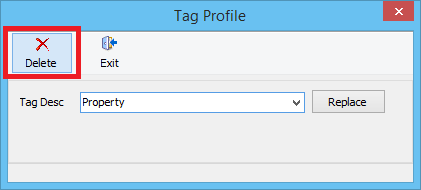
Delete an Attachment Tag
You cannot recover a deleted Attachment Tag. All previously associated attachments will no longer have an Attachment Tag set.
- Select Profiles -> Attachment Tag Setup.
- Select the existing Tag Desc from the drop-down.
- Select Delete.
- Confirm when prompted.
Add Attachment Type and/or Tag to New Attachment
New attachments with common file extensions (.jpg, .docx, .pdf) will automatically be assigned an Attachment Type.
Add Attachment Through Drag+Drop
- Drag+Drop the attachment onto either a Client Tab, Policy Express, or the Company Tab. See: Attachment Integration
- Select the desired Type and/or Tag.
- Select OK.
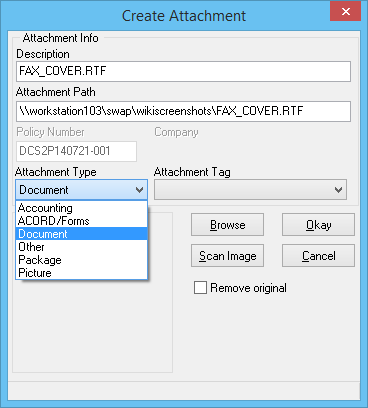
Add Attachment Through Browse
- Open the Client on one of the four client tabs.
- Do one of the following:
- Expand the Attachments band. Select Add Attachment.
- Right-Click on the policy number listed under Active Policies and select Add Attachment.
- Select Browse and choose the attachment.
- Select the desired Type and/or Tag.
- Select Okay.
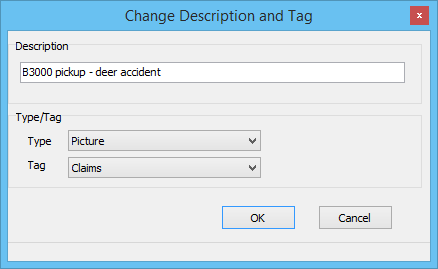
Add Attachment Type and/or Tag to Existing Attachment
- Load the Client on one of the four client tabs.
- Expand the Attachments Band.
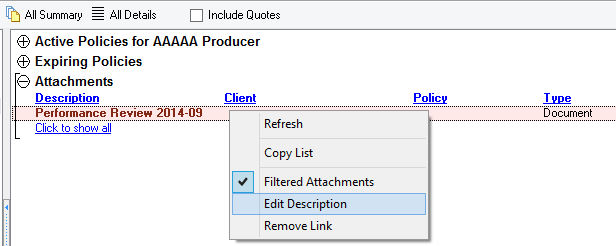
- Right-Click on the attachment and select Edit Description.
- Select the desired Type and/or Tag.
- Select OK.
Filter Attachment List by Type
- Load the Client on one of the four client tabs.
- Expand the Attachments Band.
- Right-Click on the attachment and select Attachment Types. (By default, All will be selected).
- Select the desired Attachment Type from the list.
- The attachment list will be automatically filtered to only include attachments saved as the selected Attachment Type.
- Multiple attachment types can be selected by choosing additional types.
Company and Operator Secure Attachments
Secure attachments added to the management sub-tab attachment bands can now be removed or edited using a right-click menu.
- Management -> Operator -> Attachments
- Management -> Company -> Attachments
Company tab attachments can now be converted to secure attachments using a right-click menu. After the conversion, the attachment will be removed from the company tab, and only available from the management tab.
Client Profile
Client Contacts
Client contacts which refer to the client physical or mailing address will be automatically updated if the client profile address is changed.
Copy Contacts From An Existing Client
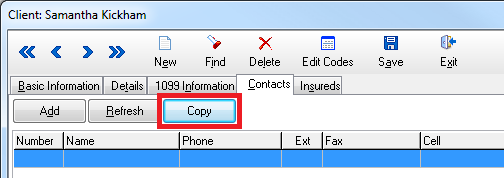
One or more contacts can now be copied from an existing client.
- Load a Client on one of the four client tabs.
- Select Edit above the contact list.
- Select the Contacts tab.
- Select Copy.
- Enter the existing source client number, or use the client keyword search to select the client. (To search left-click the display area labeled "Must Enter Client".)
- Select the desired contacts, and select Copy.
- Exit the client profile screen and the copied contacts will display on the client basic tab.
Related Clients (Cross-Reference)
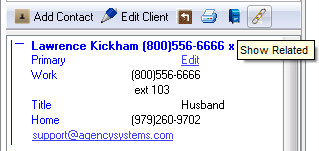
Client profiles can now be related to each other, allowing the operator simple one-click access to multiple client profiles.
Multiple clients are related in a group, which can be more than two clients. Each client is individually related to all clients in a client group.
When a group is initially created, the first related client is assigned as the primary client.
Assign a Related Client
- Load a Client on one of the four client tabs.
- Select Edit Client.
- Select the Details Tab.
- Select Related To -> and choose the related client.
- Select Save, then Exit.
View a Related Client
- Load a Client on one of the four client tabs.
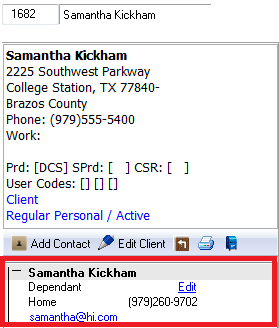
- Select Show Related in the client toolbar.
- All Related clients are listed in the contact frame.
- Left-Click on a related client to load the related client's basic tab.
Remove a Related Client
A primary client which has other client's assigned cannot be edited until all sub-client references are removed.
- Load the sub-client on one of the four client tabs.
- Select Edit Client.
- Select the Details Tab.
- Select Related To -> and remove the displayed client number.
- Select Save, then Exit.
After all sub-clients are removed, the original primary client can now be reassigned.
Company Codes
Billing Company Column
Each of the policy band lists across the system now contain a Billed column. The column displays the company code assigned to first invoice line on the policy. If the current transaction has not been invoiced, the most-recent invoice company is displayed. If the policy has never been invoiced, nothing will be listed.
- Client Basic Tab -> Active Policies
- Dashboard -> Expiring Policies
- Dashboard -> Active Policies
- Company Tab -> Active Policies
- Management Tab -> Operator/Company/Class code Policy Details or Full Details.
Parent: Subsidiary (Sub-Company) Relationships
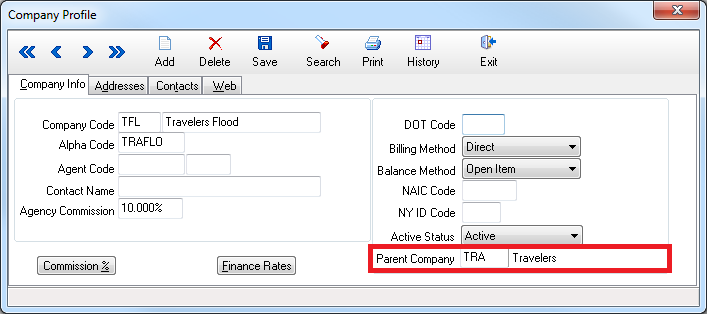
Individual company codes in Agency Systems can now be assigned to a Parent Company. The Company Tab -> Active Policies list for a parent company will list all policies assigned to the parent company, and all policies assigned to any subsidiary. The Management -> Company Tab will summarize all active polices by Parent Company, but will retain the option to display only policies assigned to specific company codes.
Assign a Parent Company
- Select Profiles -> Company.
- Select Search, then select the desired subsidiary.
- Enter the primary company code in the Parent Company field.
- Select Save.
- Repeat this process to assign each subsidiary.
- When finished, select Exit.
List All Subsidiaries Assigned to a Parent Company
- Select Profiles -> Company.
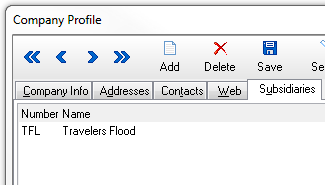
- Select Search, then select the desired parent company.
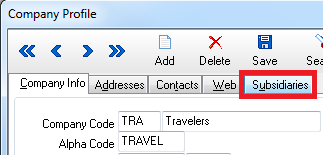
- Select the Subsidiaries tab.
- All assigned subsidiaries will be displayed.
Company Tab - Policy List By Parent Company
The Active Policies band and expired policies section of the company tab will automatically display any policy written to the parent company and assigned subsidiaries.
The Active Policies list will also include a Company column. The column displays the policy company for each item.
To list only policies assigned directly to the parent company, deselect Include Subsidiaries.
The Include Subsidiaries option and the Active Policies -> Company column are only visible on the Company Tab if the selected company code is a parent company with assigned subsidiaries.
Management Tab - Production Total By Parent Company
Select the Management Tab, then select the bottom Company tab.
By default, all companies are listed in the left frame by parent company. (Subsidiary company codes are not listed individually.)
Selecting a company will list all policies assigned to the parent company code and any subsidiary company code. The policy list will contain a column displaying the specific policy company code for each policy.
Select All Summary to display the entire active book of business by parent company.
To display each subsidiary individually, deselect Display Companies by Parent Company.
Forms
Updated ACORD Forms
| Number | Name | Form Version |
|---|---|---|
| 37 | Statement Of No Loss | (2008/01) |
| 50-ME | Insurance Identification Card | (2007/08) |
| 63 | Fraud Statements | (2013/09) |
| 64-NY | Auto Supplement | (2008/06) |
| 80 | Homeowner Application | (2013/09) |
| 90-MO | Personal Automobile Application | (2010/10) |
| 125 | Commercial Insurance Application | (2014/12) |
| 126 | Commercial General Liability Section | (2014/04) |
| 127 | Business Auto Section | (2014/12) |
| 128 | Garage And Dealers Section | (2014/12) |
| 130 | Workers Compensation Application | (2013/09) |
| 131 | Umbrella/Excess Section | (2013/12) |
| 137-NY | Commercial Auto | (2012/01) |
| 137-OH | Commercial Auto | (2011/08) |
| 138-TX | Garage And Dealers | (2014/12) |
| 138-UT | Garage And Dealers | (2012/05) |
| 146 | Equipment Floater Section | (2013/09) |
| Canada ID Card | Canada Non-Resident Inter-Province Motor Vehicle Liability Card | (2014/06) |
Form Function Updates
The form date for all ACORD forms can globally be set to "Always use the current date" if one of the policies on the form is active. For example, if a certificate is originally created on 1-15-2014, but printed on 6-4-2014, the form date on printed form will automatically show the current date of 6-4-2014 without requiring any user action. (See Global Form Configuration Options to enable this new option.)
Drivers created through commercial lines download will now populate the Year Licensed field. This field displays on the ACORD 127, and is also used to calculate the years experience column.
ACORD 70, 71, and 175 - Effective Date of Change
Effective Date of Change field now defaults to the policy sequence effective date. The Inception Date of Policy field now displays the policy term effective date.
- ACORD 70 Personal Policy Change Request (Except Auto)
- ACORD 71 Personal Auto Policy Change Request
- ACORD 175 Commercial Policy Change Request
ACORD 126 - More Hazards than Rows
The ACORD 126 only contains seven rows for the schedule of hazards. If more than seven hazards are contained within a commercial download, the additional hazards will be automatically added to the supplemental remarks form.
ACORD 131 - Primary Policy Number and Import Property Buttons
The primary policy number at the top of the form will now be automatically selected if the ACORD 131 is manually created outside of the forms tab.
Location section at the bottom of Page 1 now contains Import Property Data button for each location, allowing name and address details to populate from the property schedule.
NC FS-1 North Carolina Certificate of Liability Insurance
Company Code field will now display the DOT code saved to the policy company profile. Previously the NAIC code was displayed.
Global Form Configuration Options
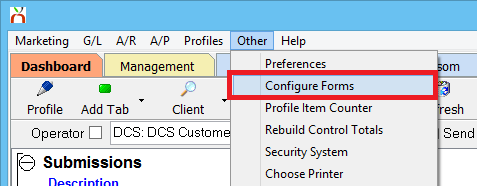
The global ACORD form configuration options have been moved to the main menu. The option can be accessed by selecting Other -> Configure Forms. (Operator security Level 9 is required)
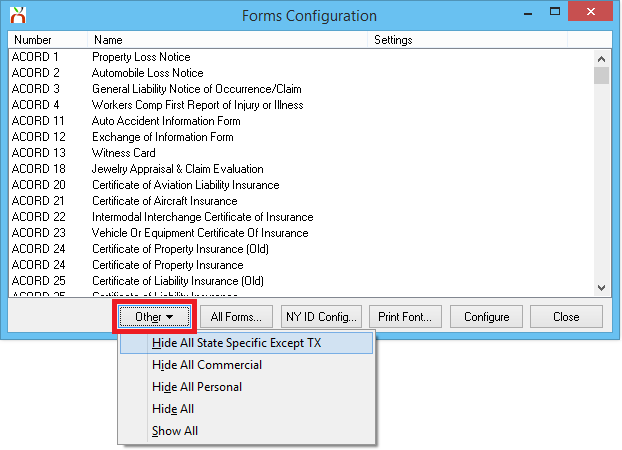
Batch Hide/Show ACORD Form Library Items
A new option has been added to quickly hide ACORD forms from the list of forms provided when a new form is generated.
- Hide All State Specific Except TX: Hides all ACORD forms specific to a state that does not match the agency profile state.
- Hide All Commercial/Personal: Hides all commercial lines or personal lines ACORD forms.
- Hide All/Show All: Hides all forms or shows all forms.
Individual forms can still be marked hidden, or marked to show, even after one of the global options is selected.
Printed Form Date Configuration
A new option to globally control the form date printed on each ACORD form is now available.
- Use date on form: Default option, which will continue to mirror prior behavior and print the saved form date visible on the ACORD form.
- Always use current date, unless policy is expired: When a form is printed/emailed, the date will automatically show the current date, as long as one of the policies is active.
- Use current date when printed from MyInsuranceDashboard, unless expired: Only forms generated by MID will automatically show the current date.
Form Interface Toolbar Changes
The top toolbar visible within an ACORD form has been updated to display the most commonly used functions.
- Selecting New has been changed to display the entire form library, instead of defaulting to a new version of the current form.
- Batch print is available for all ACORD forms, providing the ability to print or email a single form, multiple forms, or only specific holders on a certificate.
- If the form is eligible to be added to a form bundle, Bundle This Form will be listed to the right of the Other menu.
- If the form is already part of a form bundle, the same button will display View Bundle.
- If a certificate is opened, such as the ACORD 25 - Certificate of Liability, Choose Holders and Choose Properties will be listed.
- The navigation options to step through existing forms have been moved to Other -> Navigation.
Reconcile Payables
- Entering the Reconcile Payables on-account amount now requires the user to select "Add on-account amount".
- Reconcile payables report now includes the on-account amount if entered.
Batch Reconcile Payables
Reconcile payables now includes a batch processing option for both companies and producers. The batch process will search all companies or producers in the date range specified, and save a reconcile in progress for each individual code. The individual payables can then be adjusted if necessary, or processed with a single step.
For example, all producer payable reconciles can be paid with a single action, creating an individual check for each producer code.
Access to batch reconcile payable requires the following security:
- Other -> Security System -> AP -> Reconcile Payables -> View and Entry.
- Other -> Security System -> AP -> Check Transaction -> Entry.
- Other -> Security System -> Profiles -> Company -> View (For batch company payables).
- Other -> Security System -> Profiles -> Producer -> View (For batch producer payables).
Batch Create Company or Producer Payables
- Select one of the payable menu options:
- Select AP -> Reconcile Payables Batch -> Batch Create Company Payables
- Select AP -> Reconcile Payables Batch -> Batch Create Producer Payables
- The batch create window will display, pre-filled with the default reconcile start and end dates. (AP -> Reconcile Payables -> Other -> Change Default Dates...)

- Enter an amount in the Ignore if Payment Below field to limit the matches to a minimum payable value.
- Select to either Pay Full Amount, or Pay Trust Amount.
- Enter the default bank code for all check transactions, and the default check type. (These can be changed individually for each matching payable).
- When finished, select Ok. The system will automatically search for all company or producer codes which meet the selected criteria.
- When finished, a summary page is displayed for each code. The report also includes codes which do not have any matching invoices, or codes with a balance below the required amount (credit balance).
- Select Ok to view a complete list of all codes with a payable balance.
Each matching payable is now saved as a reconcile-in-progress. The window can be closed, and the process resumed at a later date.
To continue processing, see the section below, Batch Process Company or Producer Payables.
Batch Process Company or Producer Payables
- Select one of the payable menu options:
- Select AP -> Reconcile Payables Batch -> Batch Process Company Payables
- Select AP -> Reconcile Payables Batch -> Batch Process Producer Payables
- The batch process window will display showing all pending batch reconcile payables. (If no items are listed, first create a company or producer payable batch.)

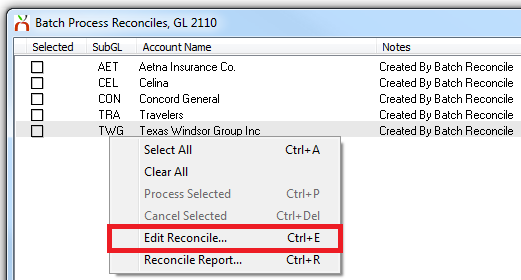
- Right-Click -> Edit Reconcile... to view all details for an item. The Reconcile Payables window will open allowing for invoice adjustments, invoice line detail, and payment detail modifications.
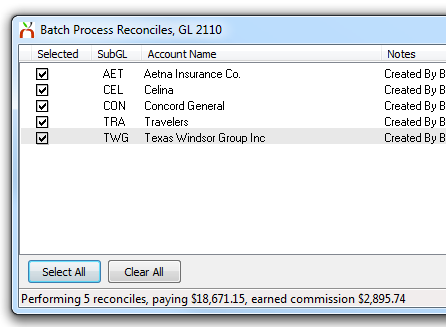
- Select the desired items to process, or click Select All to select all pending reconciles. The total payment amount and earned commission (GL 2110 - Company Payables Only) will be calculated and displayed at the bottom of the window.
- Select Process Selected to complete the reconcile for each selected item, creating a physical check or a wire check for each item. (Select Cancel Selected to remove all items.)
- When finished, select Yes to transfer any earned commission between bank accounts. (GL 2110 - Company Payables Only)
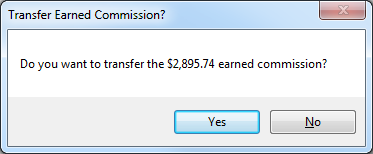
- Complete the Bank Transfer to transfer the earned income between accounts.
- Close the Batch Process Reconciles window when finished.
Bank Deposit
A new bank deposit wizard is now available to automate the daily cash deposit step outlined in the process daily cash deposits with cash on-hand account procedure.
- The Bank Deposit will do the following
- Display all unreconciled cash transactions saved to the cash on-hand bank account in Newton which have not been transferred to the operating account.
- Allow the operator to select the desired items to transfer to the operating account as a deposit.
- Create the transfer of money to the operating account as a single deposit (cash transaction).
- Automatically reconcile the transferred cash on-hand transactions.
- Print a report showing only the items transferred from the cash on-hand account, to the operating account.
Access to GL -> Bank Deposit requires the following security levels: (Other -> Security System)
- AR -> Cash Transaction -> View, Entry, Edit
- AP -> Check Transaction -> Entry
Create a Bank Deposit
- Select GL -> Bank Deposit.
- Enter the cash on-hand Bank Code. (Create a New Default Cash Bank Profile)
- Select Ok. All unreconciled cash items will be displayed, pre-selected for transfer. The total deposit amount is displayed at the bottom.
- Select Set All or Clear All to selected/deselect all items. Alternatively, individual items can be selected or deselected using the Deposit check box.
- After all of the desired transactions have been selected, Select Ok.
- The bank deposit transfer window will display.
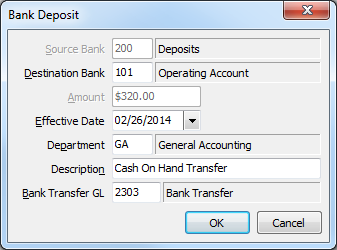
- If desired, edit the Effective Date, Department Code, Description, or Bank Transfer GL. Select Ok when finished.
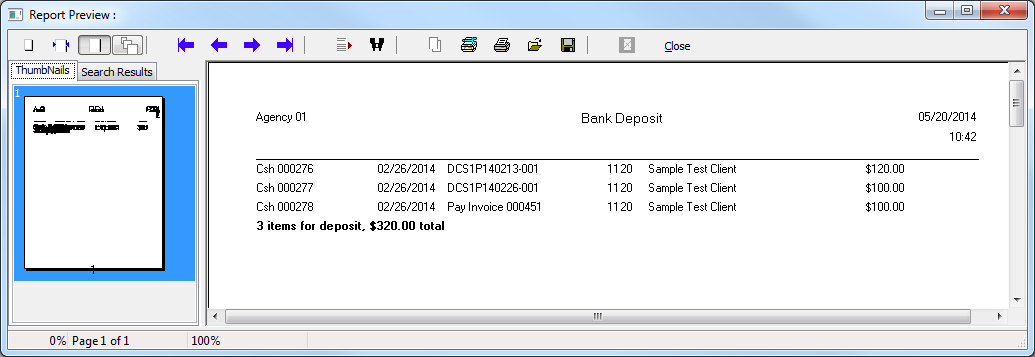
- The deposit report will be displayed, listing all transferred transactions and the deposit total.
The operating account will now have a single cash transaction displayed for the total deposit amount. The single transaction will match the amount displayed on the bank statement for use during the bank reconcile process.
Bank Reconcile
Journals transactions to GL 1100 were previously listed in the totals summary at the bottom of bank reconcile window. The journal amounts were automatically included in the reconciled bank balance value.
The line-item for each journal can now be hidden from the bank rec screen through a new right-click option.
Operator Preferences and Options
A number of new options and preferences are now available within Newton. In addition, many of the previously available global options are now available to individual operators.
Each operator can now independently select their own preferences and options, without changing settings for other users.
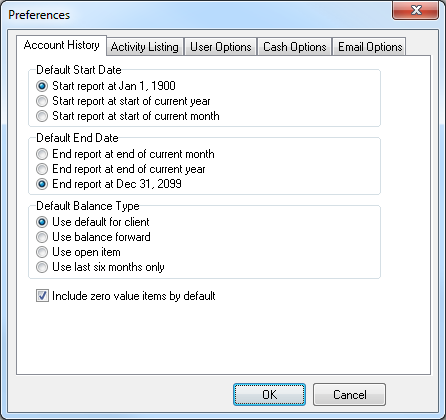
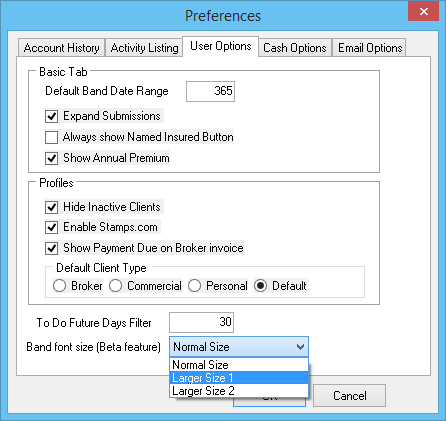
Select Other -> Preferences to access the new user control panel. (This option was previously displayed as Other -> Client Explorer Options)
Account History
The account history tab is now the first tab displayed. The available options have not been changed, and are still available for each operator. The settings control the default options for the client account tab.
Activity Listing
The Activity Listing tab is a new set of options to control which activity types display by default in the following areas:
- Dashboard -> Activity Band
- Client Basic Tab -> Activity Band
- Policy Express -> Activity Band
The default values are per operator, and the filters can be changed on-the-fly through the right-click menu.
User Options
Each of the user options are now available per operator. In addition, the first field has been renamed to Default Band Date Range and no longer applies to the client activity band. (See Activity Listing above for the new Activity Band default filter value)
The User Options tab was previously named Global Settings.
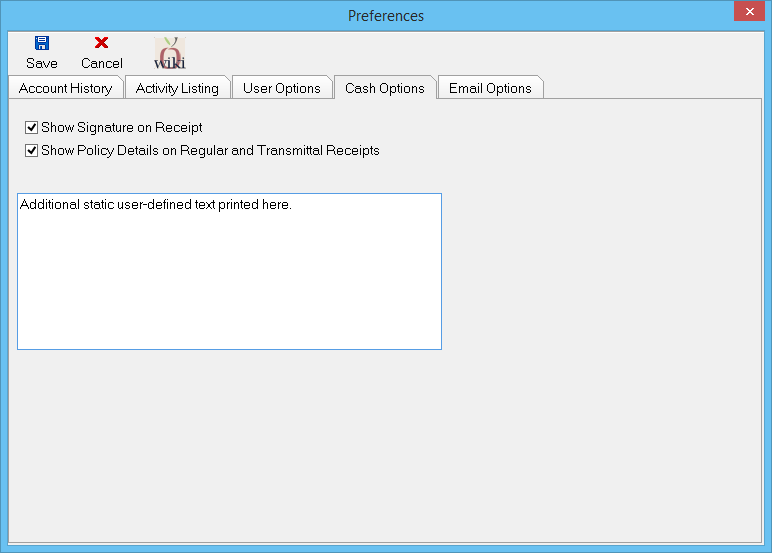
Cash Options
The cash options tab is only visible to users with a security level of 9. The cash options tab is the only tab which globally sets settings for all users.
- Check Show Signature On Receipt to enable the cash receipt signature
- Un-Check Show Policy Details on Regular and Transmittal Receipts to disable including policy details on regular cash receipts.
- Enter any desired text to be printed on every cash receipt. (Line-breaks are not currently supported)
All cash options were introduced in the March 2014 release of Newton.
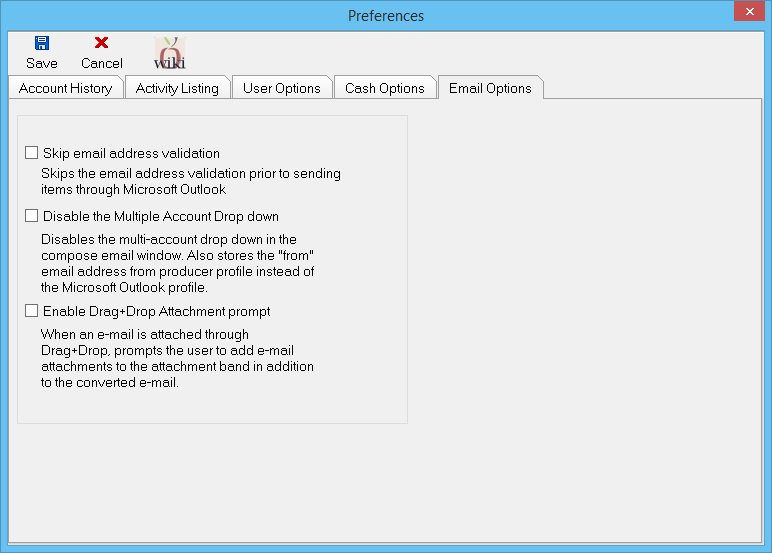
Email Options
Each of the email options are now available per operator.
All email options were introduced in the March 2014 release of Newton.
Other
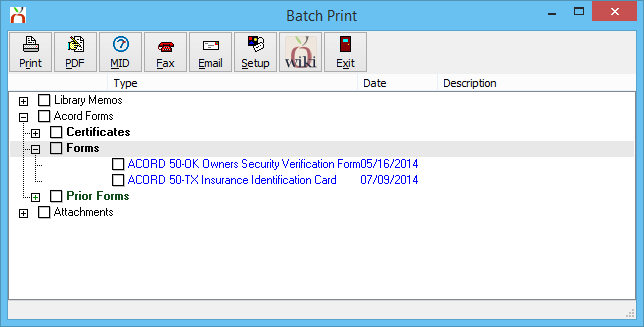
Batch Print
The Batch Print interface has been updated with larger buttons, and a Wiki help link.
Download
- Renamed "Edit Details..." button inside of Commission Download/Commission Builder to "Payment...".
- If the Commission Download / Commission Builder -> Adjust Commission Received setup configuration options have not been completed, the system will provide a prompt and wiki link with instructions.
- Commission Download / Commission Builder -> Adjust Commission Received options no longer require creating a cash receipt. The operator can use an existing on-account cash receipt, or not create any cash and still use the adjustment options.
Memo Writer
Locked memo templates can now be unlocked after pending changes have been entered, allowing the operator to easily update a locked memo template. (Previously, first unlocking a memo was required before any updates could be started.)
