Reconcile Company Payables
| Related Pages |
| Related Categories |
The Reconcile Company Payables interface is used to create GL-2110 company payable checks against Agency Bill invoices.
Access to reconcile company payables requires the following security:
- Setup-> Security System -> AP -> Reconcile Payables -> View and Entry.
- Setup -> Security System -> AP -> Check Transaction -> Entry.
- Setup -> Security System -> Profiles -> Company -> View.
Contents
Frequently Asked Questions (FAQ)
Start a Company Payable Reconcile
- Select Company -> Reconcile Company Payables (Agency Bill). (To process company or producer payables in a batch, see Reconcile Payables Batch.)
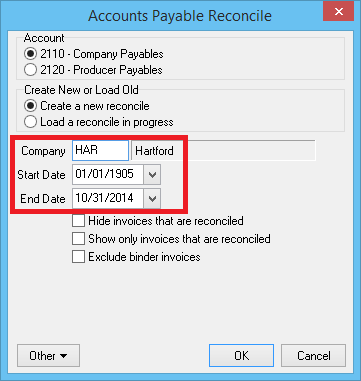
- Enter the Company Code.
- Select the Agency Bill invoice Start Date and End Date.
- (Invoices before or after the date range will not be included in the reconcile payables results. See change default date range below to modify the default values.)
- Select OK.
Start a Reconcile: Additional Options
The additional (optional) items below are available by selecting the Other button.
Change Default Date Range
- Select Company -> Reconcile Company Payables (Agency Bill).
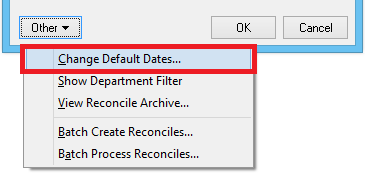
- Select Other -> Change Default Dates....
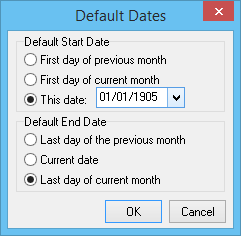
- Select a different start and end date method, and select OK. (When prompted restart Agency Systems for the default date changes to take affect.)
Include a Department Filter
The list of invoices can be limited by Department Code, commonly used for agencies with multiple locations.
Select Company -> Reconcile Company Payables (Agency Bill). Next, select Other -> Show Department Filter.
The department code entry field will display below the End Date.
Process a Company Payable Reconcile
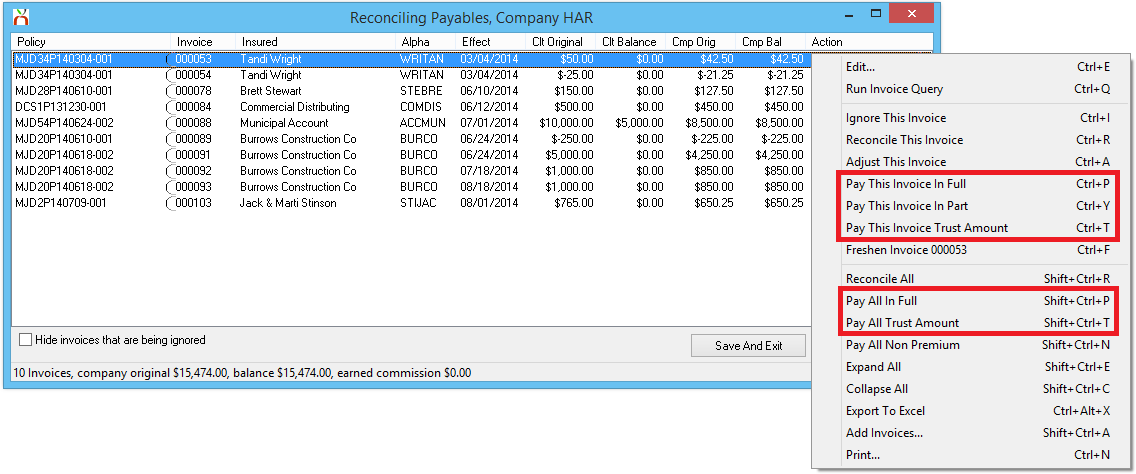
After starting a company payable reconcile, a list of matching invoices will be provided.
Step 1: Mark Invoices To Pay
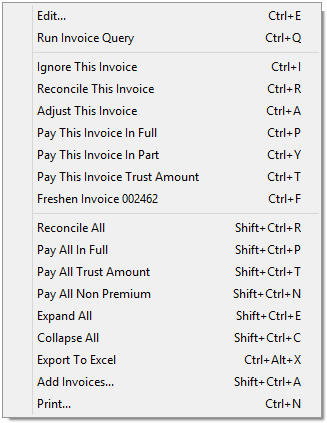
Right-Click to view the list of available actions.
- To pay individual invoices, select Pay This Invoice In Full/Part/Trust Amount. (Trust Amount = Only pay the percentage paid by the client.)
- To pay all listed invoices, select Pay All In Full/Trust Amount.
Step 2: Verify Payment Details and Earned Income Transfer
- Select Payment Details... after marking invoices to pay.
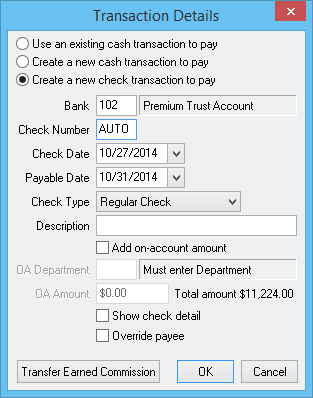
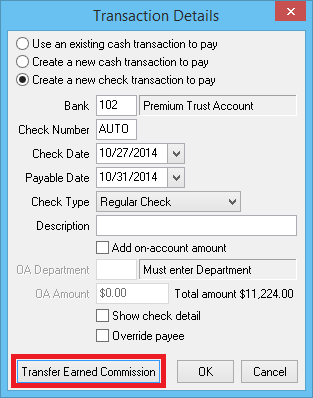
- The Transaction Details window will display.
- Enter the bank code. (The code defaults from the agency profile.)
- Verify the Check Number, Check Date, and Check Type.
- Enter a short Description.
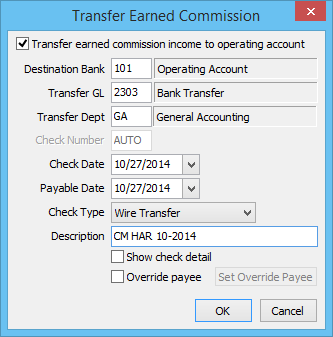
- Optionally select Transfer Earned Commission to automatically transfer any earned commission between the trust and operating bank accounts. (Do not select if paying beginning balance invoices).
- See: Setup bank transfer general ledger account or select the existing bank transfer GL profile).
- Select OK when finished.
Step 3: Perform the Reconciliation
After marking the invoices to pay, and entering the payment details, verify the total "paying" amount displayed at the bottom of the reconcile window.
Once verified, select Perform Reconciliation to execute the following:
- Create a check transaction for the total payment amount.
- Apply the check payment to each of the marked invoices.
- Create a .PDF report attached to the company tab.
- Transfer any Earned Commission if selected.
- Prompt to print the company payable check if configured as Check Type -> Regular.
Additional Options
There are many additional options available in either the primary reconcile Right-Click Menu, or by selecting the reconcile window buttons.
- Add Invoices: Search for additional invoices by date, or invoice number to add to the existing reconcile window. This option can add fully paid invoices.
- Adjust This Invoice: See: Adjust an Invoice Using Reconcile
- Export to Excel: Creates and opens a Microsoft Excel spreadsheet of the currently displayed list of invoices.
- Ignore This Invoice: Ignored invoices are not paid when selecting "pay all" options. After selecting invoices to ignore, optionally select the bottom checkbox to Hide invoices that are being ignored.
- Save And Exit: Saves the pending reconcile as a reconcile in progress without posting any changes. See the section below to resume or cancel a saved reconcile in progress.
- Window: Red X: Exit without saving any changes.
Resume or Cancel a Reconcile in Progress
If a pending reconcile is saved, it can either be resumed exactly where the operator left off, or cancelled to start the reconcile process at the beginning.
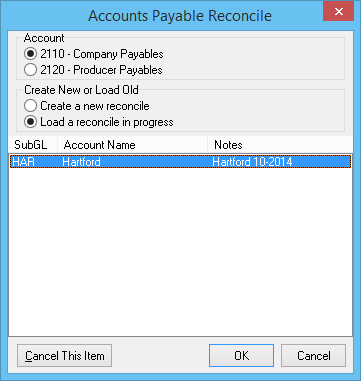
- Select Company -> Reconcile Company Payables (Agency Bill).
- Select Load a Reconcile in Progress.
- Highlight the previously saved reconcile and select OK to resume, or Cancel This Item to remove the saved reconcile.
After a reconcile in progress is cancelled, the operator can now start a new company payable reconcile for the same company.
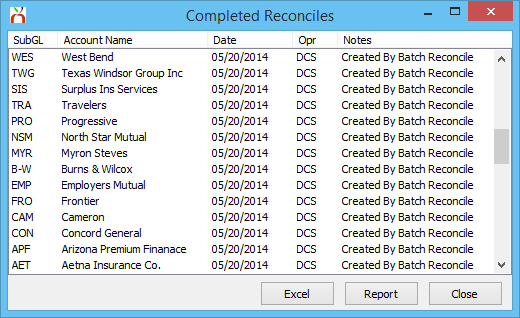
Review Reconcile Archive (Completed)
Previously processed reconciles can be viewed using the reconcile archive report, or by viewing the automatically generated .PDF from the Company Tab -> Attachments Band.
