Difference between revisions of "Report: Check Register: Not Issued Checks (Not Yet Printed)"
Jump to navigation
Jump to search
(updated images) |
|||
| Line 45: | Line 45: | ||
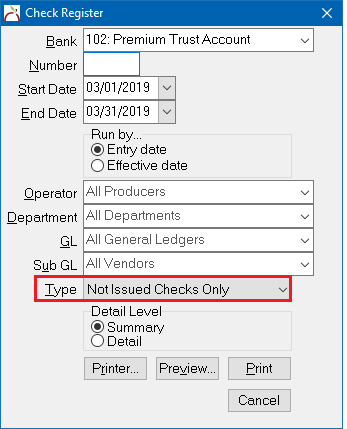
#Enter the '''Start date''' and '''End date''' which will be used on the [[Print a Check or Range of Checks|print checks screen]]. | #Enter the '''Start date''' and '''End date''' which will be used on the [[Print a Check or Range of Checks|print checks screen]]. | ||
#Select '''Type -> Not Issued Checks Only'''. | #Select '''Type -> Not Issued Checks Only'''. | ||
| − | #:[[File: | + | #:[[File:Reports-checkregister-notissued.png]] |
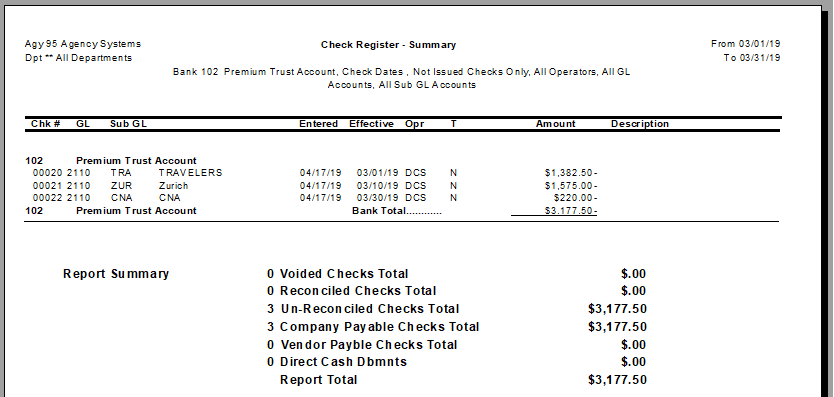
#Select '''Preview'''. | #Select '''Preview'''. | ||
| − | #:[[File: | + | #:[[File:reports-checkregister-notissued-preview.png]] |
Latest revision as of 14:56, 17 April 2019
| Related Pages |
| Related Categories |
Overview
All check transactions can be printed individually, or in a batch. Prior to printing a range of checks, it is recommended to use the a check register report to preview the pending transactions.
Any regular check matching the bank and date criteria is automatically printed using the print checks option unless:
- The check has been previously flagged as Issued (Printed)
- The check was created as Check Type -> Regular - Don't Print
- The check was created as Check Type -> Wire/EFT.
Process
- Select Reports -> Check Reports -> Check Register.
- Enter the Bank code assigned to the checks.
- Enter the Start date and End date which will be used on the print checks screen.
- Select Type -> Not Issued Checks Only.
- Select Preview.

