Difference between revisions of "Training 5: Email, Diary, Activity, Client Notes & Memo Writer"
(→Diary) |
(→E-mail) |
||
| Line 38: | Line 38: | ||
{{#ev:youtube|0UVKrT1JH98|300|right|Email Integration}} | {{#ev:youtube|0UVKrT1JH98|300|right|Email Integration}} | ||
| − | See [[Email Integration]] for additional details | + | [[File:Ic_info_black_24dp.png]] See [[Email Integration]] for additional details. |
| − | |||
| − | |||
| − | + | Emails in Newton are listed within the Emails band on the [[Client Tab]], [[Policy Express]], [[Company Tab]], [[Vendor Tab]], and [[Dashboard Tab (User)]]. Any email sent or received in Newton will also record the body of the email as a [[Client_Tab#Activity|permanent searchable activity item]]. | |
| − | + | [[File:Clienttab-Email-columnheaders.png]] | |
| + | === Create a New Email === | ||
| + | An email in Newton can be initiated from a number of areas including the [[Client Tab]], [[Policy Express]], [[Company Tab]], [[Vendor Tab]], [[Dashboard Tab (User)]], and [[Batch Send]]. | ||
| − | + | [[Email_Integration#Create_a_Client_Email_from_the_Client_Tab|Create a Client Email from the Client Tab]] | |
| + | |||
| + | [[Email_Integration#Create_a_Client_Email_by_Selecting_a_Contact_From_the_Client_Tab|Create a Client Email by Selecting a Contact From the Client Tab]] | ||
| + | |||
| + | [[Email_Integration#Create_a_Policy_Email_from_Policy_Express|Create a Policy Email from Policy Express]] | ||
| + | |||
| + | [[Email_Integration#Create_a_Policy_Email_using_Batch_Send|Create a Policy Email using Batch Send]] | ||
| − | |||
==== Address Book Options ==== | ==== Address Book Options ==== | ||
| − | + | [[File:Ic_info_black_24dp.png]] See [[Email_Integration#Selecting_an_Email_Recipient|Selecting an Email Recipient]] for additional details. | |
| + | |||
| + | An email can contain three categories of email recipients; TO, CC, and BCC. | ||
| + | '''Left-click''' TO, CC, or BCC. The '''Search Clients''' window will list active contacts for the client by default. | ||
| + | :[[File:Email-compose-searchcontact.png]] | ||
| + | |||
| + | Select '''Outlook Address''' to list all contacts stored in your external Microsoft Outlook Address book. | ||
| − | |||
==== Attaching a File from Newton ==== | ==== Attaching a File from Newton ==== | ||
| − | + | [[File:Ic_info_black_24dp.png]] See [[Email_Integration#Adding_Attachments_to_an_Email|Adding Attachments to an Email]] for additional details. | |
| + | |||
| + | An attachment can be added to an outgoing [[Email Integration#Create a Client Email from the Client Tab|client email]], [[Email Integration#Create a Policy Email from Policy Express|policy email]], or from [[Batch Send]]. Any attachment included in an outgoing email will be automatically stored within Newton's email activity for direct access. | ||
| + | |||
| + | Attachments can also be dragged and dropped onto the compose email window from outside of the system. Multiple attachments can be dragged and dropped at the same time. | ||
| + | :[[File:Email-compose-attachment-draganddrop.gif]] | ||
| − | |||
| − | |||
| − | |||
==== Templates with Memo Writer ==== | ==== Templates with Memo Writer ==== | ||
| − | + | The message body content can be entered manually, or can be pre-filled from an existing [[Memo Writer: Create a Form Letter Template|memo template]]. | |
| + | |||
| + | To select a memo template, select the '''Choose Memo template''' drop down box and select the desired memo. Memos are organized by Category, then Name. | ||
| + | |||
| + | :[[File:Email-compose-selectmemotemplate.png]] | ||
| − | |||
==== E-mail Signature ==== | ==== E-mail Signature ==== | ||
{{#ev:youtube|vVbE6Krw7-0|300|right|Configure Default Email Signature}} | {{#ev:youtube|vVbE6Krw7-0|300|right|Configure Default Email Signature}} | ||
| − | + | [[File:Ic_info_black_24dp.png]] See [[Email_Integration#Inserting_an_Email_Signature|Email Signature]] for additional details. | |
| + | |||
| + | The Email Signature for the current operator will be automatically placed as the footer of an email when it is started. | ||
| + | |||
| + | ;Configure A New Email Signature | ||
| + | #Open the [[Email Integration#Compose Email Window|compose email window]]. | ||
| + | #Enter the desired signature information into the compose email window. | ||
| + | #Highlight the text (CTRL+A) | ||
| + | #'''Right Click''' and select '''Save As Signature'''. | ||
| + | #:[[File:email-signature-saveas.png]] | ||
=== Attaching a Received E-mail to Newton === | === Attaching a Received E-mail to Newton === | ||
| − | To attach an | + | To attach an email received in Microsoft Outlook, simply drag-and-drop the email into Newton. The emails can be attached to a [[Client Tab|Client]], [[Policy Express]], [[Company Tab|Company]], or [[Vendor Tab|Vendor]]. |
| + | |||
| + | The emails can be dragged directly from Microsoft Outlook, or from their saved location on your computer. | ||
| + | |||
| + | :[[File:Email-attach-draganddrop.gif]] | ||
| + | |||
| + | After dragging and dropping an email, the converted email will open. Reply, Forward, or close the converted email window. | ||
| + | |||
| + | :[[File:Email-attach-draganddrop-converted.png]] | ||
| + | |||
| + | The content in the email will be stored as a permanent non-editable searchable activity item, and any attachments will be stored within Newton automatically. | ||
| + | |||
| + | === View, Reply, Forward, or Edit an Email === | ||
| + | [[Email_Integration#View_an_Email|View an Email]] | ||
| − | [[ | + | [[Email_Integration#Reply_or_Forward_an_Email|Reply or Forward an Email]] |
| − | + | [[Email_Integration#Edit_the_Description_of_an_Email|Edit the Description of an Email]] | |
| − | |||
| − | [[ | + | [[Email_Integration#Move_an_Existing_Email_to_.2F_from_a_Policy|Move an Existing Email to / from a Policy]] |
| − | |||
| − | |||
| − | [[ | + | [[Email_Integration#Delete_an_Email|Delete an Email]] |
| − | |||
| − | |||
| − | |||
| − | |||
| − | |||
== Diary == | == Diary == | ||
Revision as of 14:16, 23 February 2016
| Related Pages |
| Related Categories |
Visit: My Newton Campus - Getting Started
Contents
![]() See Email Integration for additional details.
See Email Integration for additional details.
Emails in Newton are listed within the Emails band on the Client Tab, Policy Express, Company Tab, Vendor Tab, and Dashboard Tab (User). Any email sent or received in Newton will also record the body of the email as a permanent searchable activity item.
Create a New Email
An email in Newton can be initiated from a number of areas including the Client Tab, Policy Express, Company Tab, Vendor Tab, Dashboard Tab (User), and Batch Send.
Create a Client Email from the Client Tab
Create a Client Email by Selecting a Contact From the Client Tab
Create a Policy Email from Policy Express
Create a Policy Email using Batch Send
Address Book Options
![]() See Selecting an Email Recipient for additional details.
See Selecting an Email Recipient for additional details.
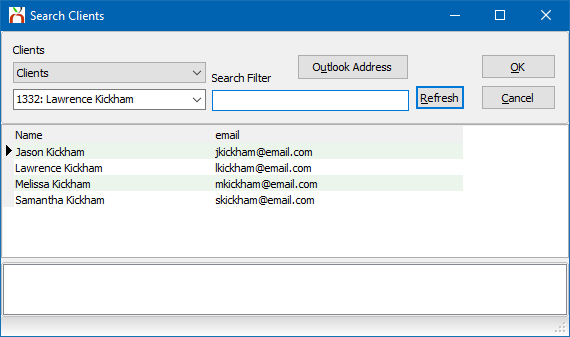
An email can contain three categories of email recipients; TO, CC, and BCC. Left-click TO, CC, or BCC. The Search Clients window will list active contacts for the client by default.
Select Outlook Address to list all contacts stored in your external Microsoft Outlook Address book.
Attaching a File from Newton
![]() See Adding Attachments to an Email for additional details.
See Adding Attachments to an Email for additional details.
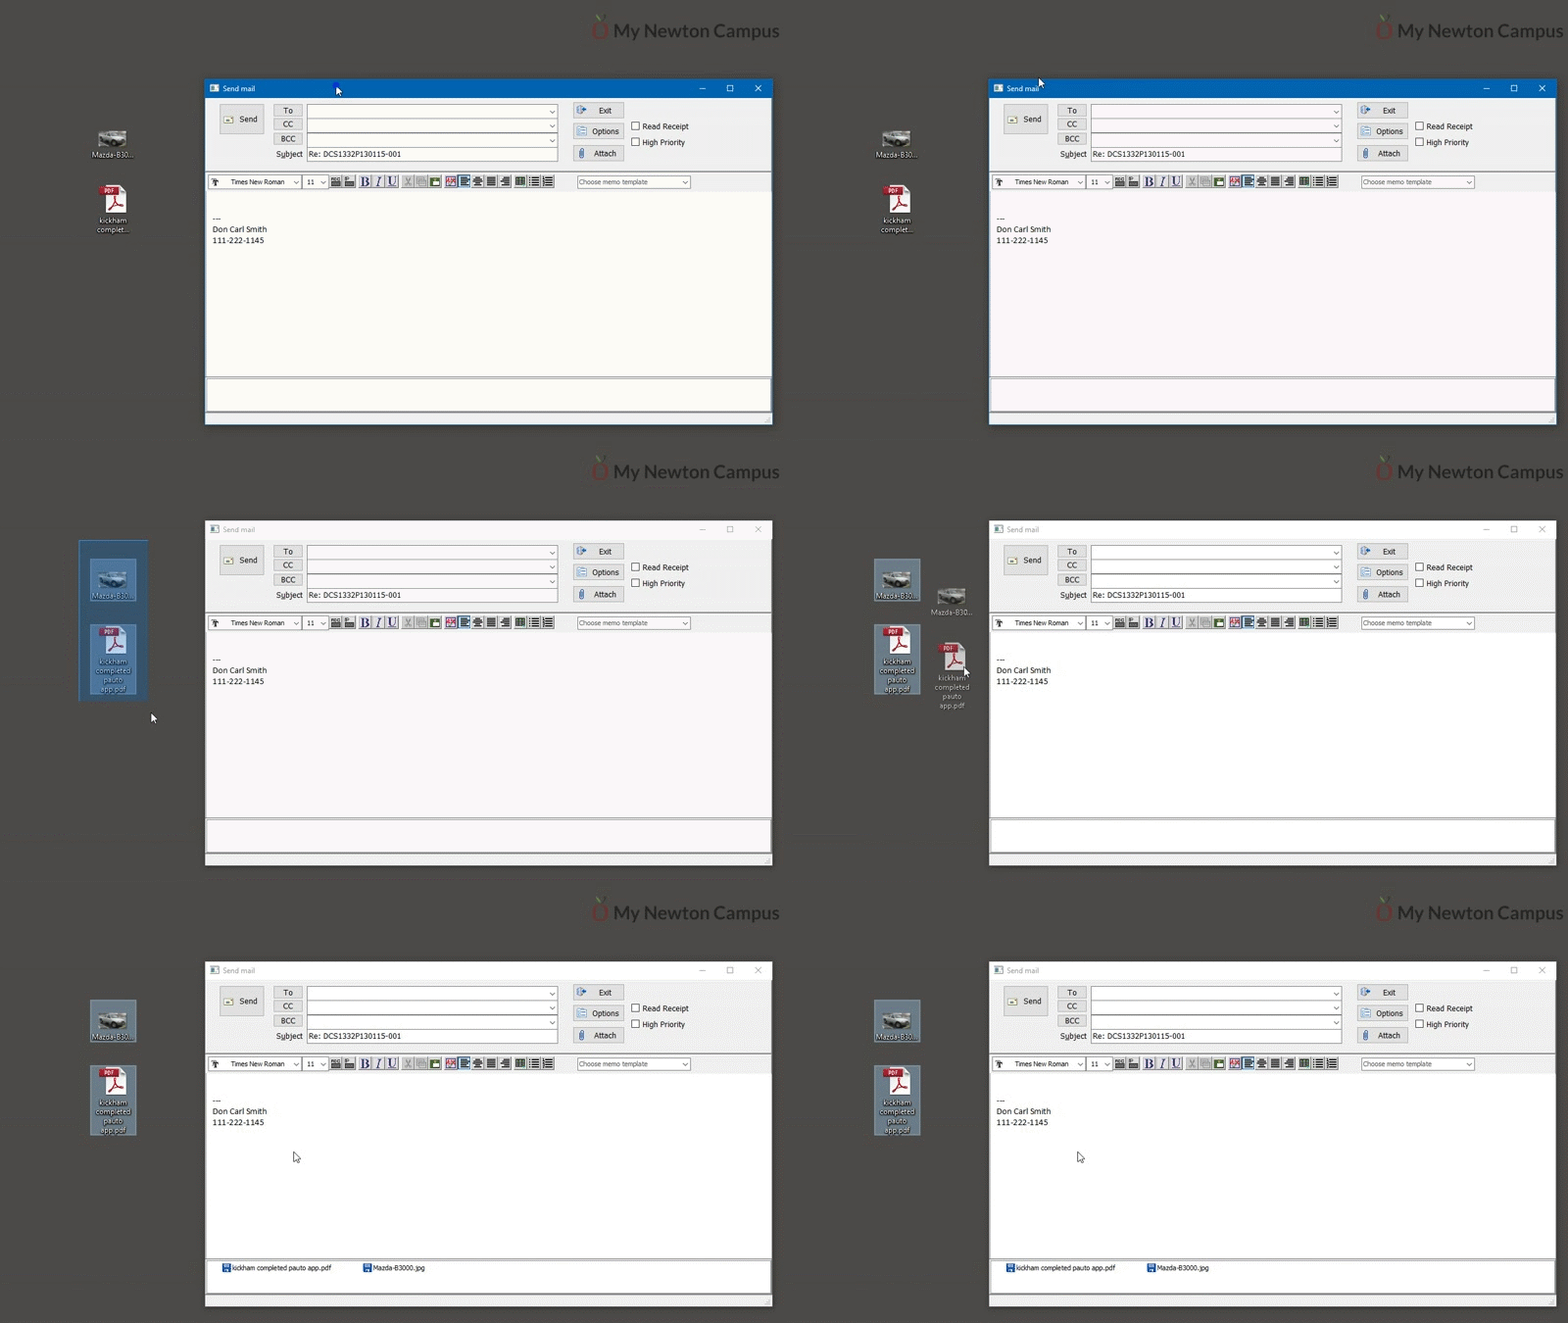
An attachment can be added to an outgoing client email, policy email, or from Batch Send. Any attachment included in an outgoing email will be automatically stored within Newton's email activity for direct access.
Attachments can also be dragged and dropped onto the compose email window from outside of the system. Multiple attachments can be dragged and dropped at the same time.
Templates with Memo Writer
The message body content can be entered manually, or can be pre-filled from an existing memo template.
To select a memo template, select the Choose Memo template drop down box and select the desired memo. Memos are organized by Category, then Name.
E-mail Signature
![]() See Email Signature for additional details.
See Email Signature for additional details.
The Email Signature for the current operator will be automatically placed as the footer of an email when it is started.
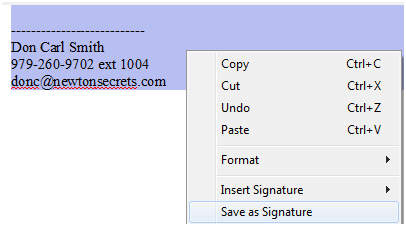
- Configure A New Email Signature
- Open the compose email window.
- Enter the desired signature information into the compose email window.
- Highlight the text (CTRL+A)
- Right Click and select Save As Signature.
Attaching a Received E-mail to Newton
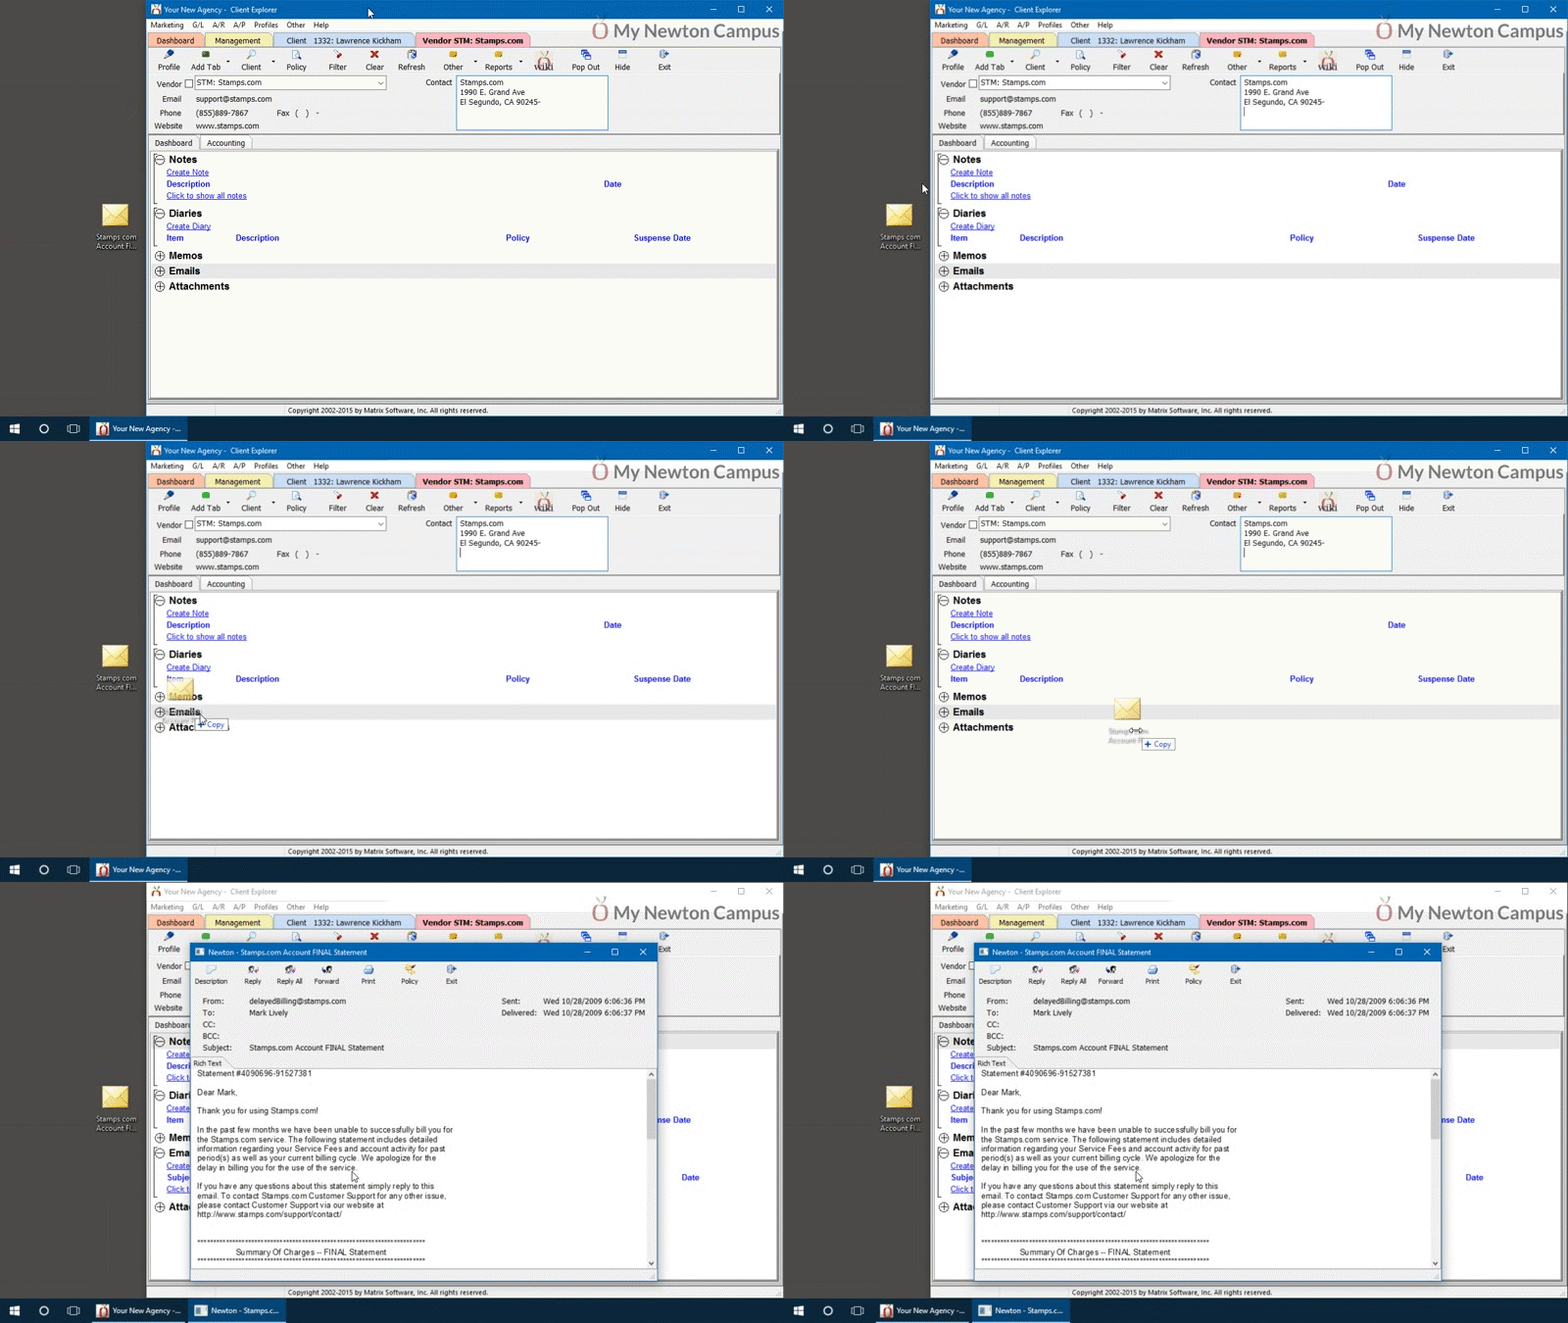
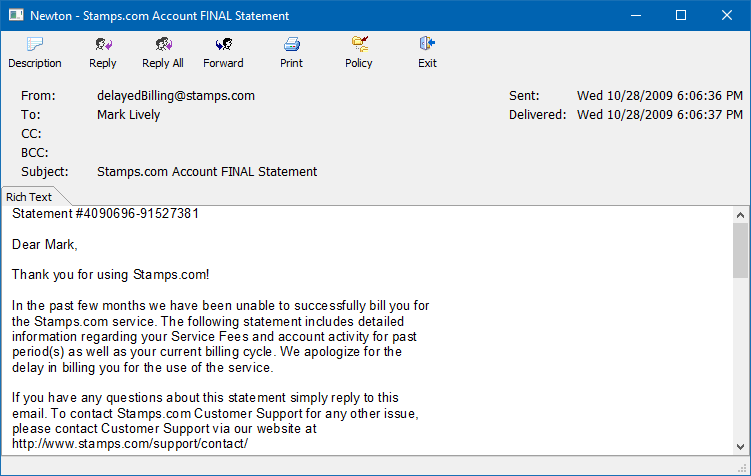
To attach an email received in Microsoft Outlook, simply drag-and-drop the email into Newton. The emails can be attached to a Client, Policy Express, Company, or Vendor.
The emails can be dragged directly from Microsoft Outlook, or from their saved location on your computer.
After dragging and dropping an email, the converted email will open. Reply, Forward, or close the converted email window.
The content in the email will be stored as a permanent non-editable searchable activity item, and any attachments will be stored within Newton automatically.
View, Reply, Forward, or Edit an Email
Edit the Description of an Email
Move an Existing Email to / from a Policy
Diary
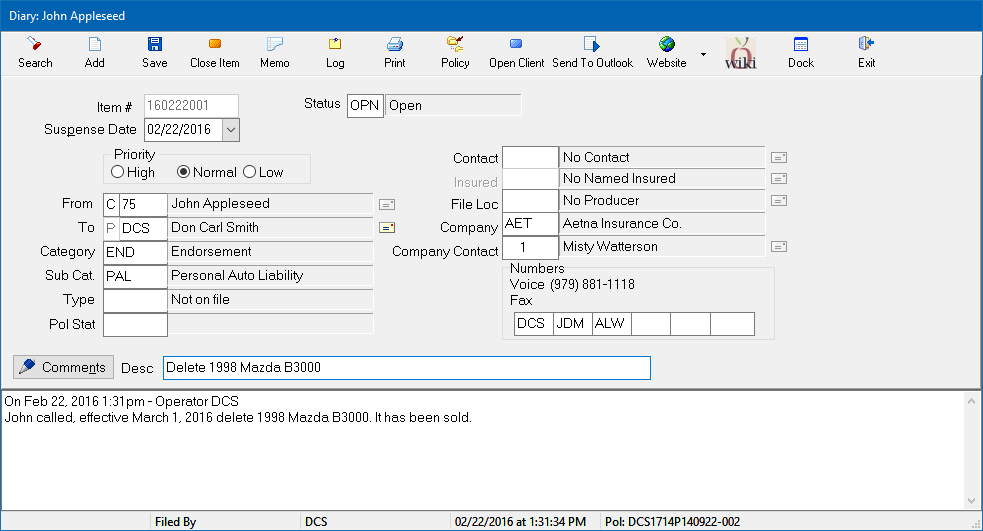
Diaries are simple follow-up or to-do items that display on the assigned operator's Dashboard Tab based on the suspense date. A diary can be used for simple inter-office communication, action items on policies, or can be created automatically by common policy tasks or Download Alerts.
A diary can be created from the Client Dashboard Tab, Policy Express, Download Alerts, the Company Tab, or the Vendor Tab.
Although a diary is commonly associated with a specific policy, a diary can also be saved to a client without a policy, or directly to an operator for inter-office communication.
![]() Click here to learn more about diaries.
Click here to learn more about diaries.
Activity
Basic Tab
Expand the Activity band on a client’s Basic tab to view activity. Only correspondence and notes are shown by default. Right-click the Activity band to view All Items.
Policy Express
Open a policy, select the View Existing Items menu, and Policy Activity to view activity on a single policy.
Color Codes
- Correspondence appears in red.
- Notes appear in green.
- All other items appear in black.
Notes
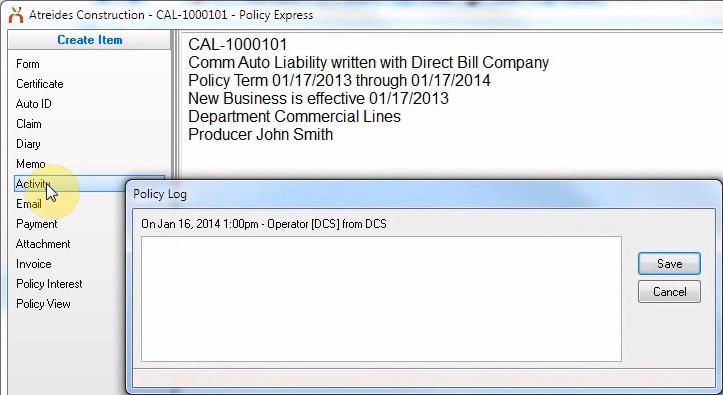
You can add an activity note to a policy. Open the policy, and select Activity from the Create Item menu. Activity notes cannot be altered once saved.
Activity Search
Type any word or phrase to search policies, correspondence, and all other activity items. Click Clear to clear the filter.
Client Notes
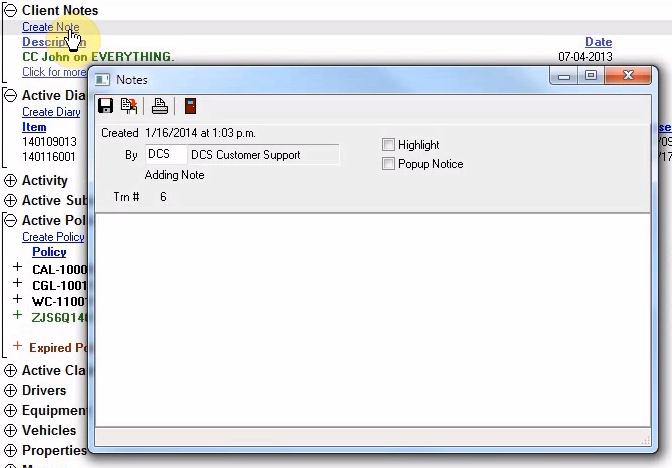
Client notes appear at the top of the client’s Basic tab. Click Create Note to create a note. Client notes are attached to the client only and not to a specific policy.
Permanent Notes
Client notes are permanent and cannot be altered once saved.
Client notes are not included in Activity Search.
Highlight and Pop-up
You can choose to highlight or un-highlight a note once saved. Highlighted notes appear on the Basic tab by default; notes that are not highlighted will not appear unless you click “Click for more notes.”
The Popup Notice option will cause a note window to pop up on the screen every time a user loads the client. These should be used extremely sparingly and only for show-stopper items.
Memo Writer
Memos are word-processing documents such as form letters. Newton features an excellent word-processing system.
Create
To create a Memo, select the Marketing menu and Memo Writer.
To create a Memo on a client, click the plus-sign next to Memos and select Create Memo. You will start with a blank document either way, but if you perform a mail-merge, the Memo will remember what client you were on.
To open a Memo from your library of Memo templates, click the File menu and Open. You will learn how to set up templates in this session.
Merge Fields
Right-click and select Insert Merge Field to add a field for mail-merge. Memo Writer allows many different types of data to be merged in from clients, policies, and more, grouped into categories such as: Agent, Client, Underwriter, Policy, et cetera. For example, expand Policy and double-click Number to insert the policy number. The menu will stay open until you close it, so you can add as many merge fields as you like. A sample Memo might appear something like:
Library and Locking/Unlocking
When you have finished creating your Memo, you will save it. Memos can be saved to 4 locations: A client, a policy, a company, or to the Memo library. You should select Library. This will allow the Memo to be accessed on any client, merged, and re-saved to the given client.
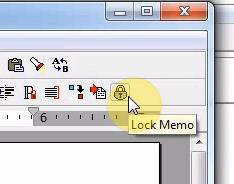
Once the Memo is saved, click the Lock button to lock the Memo. A locked Memo cannot be overwritten in the library; if anyone opens it and merges the data, or otherwise changes the template, they will be prompted to re-save a copy to the current client. Only operators with a security level equal to the “Global” value for Memo Writer can lock and unlock Memos. Security can be found under the Other menu and Security System.
Save to Client or Policy
If a Memo is saved to a client it will appear under the Memos band on the client’s Basic Tab.
If a Memo is saved to a policy it will appear under the Memos band and under the View Existing Items menu in Policy Express.
Open a Memo Saved to a Client or Policy
To open a Memo saved to a client or a policy, load the client and expand the Memos band.
Memos attached to policies will show the policy number. You can click the column heading to organize Memos by policy number.
Tips
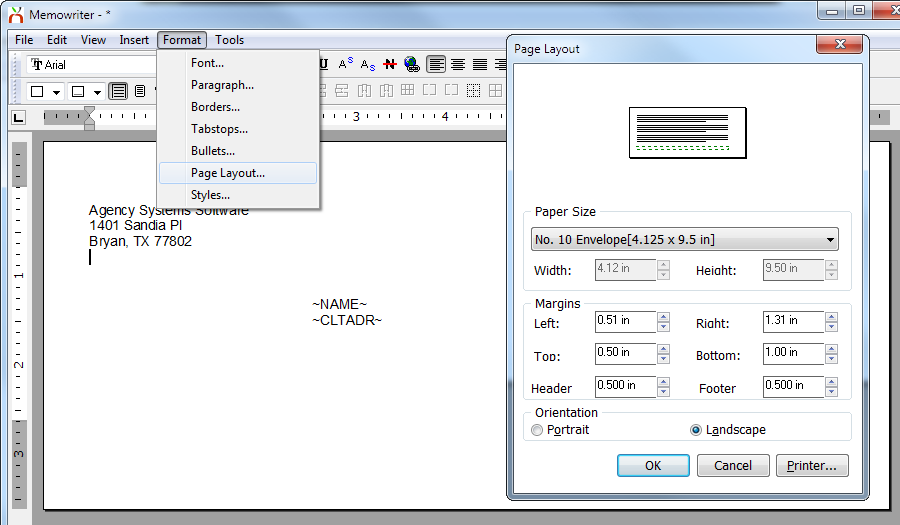
- Create an envelope template for printing envelopes. You can change the page size and orientation under the Format menu.
- Create a Memo in a Diary for Clients to sign off on changes.
- Create a Memo on the Company Tab for Underwriting Guidelines.
- Use Memos for quote worksheets, agency-created forms, or a Renewal Review Checklist to use when renewing policies.
- You may also use Memos for marketing notes on complicated commercial accounts.

