Difference between revisions of "Report: 1099s"
(updated how to access only) |
|||
| Line 34: | Line 34: | ||
== Access and Window Options == | == Access and Window Options == | ||
| − | The 1099 report window can be opened by selecting ''' | + | The 1099 report window can be opened by selecting '''Vendor -> 1099 MISC-Forms'''. |
| − | Access to the 1099 report is controlled through the [[Security System|security system]] '''A/P -> 1099- | + | Access to the 1099 report is controlled through the [[Security System|security system]] '''A/P -> 1099 MISC-Forms -> View''' setting. |
[[File:Menu-1099.png]] | [[File:Menu-1099.png]] | ||
| Line 53: | Line 53: | ||
Each batch will only print a '''single page per entry'''. If you have 20 forms to print, first print all Copy A, then repeat the process and print Copy B. | Each batch will only print a '''single page per entry'''. If you have 20 forms to print, first print all Copy A, then repeat the process and print Copy B. | ||
---- | ---- | ||
| − | #Select ''' | + | #Select '''Vendor -> 1099 MISC Forms'''. |
#Select '''Report By:''' Only Broker Clients, Only Vendors, or Both. | #Select '''Report By:''' Only Broker Clients, Only Vendors, or Both. | ||
#:[[File:Menu-1099-reportby.png]] | #:[[File:Menu-1099-reportby.png]] | ||
Revision as of 19:04, 6 March 2019
| Related Pages |
| Related Categories |
Agency Systems has the capability to calculate 1099 amounts, then either print to the IRS 1099 laser forms, or create an electronic file for submission.
- The 1099 amounts reported for vendors are calculated from the voucher invoices and check transactions coded to each vendor.
- The 1099 amounts for brokers (agents) are calculated from invoice transactions.
If you have manually entered 1099 totals on the vendor or broker (agent) profiles, the manually entered amount will display on the 1099 reports and forms instead of being calculated.
Access and Window Options
The 1099 report window can be opened by selecting Vendor -> 1099 MISC-Forms.
Access to the 1099 report is controlled through the security system A/P -> 1099 MISC-Forms -> View setting.
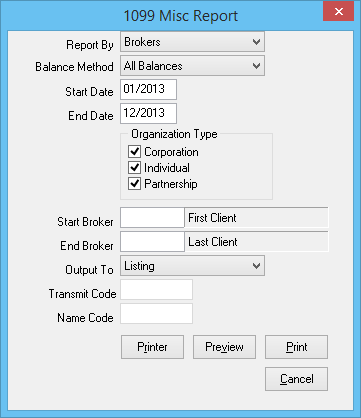
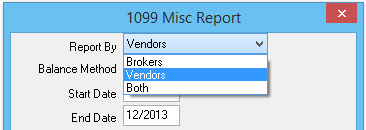
- Report By: Only Broker Clients, Only Vendors, or Both.
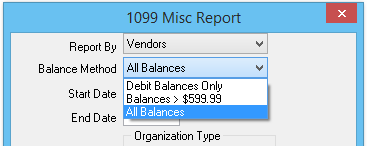
- Balance Method: Debit Balances Only, Balances > $599.99, or All Balances.
- Output: Listing, Forms (1099-MISC), Magnetic Media, Test Magnetic Media, Replace Magnetic Media, Laser Forms (1099-MISC)
Report Process
It is recommended to preview or print the 1099: Output -> Listing report first in order to:
- Verify the correct address and tax id information stored for the vendor and/or agent profiles.
- Verify the number of 1099 forms required. (1099 laser forms must be purchased at your local office supply store.)
After verifying the listing output and purchasing the 1099 forms, repeat the 1099 report and select Output -> Laser Forms (1099 MISC).
Each batch will only print a single page per entry. If you have 20 forms to print, first print all Copy A, then repeat the process and print Copy B.
- Select Vendor -> 1099 MISC Forms.
- Select Report By: Only Broker Clients, Only Vendors, or Both.
- Select Balance Method: Debit Balances Only, Balances > $599.99, or All Balances.
- Select the Start Date and End Date for the tax reporting period.
- Deselect any desired Organization Type.
- If desired, enter a start and end Vendor/Broker value to limit the results. (Only available if Report By is limited to a single type.)
- Select an Output:
- Forms (1099-MISC): One page per result, used with continuous feed paper printers (Legacy dot matrix printers).
- Listing: Summary for all Vendors/Brokers with totals for review.
- Magnetic Media: Exports a data file saved to \Empire\Programs\IRSTAX.001 for electronic submission.
- Test Magnetic Media: Exports a data file saved to \Empire\Programs\IRSTAX.001 for testing electronic submission.
- Replace Magnetic Media: Exports a data file saved to \Empire\Programs\IRSTAX.001 for electronic submission to update an existing submission.
- Laser Forms (1099-MISC): One page per result, used with modern laser or inkjet printers.
- Enter the Transmit Code and Name code, only when selecting Output -> Magnetic Media.
- Select Print.


